• Skip to primary navigation
  • Skip to main content
  • Skip to primary sidebar
It's Not Complicated Recipes
  • Home
  • Recipes
  • Blog
  • About
  • Kitchen Tips
  • Subscribe
  • Contact
menu icon
go to homepage
  • Recipes
  • About
  • Subscribe
  • Get in touch
search icon
Homepage link
  • Recipes
  • About
  • Subscribe
  • Get in touch
×
Home » Recipe Index » Pickles and Preserves

Preserved Chillies in Oil

Published: Jan 12, 2021 · Updated: Jan 12, 2021 Author: Alexandra Cook

For the full recipe including quantities and method, click the "jump to recipe" button, or scroll through and read our helpful tips along the way.

35559 shares
Jump to Video Leave Review
pinterest image with photos of recipe top and bottom and text overlay in centre.

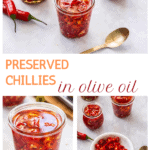
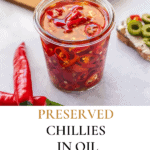
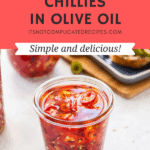
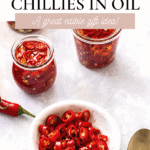
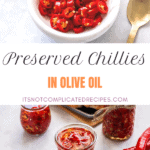
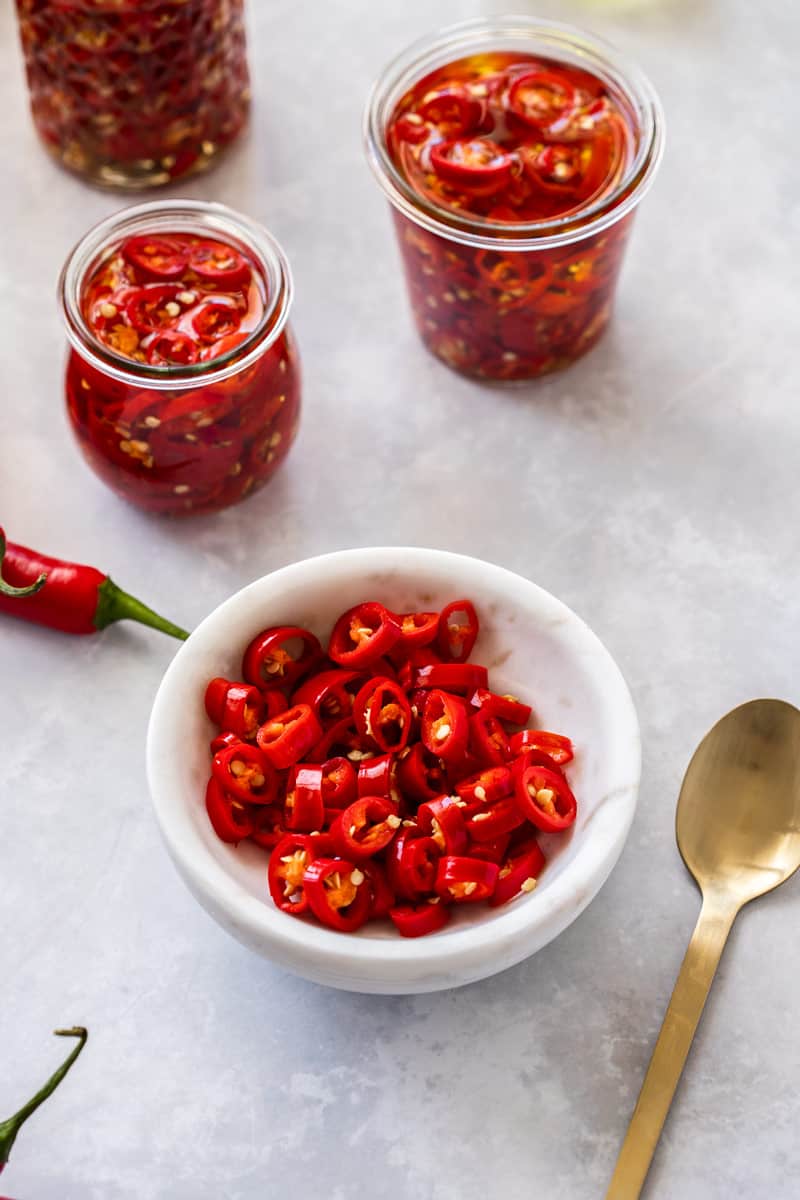
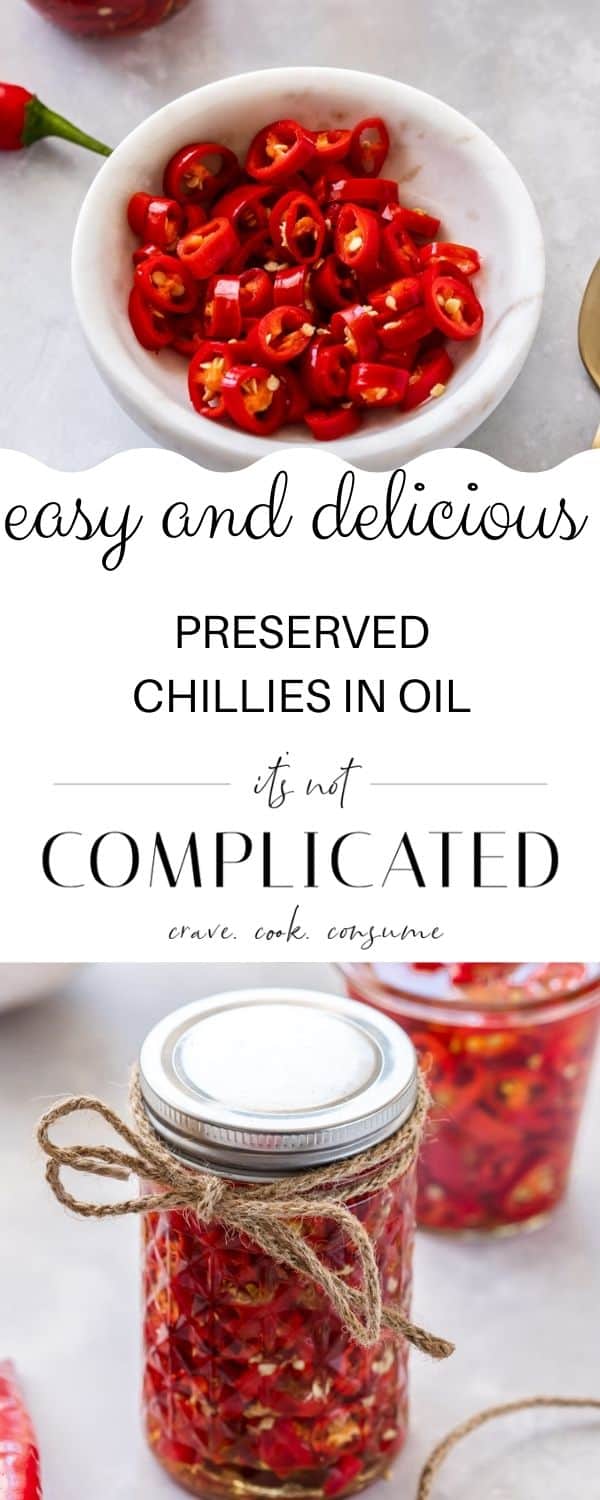
When you try these Preserved Chillies in Oil, you will discover their versatility. In fact, such is their ability to add flavour to many dishes, you may in future decide to keep a jar of these on hand at all times. They are also super simple to prepare!

jar of chillies with lid, tied with some string, and some jars and a bowl of chillies in the background.
Jump to:
  • Why we love this recipe:
  • Ingredients in this recipe:
  • Step by step instructions:
  • Tips for success and FAQs:
  • Safety precautions:
  • When it comes to serving:
  • More delicious recipes for you to try:
  • Preserved Chillies in Oil

Why we love this recipe:

I have been making this recipe for many years. It originally came from the Italian owner of our favourite pizza restaurant. He had a personal jar of homemade preserved chillies which he brought to our table whenever we dined there. He was delighted that we enjoyed them as his family has been making this condiment for generations and shared with me the method to make them.

There was, of course, no actual recipe, just an outline of what they did, so I interpreted and adapted this and was delighted with the result.

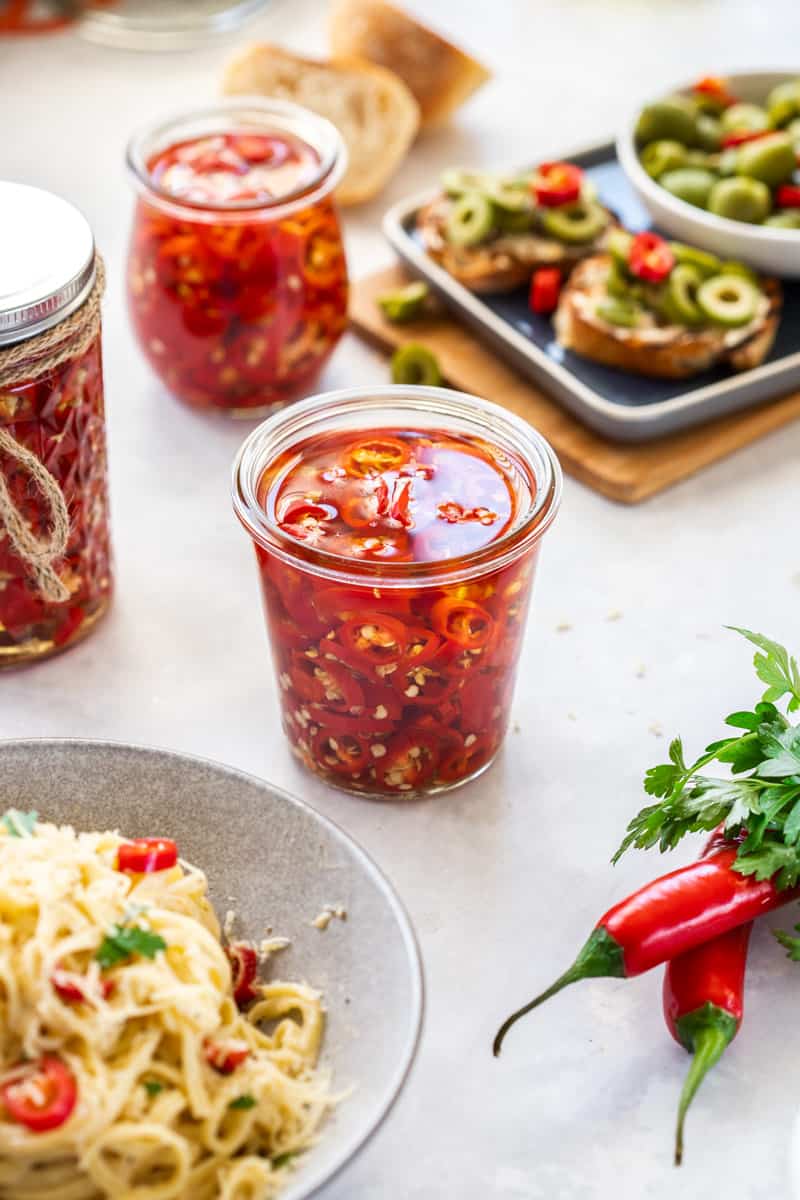
This is a great condiment. I always have a jar on hand as they are perfect for people who like a little warmth with their meals.  They are a good accompaniment to meats of all kind, poultry, pizza or pasta.  

small round white bowl of chillies, with a couple of jars of chillies in the background, and a gold spoon on the side.

Ingredients in this recipe:

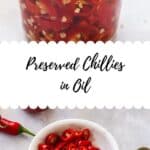
Long red chillies (cayenne chillies):

I use red cayenne chillies, they are the long, slender variety which generally have a deep warmth without an overt hit. However, the heat will depend on the variety that you choose. 

The heat of the Preserved Chillies in Oil does seem to vary according to the seasons, but even when they are very mild, they add a beautiful flavour. If you prefer very hot chillies you may like to add a couple of fiery, smaller chillies to your mixture.

Cooking salt:

For the vinegar brine, I use coarse kitchen salt, not fine table salt. This may also be known as kosher salt.

White vinegar:

Distilled white vinegar is often recommended for pickles and preserves. However, you can also use white wine vinegar. They each will have an acidity content of around 5% and when combined with the salt assist in the preservation of the chillies. For this recipe, we do not recommend apple cider vinegar as it has a lower acidity level.

Do not use vinegar which is specifically sold for cleaning purposes; it has a much higher acidity content and is not intended for culinary purposes. 

Extra virgin olive oil:

I prefer to use extra virgin olive oil for the extra flavour it provides. In addition, it is at the heart of the much-praised Mediterranean Diet being an excellent source of healthy fat and health-benefiting antioxidants.

Step by step instructions:

the first four steps to prepare this recipe - chop the chillies, add to a bowl with vinegar, add salt and then cover the bowl with cling film.
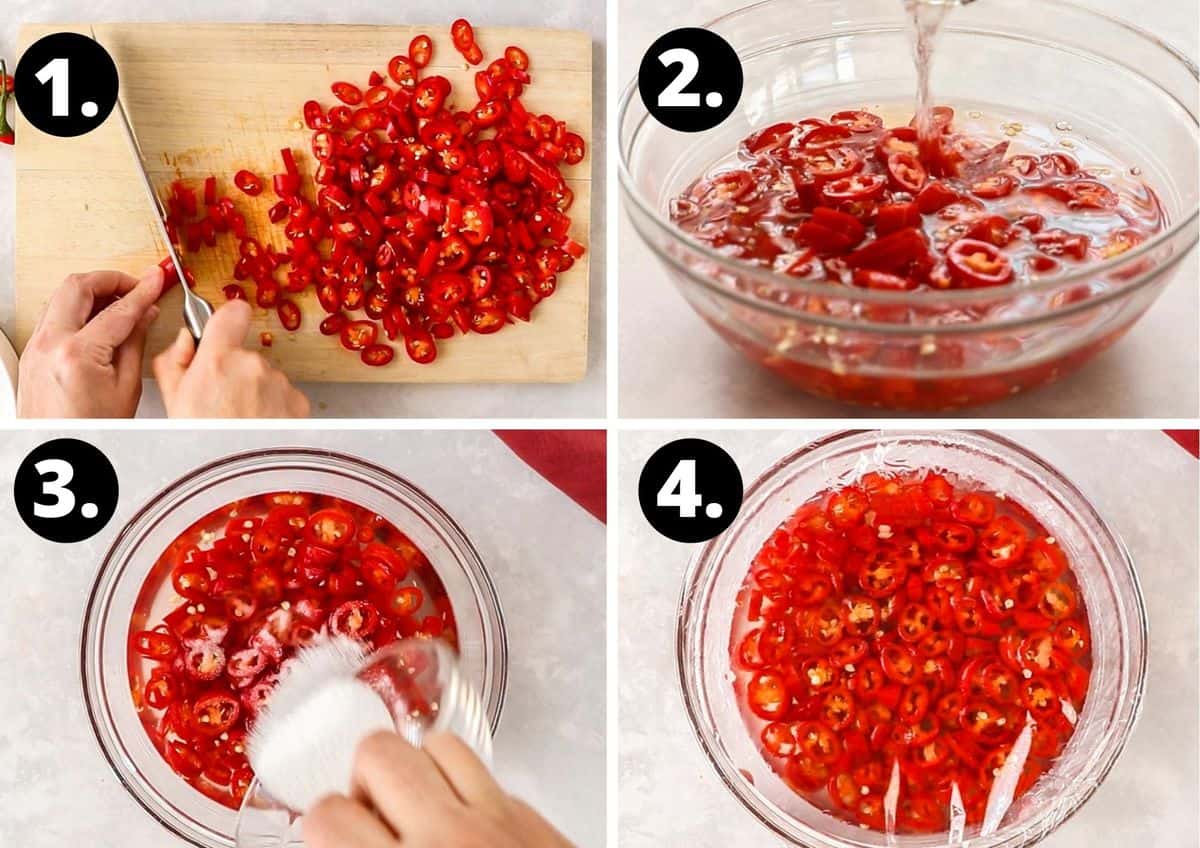
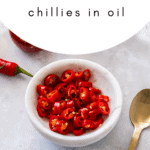
  1. To begin, I carefully wash and thoroughly dry the chillies. Then, I remove the stalks and finely slice them, seeds included.

2. and 3. In a non-reactive glass or ceramic bowl, I prepare a vinegar and salt brine, then add the chillies together with their seeds. Ensure that they are covered with the brine, adding more if necessary. Acidic ingredients, such as vinegar, may react with bowls such as aluminium, copper or iron causing the ingredients to discolour and possibly take on a metallic taste. 

4. Stir the chillies then cover them with cling wrap and set them aside in their vinegar and salt bath for a minimum of 24 hours. This process removes some of their moisture and assists with the preservation.

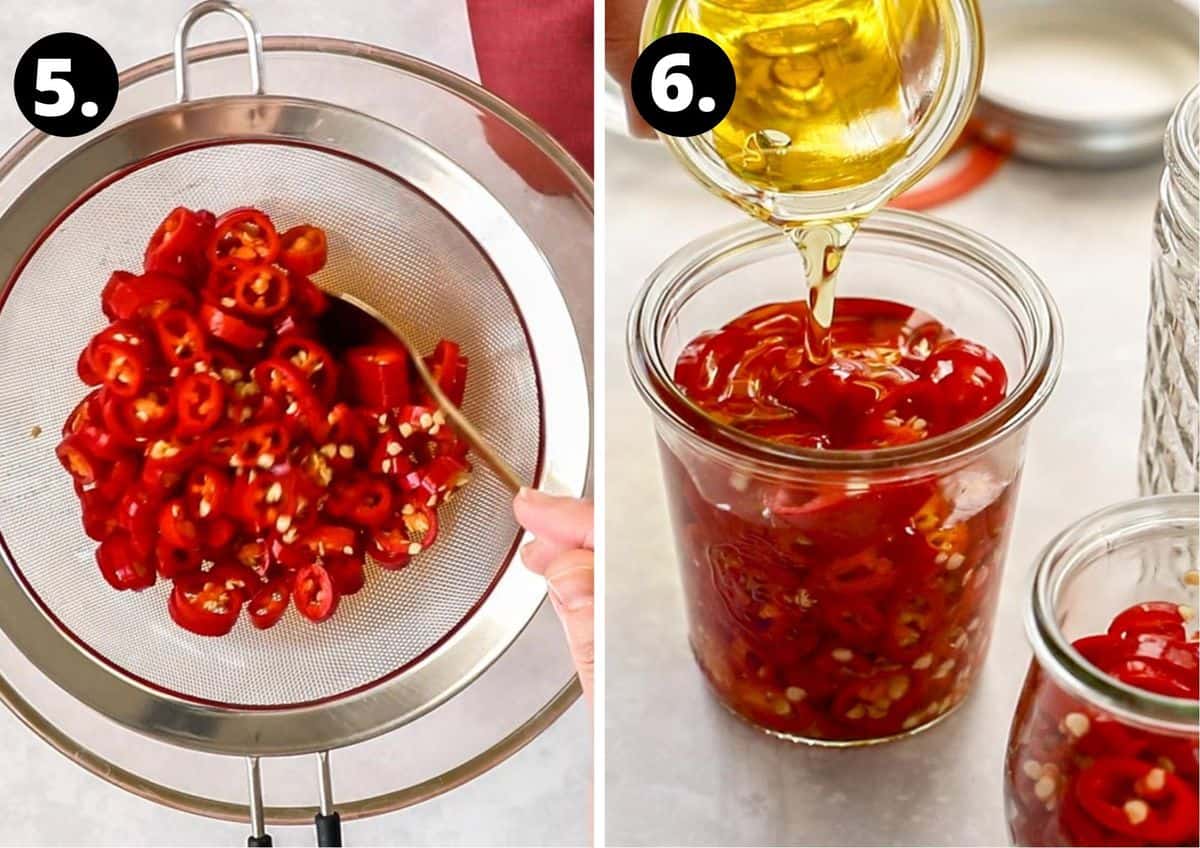
5. After that time, drain the chillies and discard the vinegar.

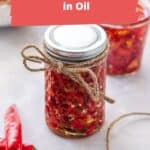
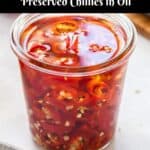
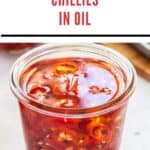
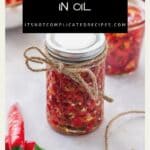
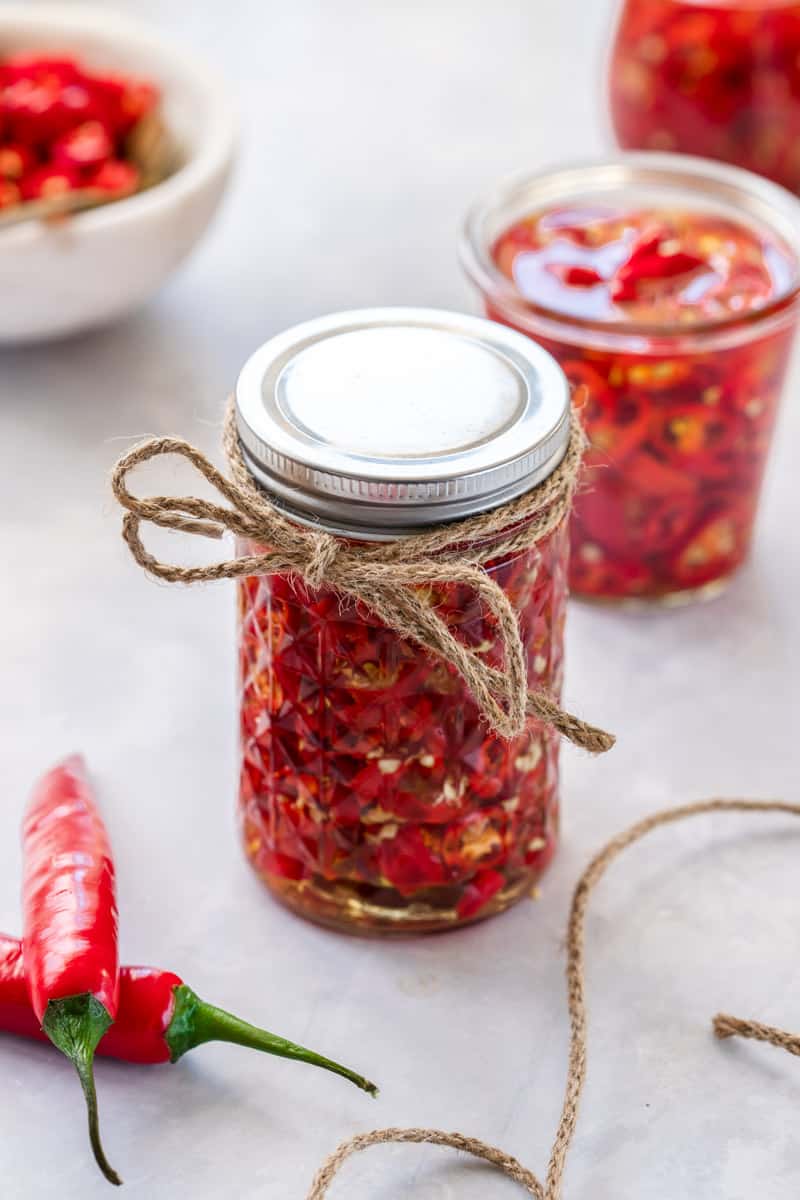
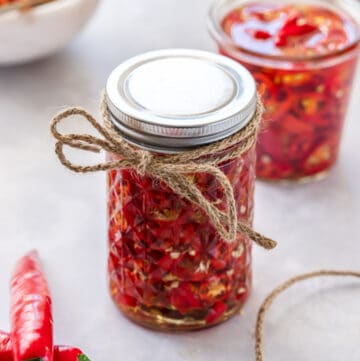
6. Pack the chillies into a sterilised jar and completely cover with olive oil. 

the final two steps to prepare this recipe - draining the brine from the chillies and adding them to a jar with olive oil.

Tips for success and FAQs:

Are long red chillies/cayenne chillies very hot?

Whilst long, red, cayenne chillies are generally of mild-moderate heat, this is not always the case. For this reason, I recommend that you wear food-safe, disposable gloves when handling the chillies. Avoid touching your face or eyes as the active ingredient, capsaicin, can irritate the skin and cause burning. After cutting the chillies, discard your used gloves and carefully wash your cutting board and knife.

How should I select the chillies?

It is important to select firm, brightly coloured, fresh chillies. They should have shiny skins without blemishes. Do not select any with wrinkled skin or soft spots.

Is it okay if I soak the chillies for just a few hours?

No, it is important to soak the chillies for at least 24 hours. On occasion, for convenience I have left them in the brine for 48 hours without ill effect. The acidic vinegar and the salt are the preserving agents in this recipe.

Can I make a large batch of chillies?

For freshness and to maintain good texture and a vivid colour, I prefer to make the batch size as specified and to make a fresh batch as required.

Can I add anything else to the chillies?

We do not recommend adding any other herbs, spices, garlic etc. to the chillies. Please see the Safety Precautions section below.

up close shot of jar of chillies with no lid.

Safety precautions:

To prevent bacteria and the growth of botulism in vegetables, herbs or spices which are packed in oil, the CSIRO (Commonwealth Scientific and Industrial Research Organisation) in Australia has provided advice for commercially produced vegetables in oil. They must not have a pH greater than 4.6. This “can be achieved only by adding acid to the vegetable material”.

For this reason, we soak the sliced chillies in vinegar and salt for a minimum of 24 hours prior to bottling in oil to increase their acidity.

The jar in which the chillies are stored must be sterilised and I have given instructions in the recipe notes.  

I store the chillies in a cool, dark location and have kept them for 2-3 months although generally I prefer to make small batches that are consumed within a few weeks. If you prefer, you can keep them in the refrigerator, but the oil will solidify and become cloudy. It does not look attractive but as the oil reaches room temperature it will again become liquid. 

When removing chillies from the jar it is important to always use clean utensils.

We have had two batches of our chillies tested by a Government food testing laboratory. The first batch was two days old and registered a pH of 3.21 and the second batch was three months old and registered a pH of 3.28.

I suggest that if you are intending to make the chillies and would like to check their pH you could invest in a pH testing kit.    

When it comes to serving:

This recipe for Preserved Chillies in Oil will enable you to enjoy their spiciness – it is an easily prepared condiment which is a great addition to many dishes.

I place a bowl of these Preserved Chillies in Oil on the table for many meals. They are delicious served with pizza, pasta, salads, meat, poultry or vegetables. 

I serve them with my Greek Chicken and Salsa and Mediterranean Beef Stew, to name a few!

In fact, I have even been known to add them to my breakfast toast with tomato or mashed avocado.

three jars of chillies in centre, with a bowl of pasta at front, some whole chillies to the side, and some bruschetta in the background.

More delicious recipes for you to try:

We love to use long red chillies in our cooking. You’ll find some more recipes featuring them here:

  • Sweet Chilli Sauce
  • Red Chilli Paste
  • Roasted Mediterranean Olives
  • Baked Feta with Olives and Rosemary
  • Mushroom San Choy Bow

Homemade preserves, such as our Preserved Chillies in Oil, make a fantastic edible gift – here are some more of our favourite ideas:

  • Homemade Pickled Jalapenos
  • Bread and Butter Cucumber Pickles
  • Japanese Pickled Ginger (Gari)
  • Spicy Cucumber Pickles
  • Pickled Daikon
  • Beetroot Pickled Turnips
  • Dill Pickled Cucumbers

Enjoy these delicious Preserved Chillies in Oil. I would love to know what you think in the comments below!

Alex xx

This post was originally published in September 2018. It has been updated with new photos and more information. The recipe remains the same.

jar of chillies with lid, tied with some string, and some jars and a bowl of chillies in the background.

Preserved Chillies in Oil

Elevate the flavour of many dishes with these delicious Preserved Chillies in Oil! So simple to make.
4.97 from 66 votes
Print Pin Review
Course: Condiment
Cuisine: Italian
Prep Time: 15 minutes minutes
Brine Time: 1 day day
Total Time: 1 day day 15 minutes minutes
Servings: 1 400ml Jar
Calories: 2058kcal
Author: Alexandra Cook – It’s Not Complicated Recipes

Please note:

For accuracy, when weights are provided, we recommend weighing your ingredients. This will produce the best results. All oven temperatures listed are for fan forced.

Ingredients

  • 200 gm (7 ounces) long red (cayenne) chillies See Notes 1 and 2
  • 1 ½ tablespoon (30 g) coarse cooking salt See Notes 3 and 4
  • 1 ½ cups (375 ml) white vinegar (5% acidity) See Note 5
  • 1 cup (250 ml) extra virgin olive oil See Note 6

Instructions

To Sterilise the Jars:

  • Choose glass jars with an airtight, metal lid and ensure they have been washed in the dishwasher or by hand in hot soapy water then rinsed well. Check that the metal lids do not have rubber inserts – if they do, allow them to air dry instead of placing in the oven.
    Preheat the oven to 130 Degrees C (270 F). Place the jars and lids on a baking tray. Heat in the oven for at least 20 minutes, then remove and allow to cool before filling.

To Prepare the Chillies:

  • To begin, carefully wash and thoroughly dry the chillies. Then, remove the stalks and finely slice the chillies, seeds included. Do not use any which have blemishes or bruises.
  • I recommend that you wear food-safe, disposable gloves when handling the chillies. Avoid touching your face or eyes as the active ingredient, capsaicin, can irritate the skin and cause burning. After cutting the chillies, discard your used gloves and carefully wash your cutting board and knife.
  • In a non-reactive glass or ceramic bowl, (see Note 7), prepare a vinegar and salt brine. Combine the two ingredients and stir them well. Add the chillies along with their seeds. Ensure that they are covered with the brine, adding more if necessary, using a ratio of 1 tablespoon of salt for each cup of vinegar.
  • Stir the chillies then cover them with cling wrap and set them aside in their vinegar and salt bath for a minimum of 24 hours. Stir once or twice during this time. This process removes some of their moisture, increases acidity and assists with the preservation. (See Note 8)
  • After that time, drain the chillies well in a fine sieve, discard the vinegar, pack the chillies into the sterilised jar (see Note 9) and completely cover with olive oil. There will be some air pockets; wait until the oil has settled, you may need to add a little extra.
  • Store the chillies in a cool, dark place. The chillies will last for about 3 months, but are best consumed within the first 2 as they soften in texture the longer they sit in the oil.
    Alternatively, you may prefer to store them in the refrigerator. The olive oil will solidify and become cloudy but will become liquid again when the chillies return to room temperature. For this reason, some readers have used another oil but we prefer the taste of olive oil. 
    Always use clean utensils when removing the chillies from the oil.

Video

Notes

  1. This is the weight of the chillies after the stems have been removed.  This is a flexible recipe and can be made to a smaller quantity. Just use the ratio of 20 gm of salt to 1 cup of vinegar for the brine.
  2. I find that cayenne chillies generally have a mild heat. When I want to increase the heat I add a few of the small, red, very hot chillies.
  3. Use coarse kitchen salt, or Kosher salt. Do not use table salt; it is finer and the chillies will become too salty.
  4. The Australian tablespoon is 20 ml or 4 teaspoons. In many other countries the tablespoon is 15 ml or 3 teaspoons. You may have to adjust the measurements accordingly.
  5. You can use distilled white vinegar or white wine vinegar. They each will have an acidity content of around 5%. For this recipe, we do not recommend apple cider vinegar as it has a lower acidity level. Do not use vinegar which is specifically sold for cleaning purposes; it has a much higher acidity content and is not intended for culinary purposes.
  6. Always ensure there is sufficient oil to cover the chillies. For 200 gm chillies, and the container in which I stored them, I used 1 cup of oil. Depending on the container, you may need to use a little more.
  7. Acidic ingredients, such as vinegar, may react with bowls made from aluminium, copper or iron, causing the ingredients to discolour and possibly take on a metallic taste.
  8. On occasion, for the sake of convenience, I have left the chillies in their brine for more than 24 hours without ill effect.
  9. To prevent the growth of bacteria, it is essential that the jar be properly sterilised and always use clean utensils when removing chillies from the jar.
  10. Please note, the nutritional information is based on the entire jar (including the oil). The nutritional information is an estimate only. 
Made this recipe? We’d be so grateful if you could leave a comment and rating at the bottom of the page!

Nutrition Estimate:

Calories: 2058kcal | Carbohydrates: 18g | Protein: 4g | Fat: 217g | Saturated Fat: 30g | Sodium: 10495mg | Potassium: 644mg | Fiber: 3g | Sugar: 11g | Calcium: 51mg | Iron: 3mg
Nutritional Disclaimer:

The nutritional information is an estimate only, and is derived from online calculators. For accurate results, we recommend calculating the nutritional information based on the ingredients and brands you use.

pinterest image with photos of recipe top and bottom and text overlay in centre.
« Cranberry Pistachio Bark
Homemade Pasta Tips »

Reader Interactions

Comments

  1. Jennifer

    February 27, 2025 at 10:40 pm

    Can I use frozen peppers? Or dehydrated peppers?

    Reply
    • Alexandra Cook

      February 28, 2025 at 6:39 am

      Hi Jennifer,
      We only use and recommend fresh peppers for this recipe.
      Alex xo

      Reply
  2. Sophie

    February 19, 2025 at 9:56 am

    Just wondering if I could use green chillies instead of red?
    Thanks

    Reply
    • Alexandra Cook

      February 23, 2025 at 9:16 am

      Hi Sophie,
      Yes, you can! I will just say, from my experience, the green chillies do dull in colour a lot more than the red.
      They’re still delicious, but just don’t stay a beautiful vibrant green.
      Enjoy! Alex xo

      Reply
  3. Anita

    September 26, 2024 at 7:35 pm

    Love this. So easy to prepare. Is there anything that I can use the spicy vinegar in? I hat to throw it out if it can be used. Thanks

    Reply
    • Alexandra Cook

      September 27, 2024 at 9:39 am

      Thank you, Anita!
      We don’t recommend reusing the vinegar for another batch of chillies, as the acidity may have changed (this goes for all vegetables/pickles).
      We do tend to discard it, as we find it is very salty, however, some readers have used it as a hot sauce and stored it in the fridge. We are yet to try this, but wanted to pass on this suggestion 🙂
      Alex xo

      Reply
      • CharzWEB

        April 21, 2025 at 8:08 pm

        I hope this still works! I searched for recipes to preserve thawed chillis and this one popped up. I read the comments and it has been recommended for fresh chillis!! Will keep you updated

      • Alexandra Cook

        April 21, 2025 at 8:13 pm

        Hi there,
        Yes, we definitely only use and recommend fresh chillies for this recipe. (I guess it came up in the results as this is a question that has been asked before.)
        We don’t recommend thawed chillies as they will be quite soft – possibly mushy and definitely not an ideal texture for this recipe.
        Also, I doubt they will keep as well or for as long as using fresh chillies.
        Although I haven’t tried thawed chillies in either, other more suitable recipes would be my Red Chilli Paste or Sweet Chilli Sauce, as this involves cooking of the chillies, so it may not matter that they are soft to begin with.
        Thanks, Alex

  4. Carlo

    June 30, 2024 at 7:17 am

    5 stars
    My family loves this recipe ! Every time we run out, they ask me to make more. The recipe is so simple, the chillies taste great and they last.
    Thank you

    Reply
    • Alexandra Cook

      June 30, 2024 at 12:21 pm

      Thank you, Carlo!
      So happy to hear this recipe is a family favourite 🙂 Alex xo

      Reply
  5. Richard Brown

    March 19, 2024 at 2:26 am

    5 stars
    I have to say that this really works! I used cayenne peppers as suggested and it is perfectly full of amazing chilli flavor without numbing your taste buds! I have separated half and added it 50% to some homemade tomato jam and that is a very nice condiment for my guests who are not into hot preserves. Thanks for the clear instructions. I followed them exactly and i reccomend the process.

    Reply
    • Alexandra Cook

      March 22, 2024 at 7:41 am

      Hello Richard,
      Thank you so much for trying this recipe, and I am so pleased you enjoyed it.
      The tomato jam with and chilli sounds so good! 🙂
      Really appreciate you taking the time to comment!
      Alex xo

      Reply
  6. Kareemah

    February 01, 2024 at 4:31 am

    Hi there, will the final product have a vinegar or pickled taste from soaking in the vinegar?

    Reply
    • Alexandra Cook

      February 01, 2024 at 7:41 am

      Hello Kareemah,
      Yes, there is a slight vinegar/pickled taste, but it does mellow out in the Extra Virgin Olive Oil a little bit.
      Hope you’ll enjoy! Alex xo

      Reply
      • Ash

        August 24, 2024 at 9:22 pm

        can you use any chillies?

      • Alexandra Cook

        August 24, 2024 at 9:27 pm

        Hey Ash,
        It really comes down to personal preference here. My preference is definitely for the cayenne peppers – the flavour and heat level is ideal for how I use them – but some readers have used bird’s eye chillies or jalapeños. I would say that most chillies would work! What type were you thinking?

  7. Lathiya

    January 16, 2024 at 7:40 pm

    5 stars
    Awesome recipe..I really loved the flavor of the dishes when I use chili oil.

    Reply
    • Alexandra Cook

      January 16, 2024 at 9:07 pm

      Thank you for trying this recipe, Lathiya!
      I am so pleased you enjoyed it.
      Alex xo

      Reply
  8. Helen

    January 04, 2024 at 9:07 am

    5 stars
    I love chilis. And I really love these chilies . They’re not just your average pickled peppers, they are just bursting with flavor. I put them in my make again file.

    Reply
    • Alexandra Cook

      January 07, 2024 at 9:26 am

      Thank you for making this recipe, Helen! 🙂
      I anm so happy you enjoyed it and will be making them again. Alex xo

      Reply
  9. Dima

    October 02, 2023 at 12:12 pm

    5 stars
    AWESOME recipe. I’m so addicted to this chilli recipe. I’ve made a few batches and also gifted some as well.

    Reply
    • Alexandra Cook

      October 03, 2023 at 10:47 am

      Hi Dima,
      I am so happy to hear this! Thanks so much for taking the time to comment 🙂 Alex xo

      Reply
    • Libby

      February 21, 2025 at 10:54 am

      Hello! Really enjoying this recipe, thank you! If I use green chillies, does the same process and salt to vinegar ratio apply?

      Reply
      • Alexandra Cook

        February 23, 2025 at 9:13 am

        Hi Libby,
        So happy to hear this 🙂
        Yes, that is correct. I will just say, from my experience, the green chillies do dull in colour a lot more than the red.
        They’re still delicious, but just don’t stay a beautiful vibrant green.
        Enjoy! Alex xo

  10. Alan

    September 16, 2023 at 9:11 am

    I was hoping that this would be a homemade version of an asian chiles in oil, though I have a couple of questions..
    – can this be done with just salt?
    –Does the vinegar impart to the final product like it does for my giardiniera?
    the process is a bit similar, though with giardiniera it’s vinegar & oil that stay w/ mixed vegs.
    Lastly: I’ve had EVOO coagulate in the fridge one time too many, even trying a partial dilution, so I’ve been going with quality sunflower, or grapeseed oil as it doesn’t cloud over in the fridge.
    I do keep a jar from the asian market on hand, though I’m pretty sure they’re using a sulfite or other preservative not common to the average kitchen.
    Hope to catch a reply on these as my commercial jar is getting low & would like to try this..

    Reply
    • Alexandra Cook

      September 16, 2023 at 9:16 am

      Hi Alan,
      We have only tested this recipe as written with the vinegar and salt. I cannot recommend doing it with just salt, as I haven’t tested this.
      The vinegar does impart flavour on the chillies, but it also helps provide the acidity needed to preserve the chillies.
      I would say that the chillies are not as strong as a traditional Giardiniera.
      You can certainly use another oil of your preference – we prefer the taste of EVOO, and use it in many dishes as well as eating the chillies, but if you prefer a seed oil, that is fine.
      Hope you’ll give our recipe a try – it is one of my favourites. I just made another jar yesterday 🙂
      Thanks, Alex

      Reply
  11. Insurance Khabar

    September 06, 2023 at 9:37 pm

    I absolutely loved the Preserved Chillies in Oil recipe. It’s a versatile condiment that adds a spicy kick to various dishes, and it’s simple and cost-effective to make. A fantastic way to preserve and enjoy chili peppers year-round, and a valuable addition to any kitchen. Highly recommended!

    Reply
    • Alexandra Cook

      September 07, 2023 at 12:26 pm

      So pleased you enjoyed this recipe!
      Thanks for commenting 🙂

      Reply
  12. Rob A

    September 05, 2023 at 1:21 pm

    Could the chilis be chopped very fine and then use your recipe to make a paste?
    Thank you.

    Reply
    • Alexandra Cook

      September 05, 2023 at 2:10 pm

      Hi Rob!
      That is not something I have tried before – it may work! Another reader did chop the chillies up in a food processor and then otherwise prepared as per the recipe, so not dissimilar to what you are suggesting.
      If you give it a try, I’d be keen to hear how you get on!
      You may also be interested to try our recipe for Red Chilli Paste (linked)
      Thanks! Alex

      Reply
      • Rob A

        September 07, 2023 at 7:51 am

        Thank you, will do!

  13. Lisa B

    August 02, 2023 at 6:19 am

    5 stars
    LOVE THIS PROCESS!! This is now my favorite way to preserve my garden grown hot peppers. Family members look foward to getting their annual jar. Our favorite use for these is on pizza, just divine. Thank you for sharing this recipe!

    Reply
    • Alexandra Cook

      August 03, 2023 at 9:47 pm

      Hi Lisa!
      Thanks so much for your lovely comment.
      With pizza is a favourite for me too 🙂 Thanks for taking the time to let me know you enjoyed this recipe. Alex xo

      Reply
  14. Jackie

    June 23, 2023 at 12:01 am

    5 stars
    Hi Alex,
    We usually dry the chillies we grow, but on this occasion, we preserved some in olive oil instead. Fantastic recipe! Thanks 🙂

    Reply
    • Alexandra Cook

      June 24, 2023 at 6:21 pm

      Hi Jackie,
      I am so happy you enjoyed this recipe. Thanks for sharing! Alex xo

      Reply
  15. Kym - Adelaide

    June 05, 2023 at 11:21 pm

    5 stars
    I have done 3 batches now equaling 20 jars, my friends love them and already have questions from them, when are you doing more, great recipe. Going to do some jalapeños the same way.

    Reply
    • Alexandra Cook

      June 08, 2023 at 5:31 pm

      Hi Kym,
      Thank you for your lovely comments on the Preserved Chillies. I am delighted that you and your friends enjoy them and appreciate that you took the time to let me know. 🙂

      Reply
  16. Sofia

    May 20, 2023 at 9:43 am

    5 stars
    This preserved chillies in oil is not only delicious but also great homemade gift idea. Thank you for the inspiration.

    Reply
    • Alexandra Cook

      May 20, 2023 at 5:29 pm

      Hi Sofia,
      Thank you for your feedback on the Preserved Chillies. I am delighted to know that you enjoy them. 🙂

      Reply
Newer Comments »

Leave a Comment Cancel reply

Your email address will not be published. Required fields are marked *

Recipe Rating


Primary Sidebar

Hi! I’m Alex.

Welcome to It’s Not Complicated Recipes!

My blog reflects my approach to cooking. I like it to be simple, easily prepared and delicious. 

Learn more

Popular Recipes

  • Round dish of cooked patties sitting on some baking paper, garnished with parsley.
    Chickpea Patties (Vegan and Gluten Free)

  • Overhead shot of Lemon Curd Cake, with a slice missing, sitting on a round white dish.
    Lemon Curd Cake (Gluten-Free Option)

  • up close bowl of soup on a grey cloth, another bowl in the background to the right, some sliced bread to the left and two silver spoons on the side.
    Pumpkin and Sweet Potato Soup

  • Gluten-Free Almond Cookies


Comfort Food

  • Skillet with a tomato sauce and the ricotta gnocchi sitting on top, with a wooden spoon about to combine them.
    Gnocchi di Ricotta (Ricotta Gnocchi)

  • Eggplant Involtini – Italian comfort food

  • Overhead shot of cooked casserole, sitting on a brown cloth, with some parsley, feta and olives around the edge.
    Mediterranean Chicken Casserole

  • Bowl of mac and cheese.
    Bacon Mac and Cheese


Recent Recipes

  • Cooling rack topped with freshly baked Gluten-Free Pistachio Cookies, one broken in half to show the interior.
    Gluten-Free Pistachio Cookies

  • Frying pan with Creamy Tomato Chicken, garnished with some fresh basil.
    Creamy Tomato Chicken

  • Jug of Cherry Sauce, on a cream cloth with some fresh cherries around the edge.
    Easy Cherry Sauce

  • Photo collage of four side dishes: quinoa spinach salad, grilled zucchini, stewed beans and smashed potatoes.
    The Best Side Dish Recipes

Footer

About

  • Our Story
  • Recipes
  • Blog

Disclaimers

  • Privacy Policy
  • Privacy Policy (GDPR)
  • Cookie Policy
  • Accessibility Policy
  • Terms Of Use

Contact

  • Contact
  • Subscribe
↑ back to top

COPYRIGHT © 2025 · IT'S NOT COMPLICATED RECIPES® | ALL RIGHTS RESERVED

35559 shares