


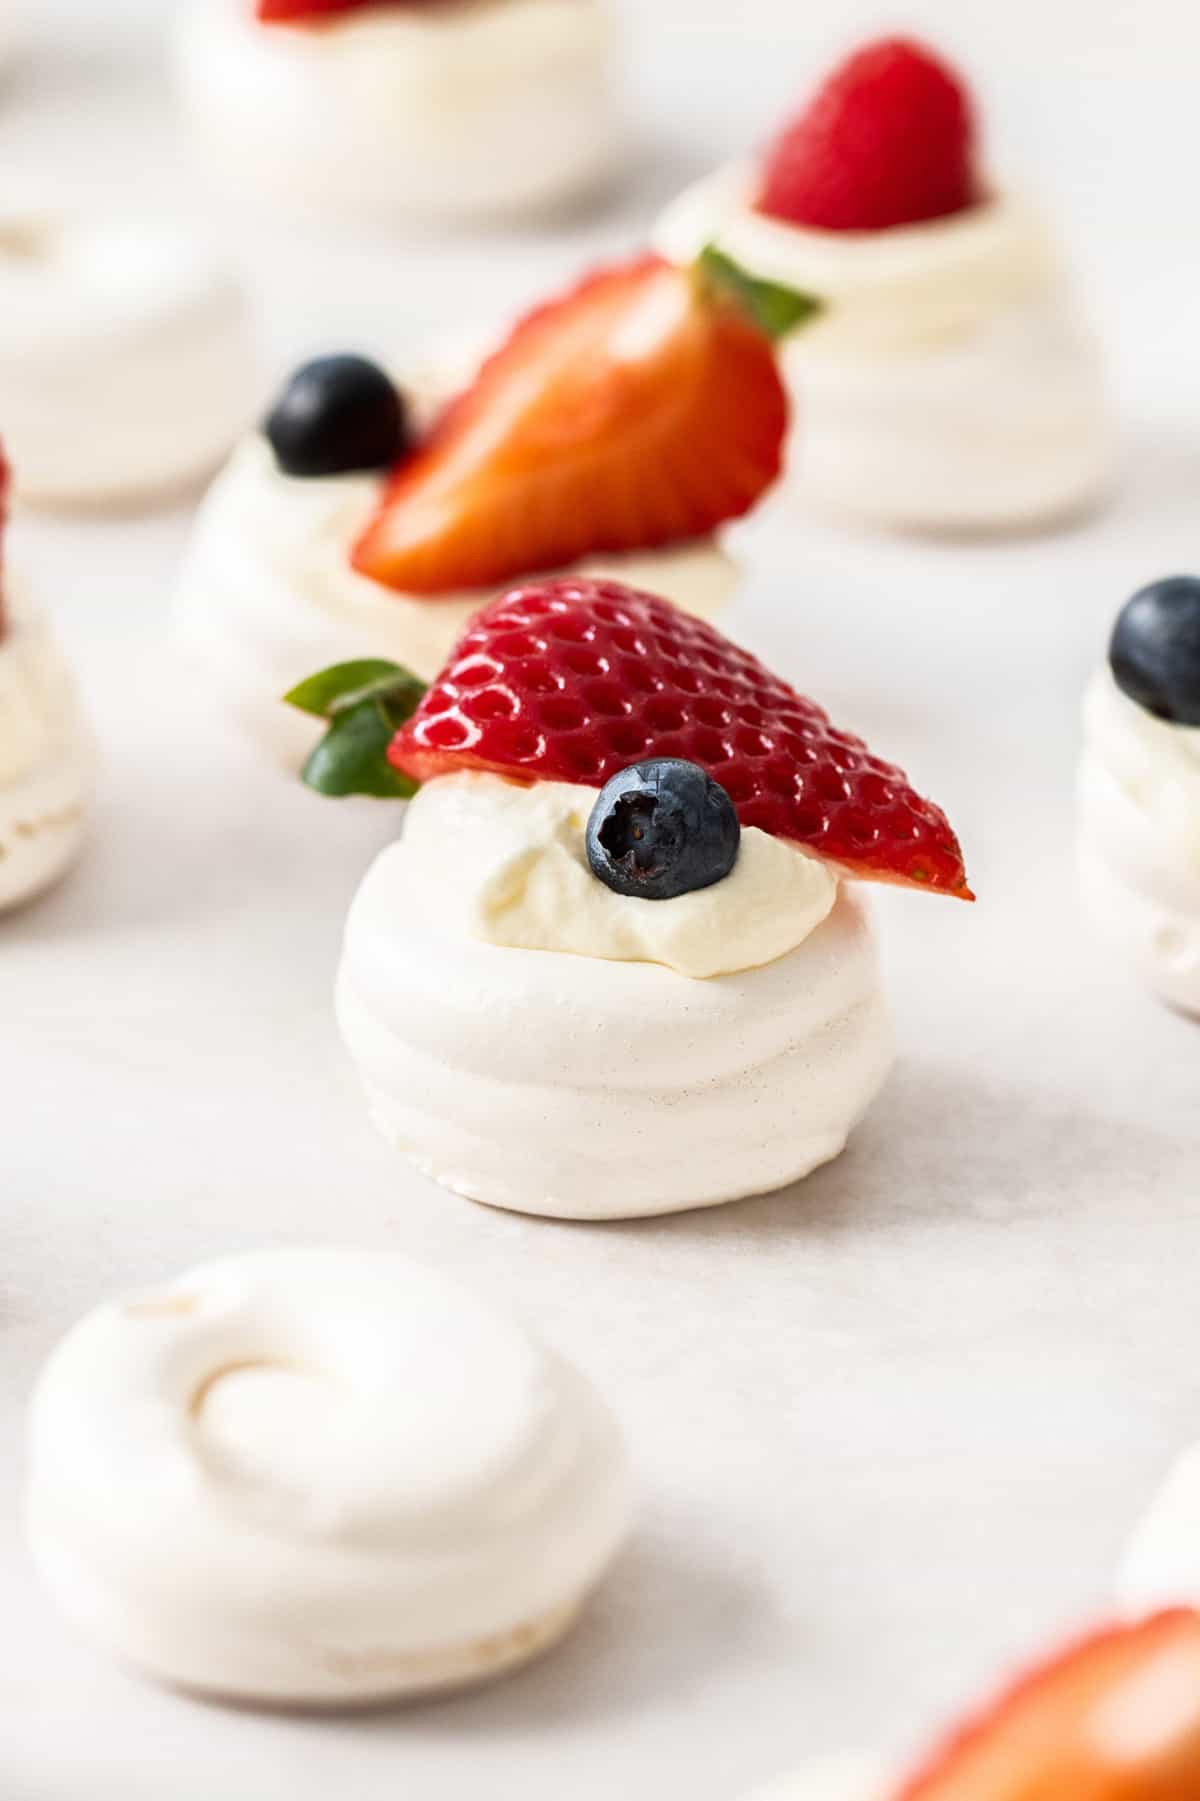
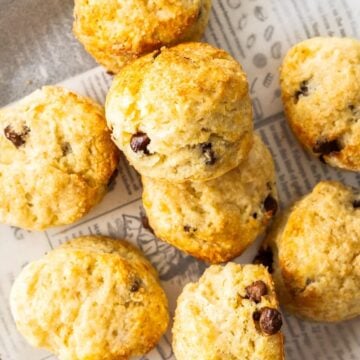
These Mini Meringues with Berries and Cream are a guaranteed crowd-pleaser. The melt-in-the-mouth Meringue Nests are filled with whipped cream and topped with fresh berries. The sweet crunch of the meringue contrasts with the smooth whipped cream and the sweet tang of the berry. They are tantalisingly irresistible!
You will love the Mini Meringue Nests because:
- They contain just 4 simple ingredients and are very easy to make.
- It is a great way to make use of leftover egg whites.
- You can set out a colourful variety of Meringue Nests on one platter simply by using different toppings.
- They can be prepared up to 2 days ahead of time and stored in an airtight container in a cool, dry location to fill shortly before serving.
Ingredients in this recipe:
Please see the recipe card further along in the post for exact quantities of ingredients and the full method.
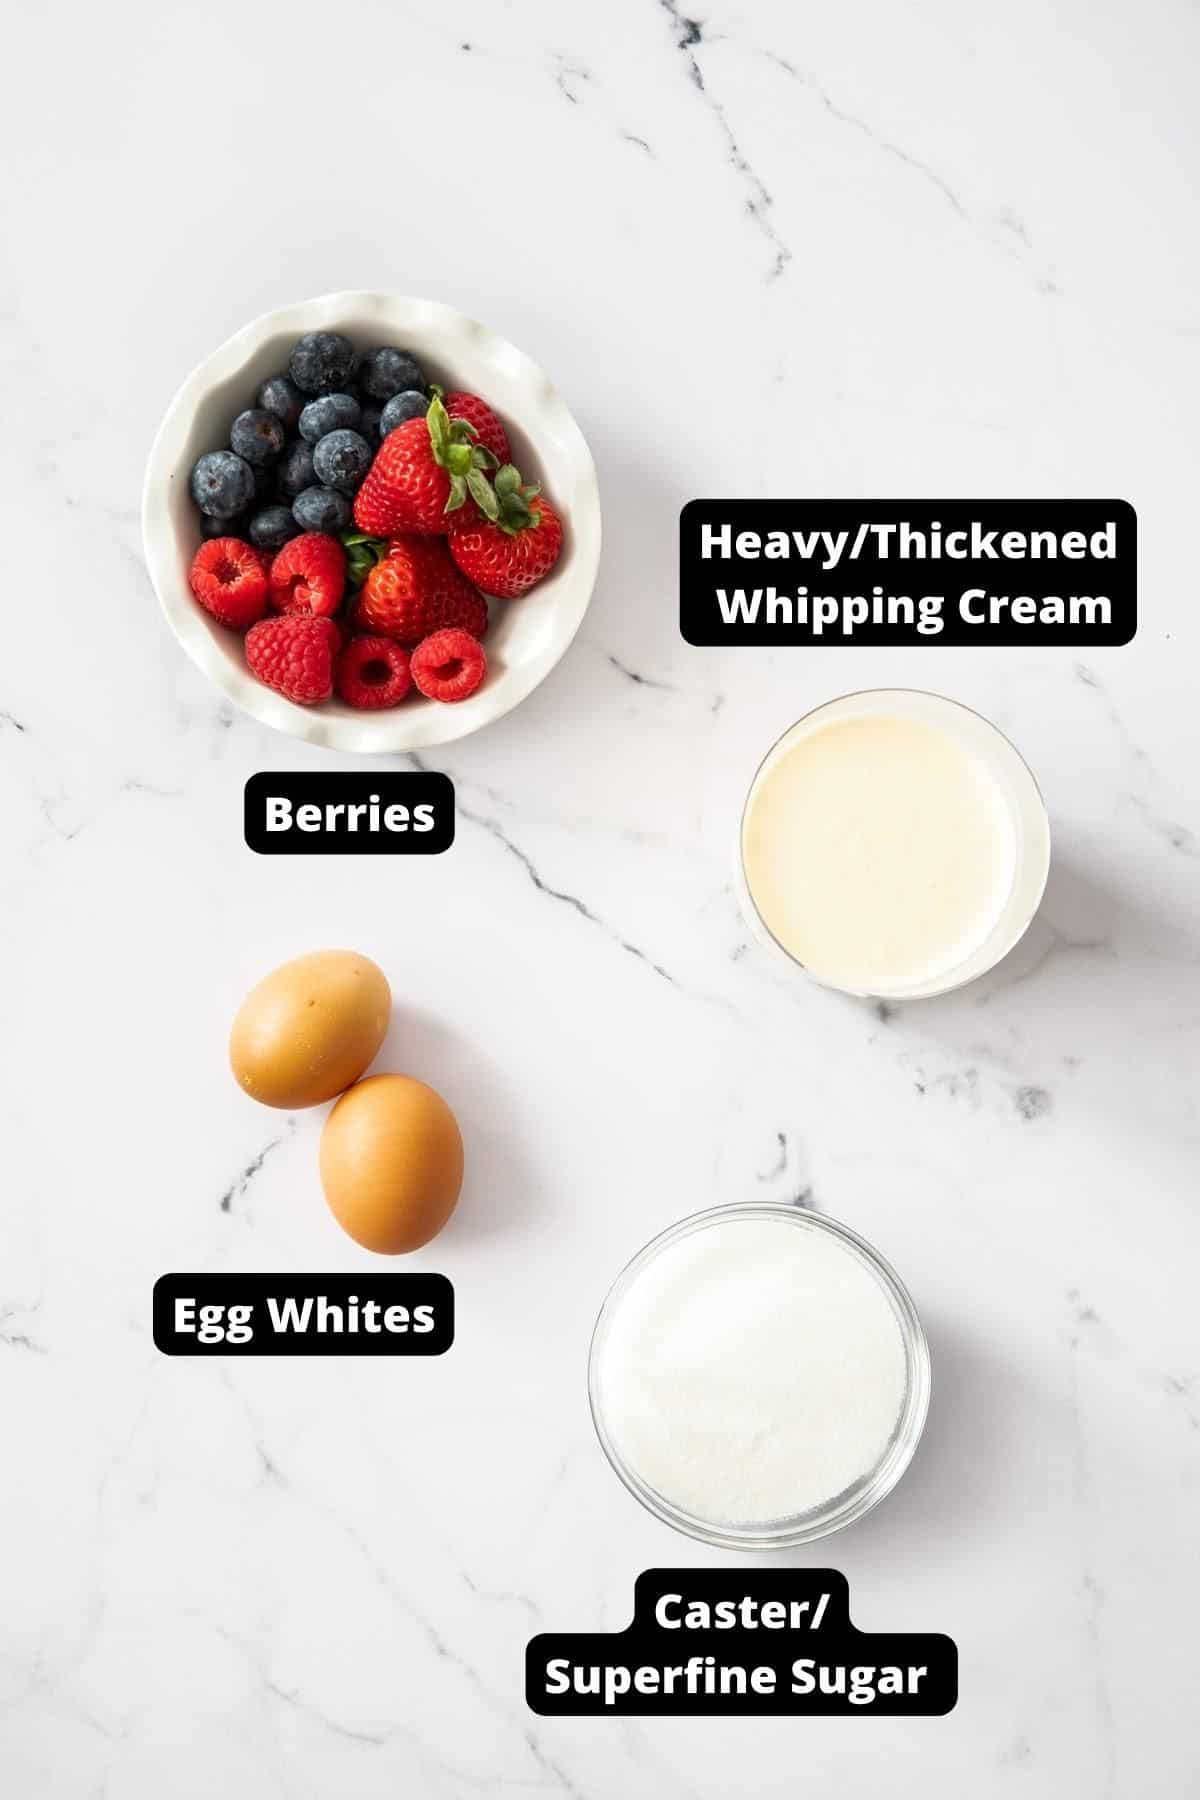
Egg whites - I use the whites from large, free-range eggs. Save the yolks to make custard or Blood Orange Curd.
Caster/superfine sugar - dissolves more readily than regular granulated sugar.
Whipping/thickened cream - we use heavy whipping/thickened cream, which contains a minimum of 35% milk fat.
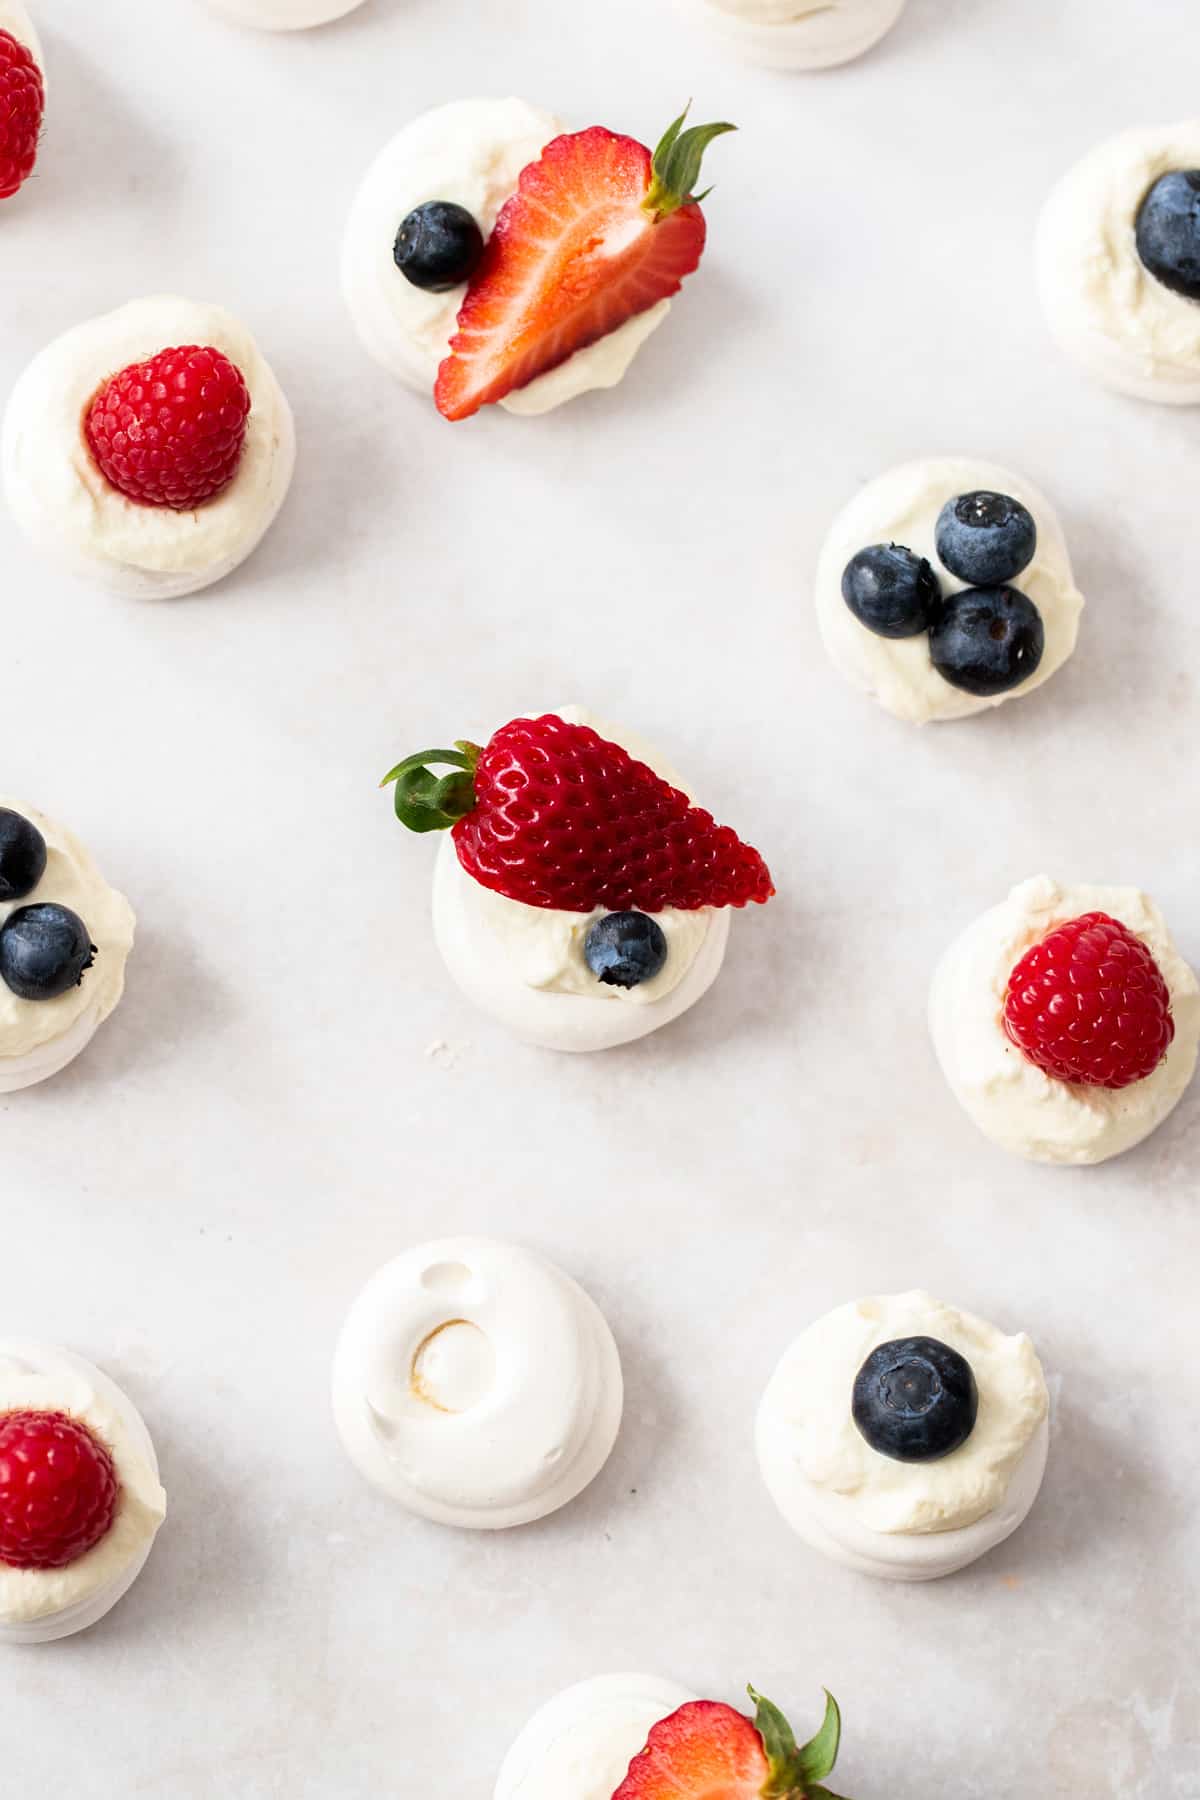
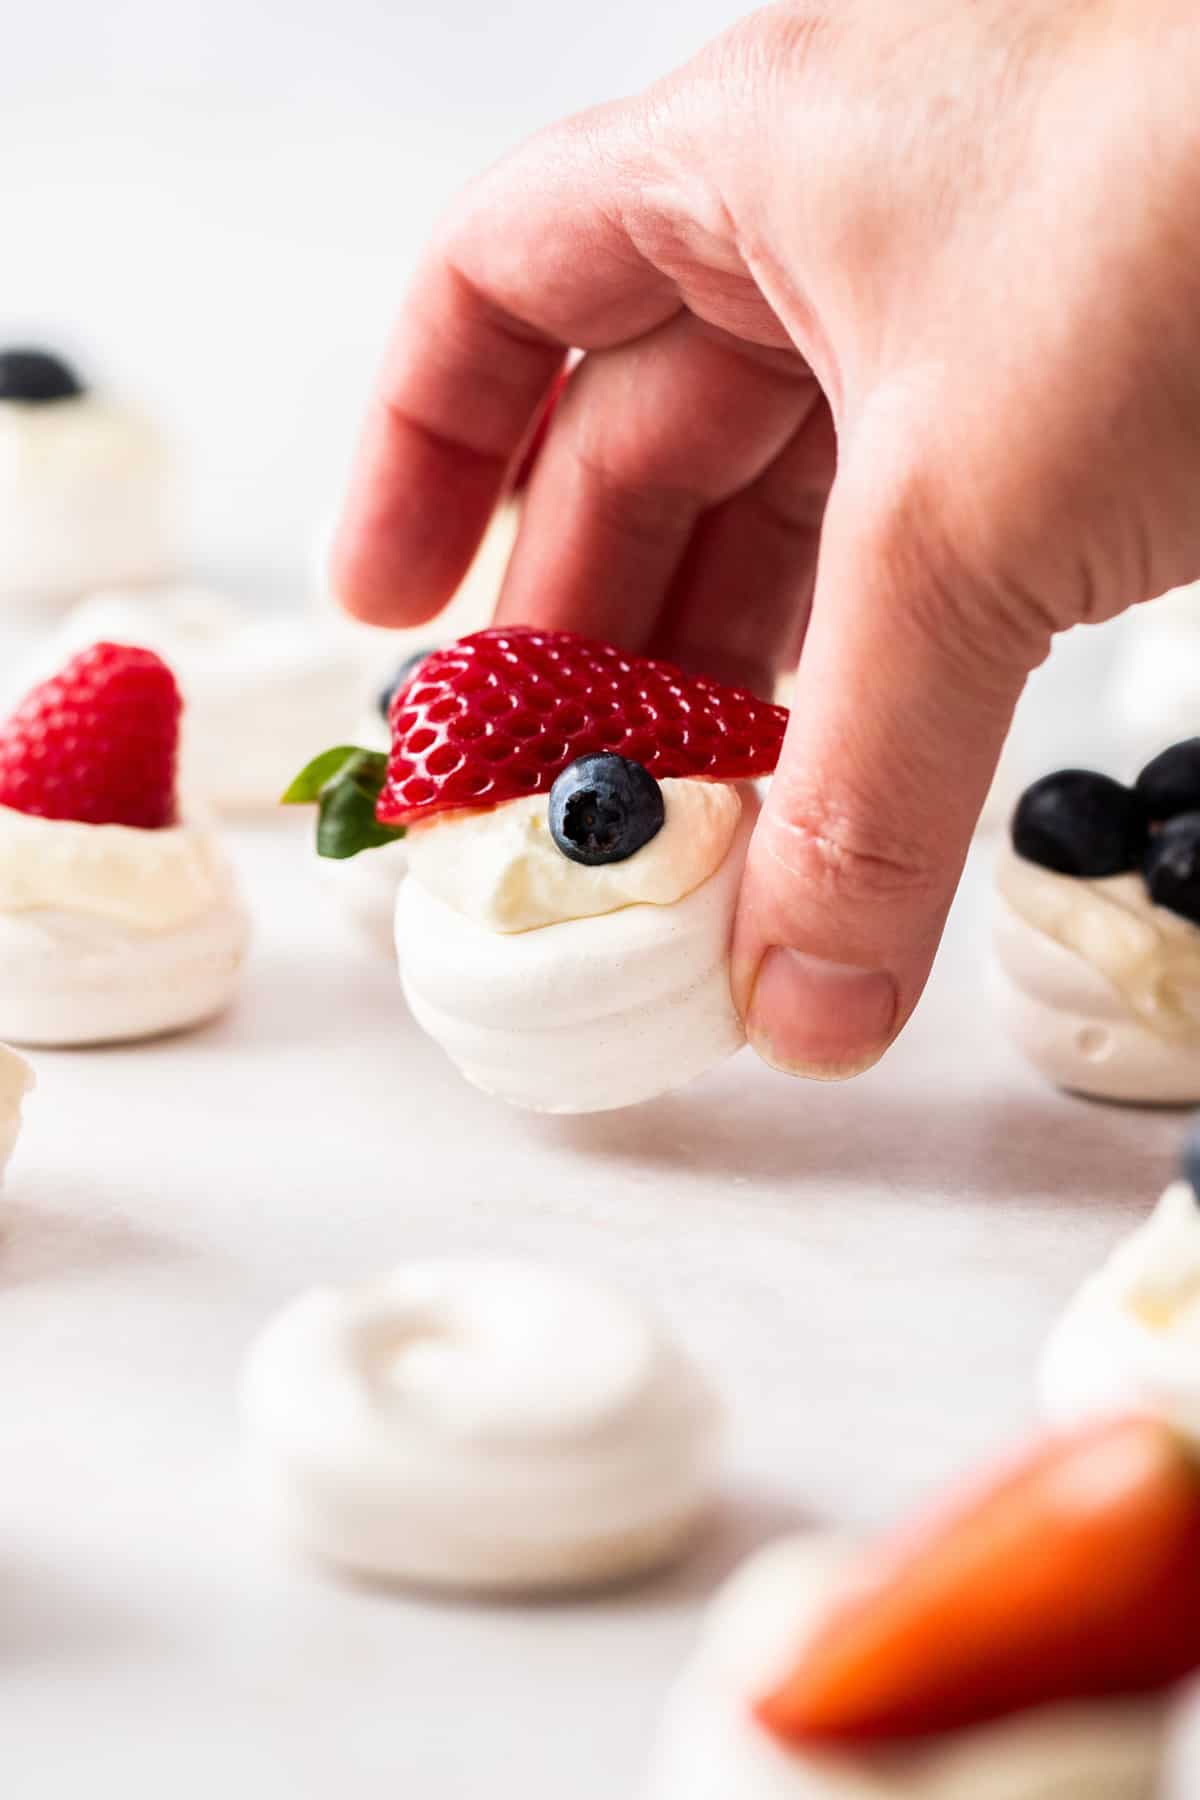
Berries - the Mini Meringues are topped with fresh strawberries and blueberries. However, you can use other berries or the fruit of your choice.
How to Make Mini Meringues:
Please see the recipe card further along in the post for exact quantities of ingredients and the full method.
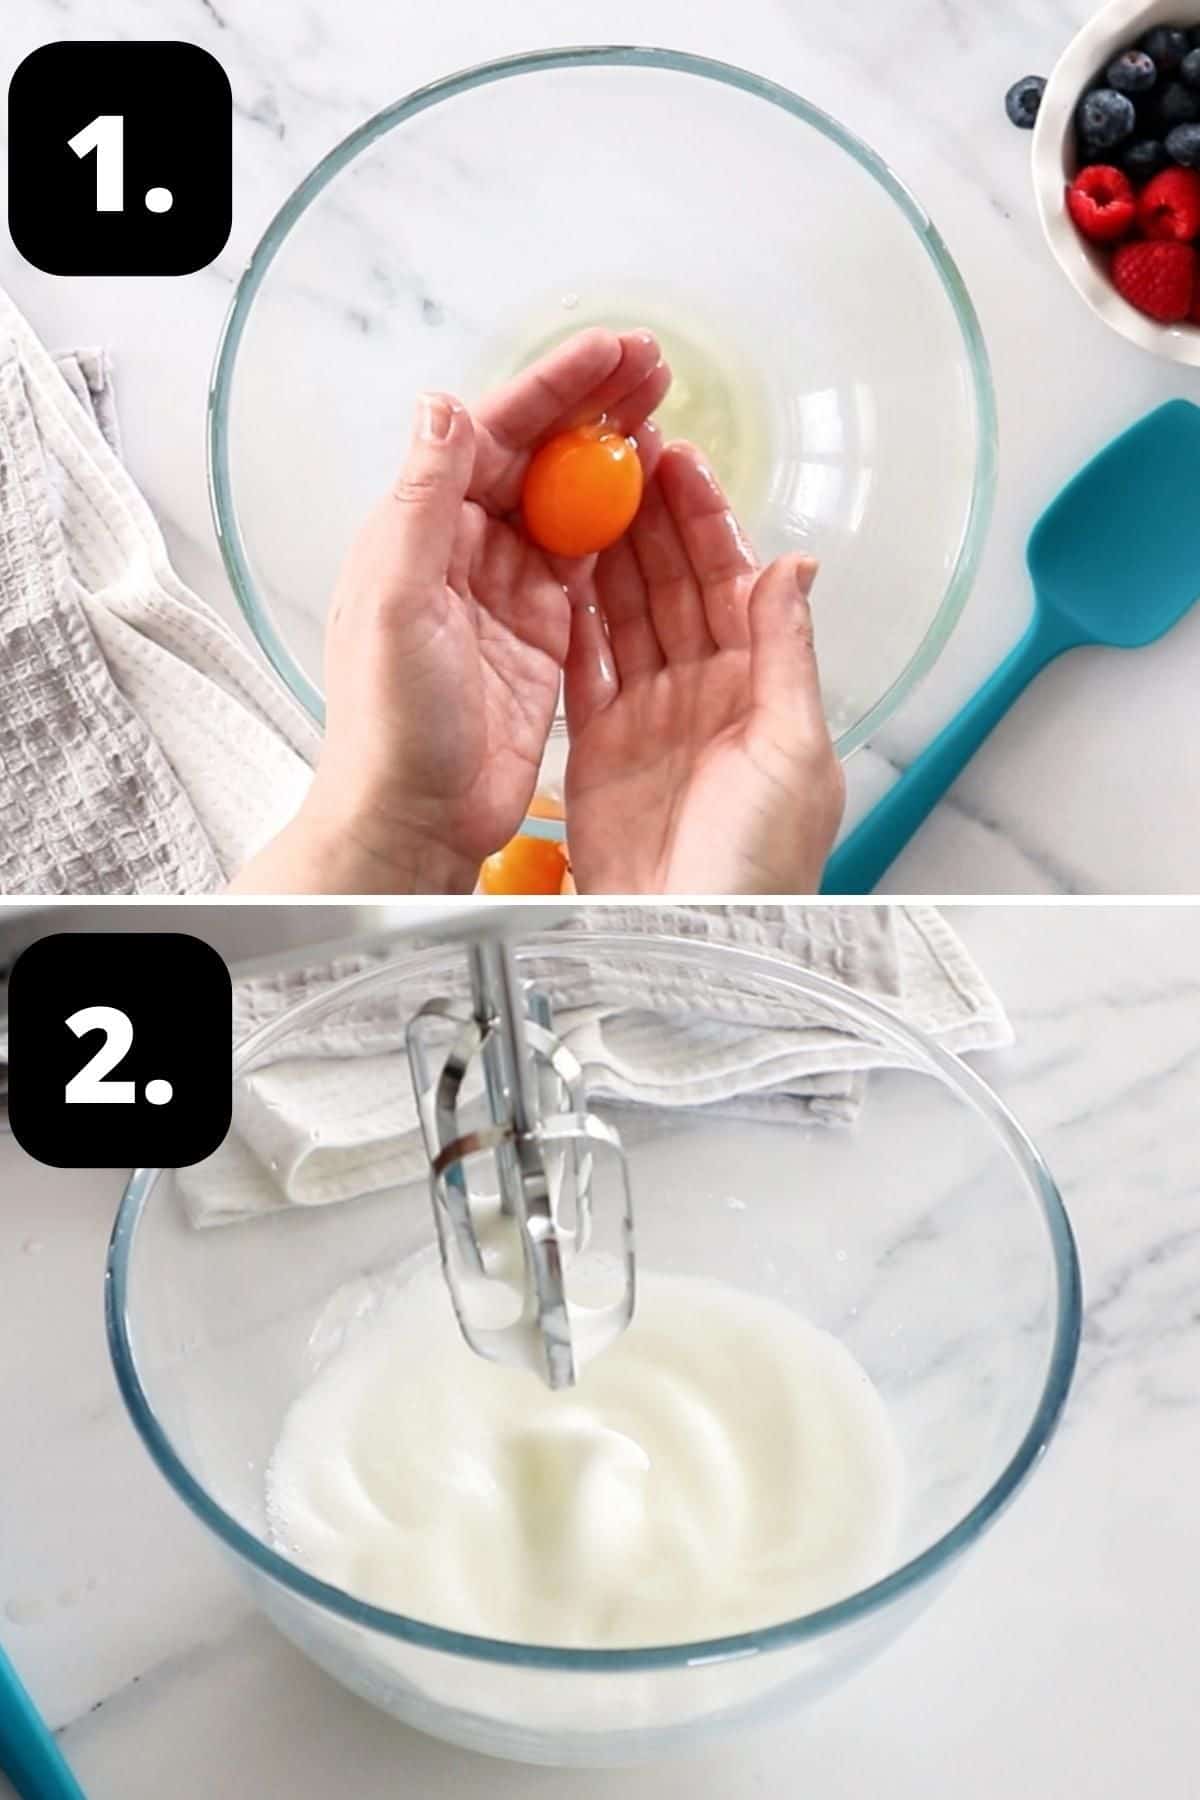
1 - Separate the yolks and whites:
Separate the egg yolks and whites and reserve the yolks for another use.
2 - Whip the egg whites:
Place the egg whites in the bowl of a stand mixer or use a bowl and hand-held electric beaters. Beat on low speed until soft peaks form.
3 - Gradually add the sugar:
Gradually add the sugar, increasing the speed of the beaters.
4 - Beat until stiff peaks form:
Beat constantly until the sugar dissolves, the mixture is thick and glossy, and the meringue has stiff peaks.
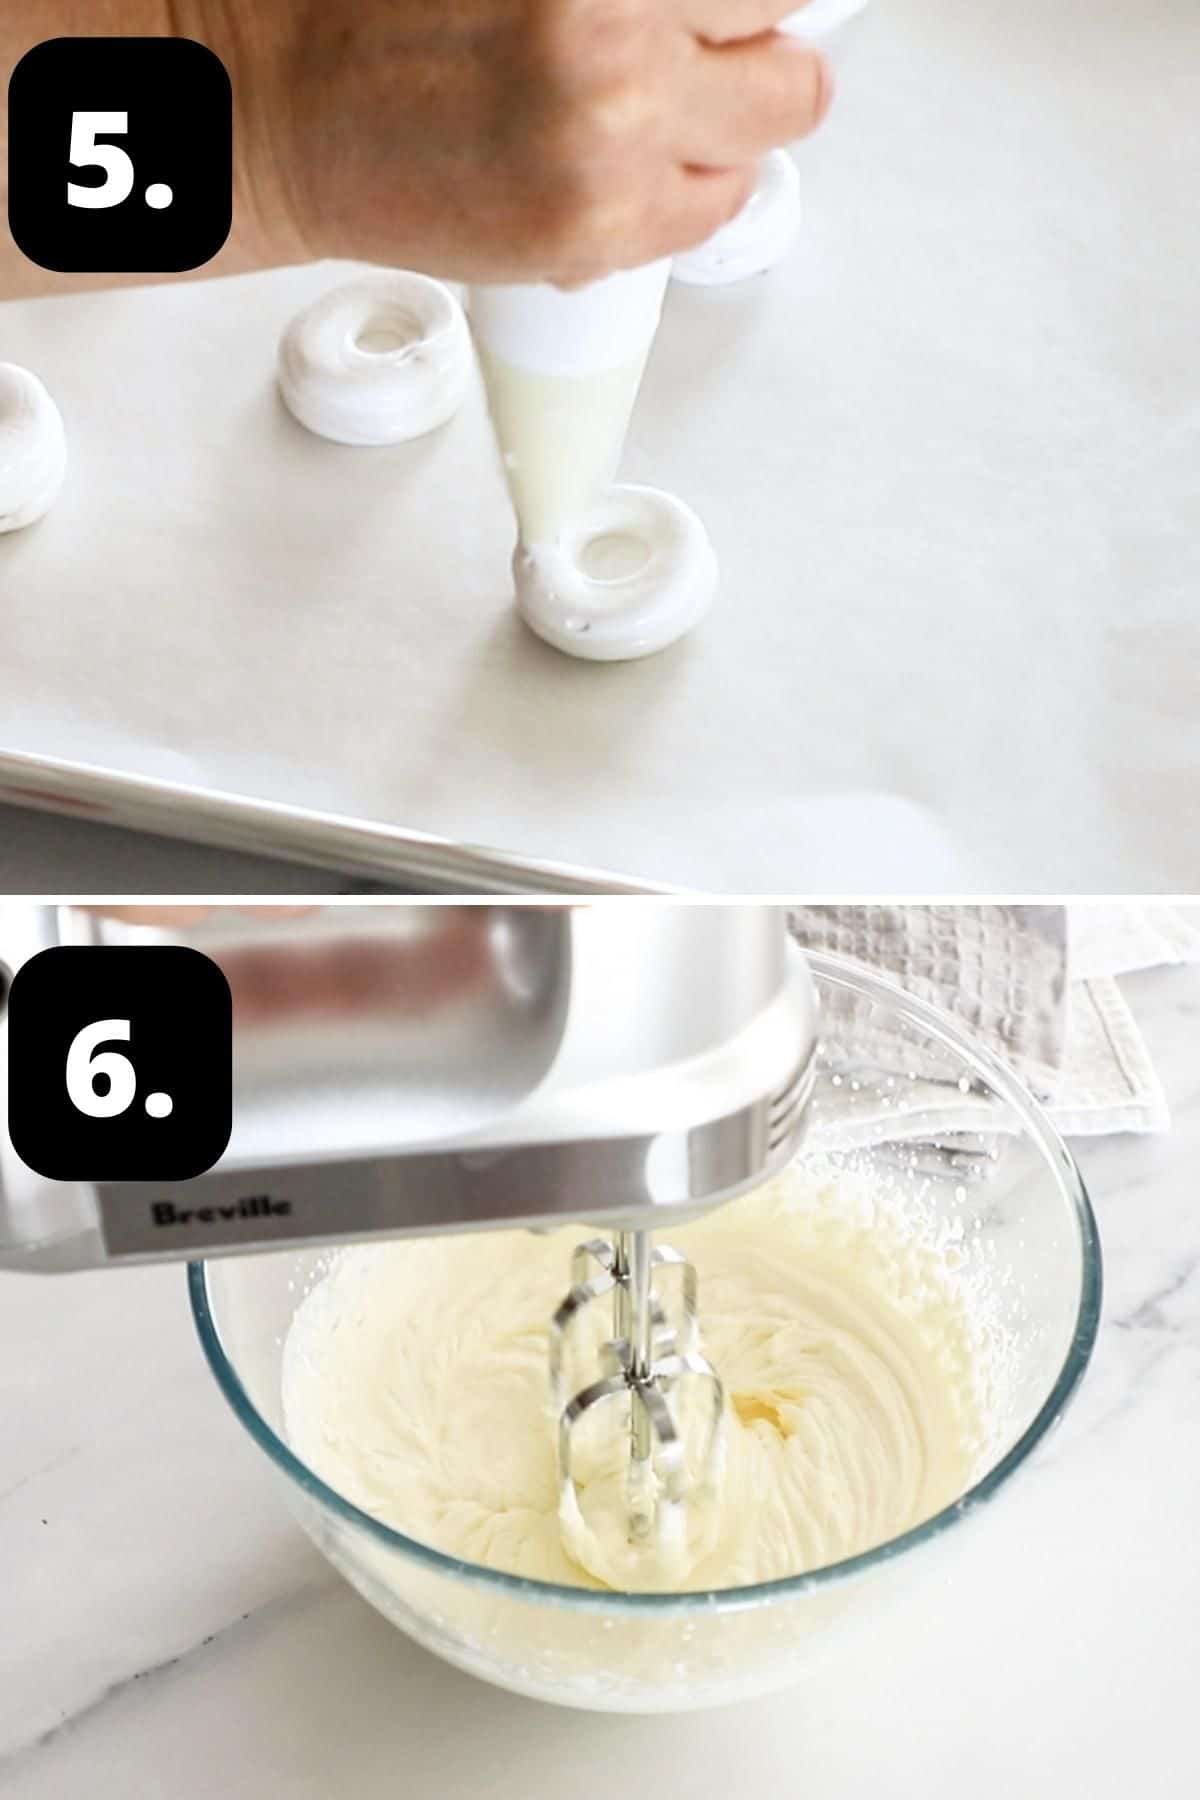
5 - Pipe the meringues:
Spoon the meringue into a piping bag fitted with a small star nozzle.
Pipe the meringue onto a prepared baking tray in a small circle. Continue piping and build the meringues to 3 layers high.
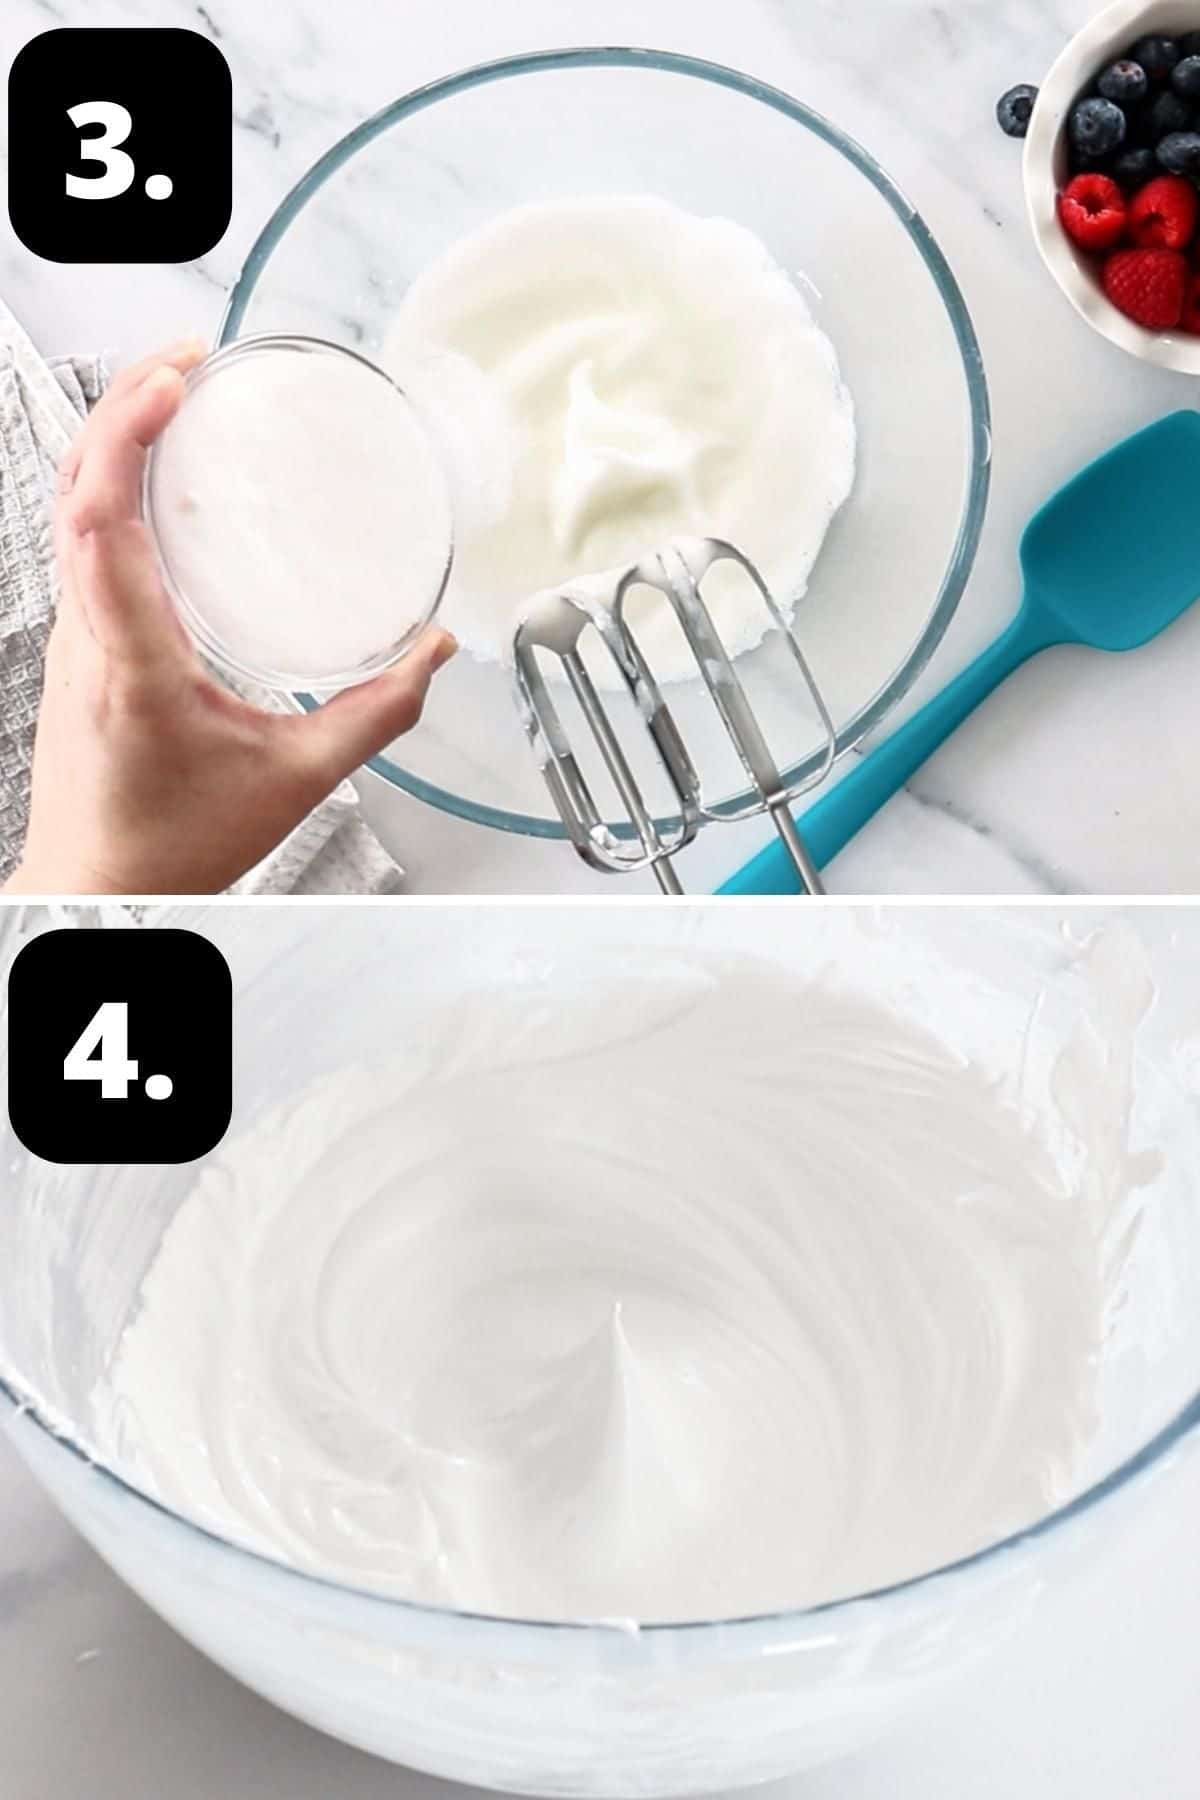
6 - Make the whipped cream:
To make the filling, whip the cream in the bowl of a stand mixer fitted with the whisk attachment, or use hand-held electric beaters. Whip until the cream has firm peaks and is strong enough to hold its shape.
Spoon some cream into each meringue case and decorate with the berries or fruit of your choice.
Tips for success and FAQs:
One of the most important tips for successful meringues is that the equipment you use must be scrupulously clean, dry, and grease-free. Even the slightest smudge of oil on the bowl, or smattering of egg yolk in the whites, will stop the eggs from properly whisking. If a speck of yolk should fall in when separating the egg, the best way to get it out is with an empty eggshell.
They both contain egg whites and sugar. However, a meringue is dried in the oven until it is crisp. On the other hand, a pavlova is crisp on the outside and marshmallow-like on the inside.
It is easier to separate the whites and yolks when the eggs are chilled. However, the whites will achieve greater volume if they are at room temperature for about 20 minutes before being whisked.
Yes, it does. It is best to make meringues on a dry day as they do not like humidity. Sugar is hygroscopic, which means that it will absorb moisture from the air, making it difficult to whip the whites to stiff peaks. In very humid conditions you are likely to find it difficult to successfully bake a meringue as the baked meringues may weep and become soft.
If kept in a perfectly dry, airtight container, and stored in a cool, dry, and dark location, the meringues will last up to 2 weeks. I prefer to store them in a large glass jar with a tight-fitting lid.
Yes, the meringue nests can be frozen for up to three months. Freeze the meringues on a tray in a single layer before transferring them to an airtight container. Separate the layers with non-stick baking paper. Allow the,m to defrost at room temperature.
Serving suggestions:
The Mini Meringue Nests are extremely versatile. They are sufficiently elegant to serve for a morning tea, but simple enough to serve the family on a weeknight. As well, they will be a hit at picnics or potlucks and are ideal for the Festive Season.
They are perfect for entertaining as you can make the meringues ahead of time. You can fill them yourself or take the easy and fun way:
- Set up a Meringue grazing board with an attractive assortment of fruit and some whipped cream;
- Some of our Classic Lemon Curd or Strawberry Sauce;
- Chocolate shavings.
- You are only limited by your imagination as to what to include.
Say goodbye to store-bought meringue nests with this simple, easily made recipe. The melt-in-the-mouth bite-size desserts are quickly and easily made and are a guaranteed crowd-pleaser. I do hope that you will try these Mini Meringue Nests filled with berries and cream. Your friends and family will thank you for it. Please let me know in the comments below if you do.
Alex xx
More delicious recipes for you to try:
Stay in touch!
Follow me on Facebook, Pinterest and Instagram and subscribe to my newsletter.

Mini Meringues with Berries and Cream
Please note:
For accuracy, when weights are provided, we recommend weighing your ingredients. This will produce the best results. All oven temperatures listed are for fan forced.
Ingredients
Meringues:
- 2 large egg whites - at room temperature See Note 1
- 115 g (½ cup) caster/superfine sugar See Note 2
Filling:
- 250 ml (1 cup) heavy whipping/thickened cream See Note 3
- 250 g (9 oz) berries - I used strawberries and blueberries
Instructions
- Preheat oven to 120 Degrees C (250F).Line two baking trays with baking paper.
- Separate the egg yolks and whites. Save the egg yolks for another use.Place the egg whites in the bowl of a stand mixer or use a bowl and hand-held electric beaters. Beat on low speed until soft peaks form.
- Gradually add the sugar, a tablespoon at a time, increasing the speed of the beaters. Beat constantly until the sugar dissolves, the mixture is thick and glossy and the meringue has stiff peaks. To check if the sugar has dissolved, rub a small amount of meringue between your thumb and a finger to check if it's gritty or smooth. If it's gritty, you will need to beat the mixture a little longer.
- Spoon the meringue into a piping bag fitted with a ½ cm-1cm (¼ "- ½") small star nozzle.Starting at the centre, pipe the meringue onto a prepared baking tray into small circles about 3 ½ cm (1 ½") in diameter. Continue piping around the edge of the circle and build the meringues to 3 layers high, to form a nest shape. Leave some space between the meringues.
- Bake for 50 minutes or until they feel crisp.Turn the oven off. Leave the meringues to cool in the oven.Once cool, store the meringues in an airtight container.
- Whip the cream in the bowl of a stand mixer fitted with the whisk attachment. or use hand-held electric beaters and whip until the cream has firm peaks and it is strong enough to hold its shape.
- When you're ready to serve, spoon some cream into each meringue case.Decorate with the berries or fruit of your choice.
Video
Notes
- Egg whites: ensure your egg whites are at room temperature - this will help them whip up faster and gain extra volume.
- Sugar: gradually adding the sugar ensures that you do not destroy the aeration of the whites that you have achieved through whisking, keeping them light and fluffy.
- Cream: heavy whipping/thickened cream contains 35% milk fat.
- Meringues: I made small meringue nests - if you prefer to make them larger, use a larger piping nozzle. It is not necessary to pipe the meringue. Just spoon the meringue onto a baking tray. Use a teaspoon to make an indent in the centre.
- Humidity: avoid baking the Mini Meringues on a humid day. In very humid conditions you are likely to find it difficult to successfully bake a meringue as the baked meringues may weep and become soft.
Nutrition Estimate:
Nutritional Disclaimer:
The nutritional information is an estimate only, and is derived from online calculators. For accurate results, we recommend calculating the nutritional information based on the ingredients and brands you use.
This post was originally published in March 2019. It has been updated with new photos and more information. The recipe remains the same.


Meewah says
Doesn't say how long it needs in oven or oven temperature!
Alexandra Cook says
Hi Meewah,
Please see the information in the recipe card:
Step 1: Preheat oven to 120 Degrees C (250F).
and Step 5: Bake for 50 minutes or until they feel crisp.
Turn the oven off. Leave the meringues to cool in the oven.
Sue says
I love this "small bites" approach to sweets. Makes it so approachable. These meringues were sweet and perfect, a little whipped cream and fresh berries added just enough. Can't wait for the next batch!
Alexandra says
I am thrilled to hear this, Sue - thank you so much for letting me know!
Jay Byrd says
Excited to find this recipe! Haven't cooked it yet as I need them for Xmas day. Could you let me know how long these will keep for. Will defo need to make them in advance as my Mum hates anyone doing anything that isn't strictly necessary in the kitchen over Christmas
Alexandra Cook says
Hi Jay 🙂
We go into more detail about storage in the Tips for Success and FAQs section (linked)
They can be baked up to two weeks in advance if stored properly, or you can even freeze them if you have the space 🙂 Have a read of that section to see what might work best for you.
Thanks, Alex
Rhonda says
Perfect. They look great on the plate and taste even better. I love big meringues, but the small single serve size is just perfect.
Alexandra says
Thanks, Rhonda!
I agree - sometimes a single serve is ideal!
Cristina says
Mini desserts full of love, goodness and sweetness! Excellent also for an aperitif with a glass of sparkling wine or rosé!
Alexandra says
Yes, love that so much! 🙂 🙂