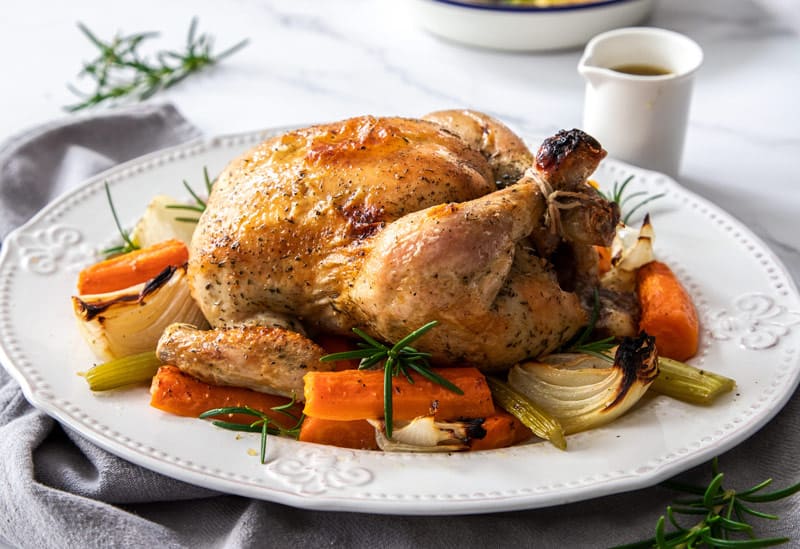
The Perfect Roast Chicken - our easy to prepare recipe with a clever dry brine - is an absolute revelation! It is the ideal roast chicken with tender, juicy flesh and flavoursome, crispy skin.
Jump to:
I do not think that I am alone in believing that a beautifully Perfect Roast Chicken with crispy skin is the ultimate comfort food. But you can perfect it with one simple process; a dry brine.
I feel that this is the best way to achieve the tender, succulent flesh and golden, crispy skin that we all love.
What is a dry brine?
It is a simple concept. The exterior of the chicken, or other poultry or meat, is coated with salt, perhaps with the addition of some herbs or spices, and left uncovered, in the fridge for 24 hours prior to roasting.
I believe that dry brining the chicken is the best way to get succulent, juicy meat, and crispy, golden skin. And to me, that describes the Perfect Roast Chicken!
Although dry brining is a simple technique, it does require some advance planning. With some simple preparation a day ahead of cooking, you will be rewarded with the most amazing, juicy, flavoursome chicken you have ever had.
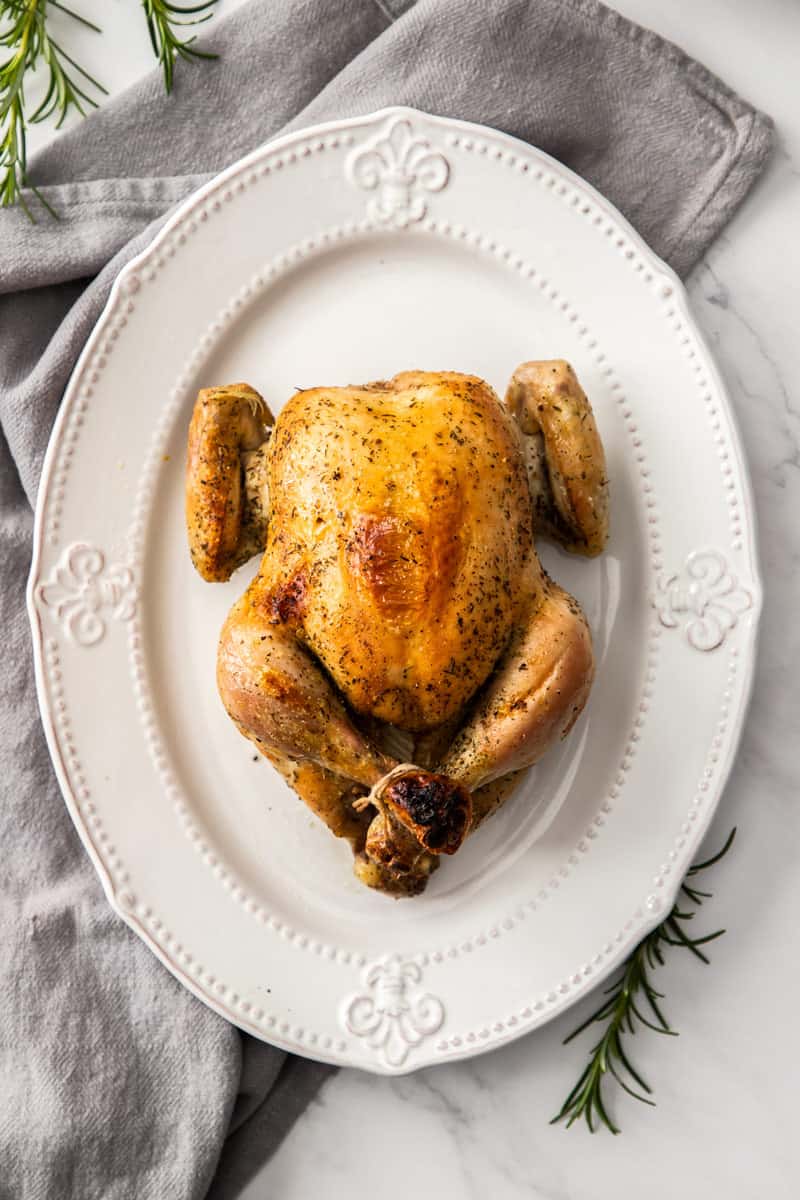
Why we love this recipe:
I was familiar with the method of a wet brine for poultry but had always been deterred from trying it. The notion of a large container of water, sloshing around in my fridge, did not appeal at all.
As well, my fridge generally does not have the required amount of empty space to accommodate this.
The term “brining” implies that a liquid is used with salt. The idea that a brine, which does not involve water or another liquid, seemed contradictory and I was sceptical of the outcome. In essence, this method is, perhaps, more of a dry rub.
However, curiosity finally got the better of me and I am now a convert to the dry brine method, and truly believe it gives you the Perfect Roast Chicken.
After trying dry brining, you'll never go back to the wet brine.
Ingredients in this recipe:

Please see the recipe card further along in the post for exact quantities of ingredients and the full method.
Chicken – medium size, free-range. Please remember the size of your chicken will impact the cooking time.
Coarse kitchen salt – do not use table salt, it is too fine and may make the chicken too salty.
Dried mixed herbs – I used sage, thyme and marjoram. Oregano also works well.
Freshly ground black pepper – has a fresher, brighter taste than pre-ground.
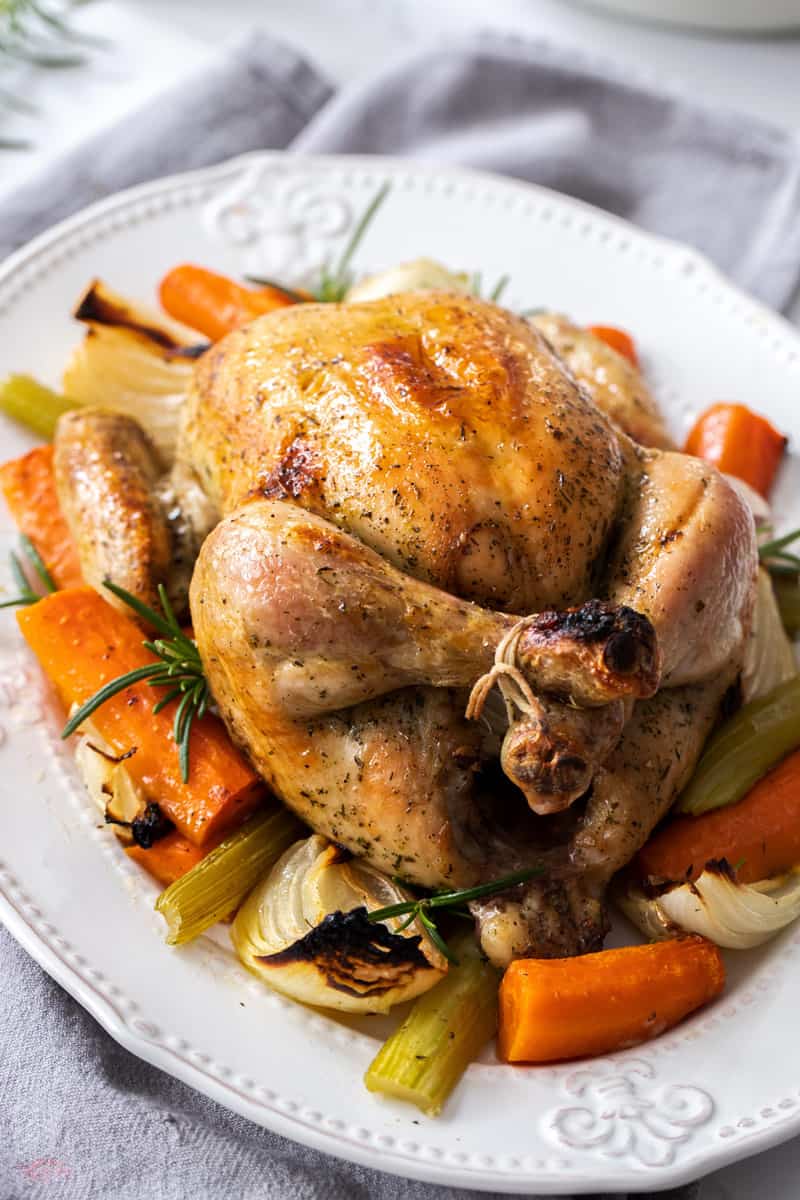
Onion, carrots and celery - a great flavour base for the chicken to sit on.
Olive oil - our preference is for Extra Virgin Olive Oil.
Step by Step Instructions:

- To begin, take some paper towels and pat the chicken dry, both inside and out. Remove any excess fat from the chicken’s cavity.
- Combine salt, pepper and herbs. Place the chicken on a plate and sprinkle the entire surface with the salt mixture, leaving a little to sprinkle inside the chicken. Rub the mixture onto the skin to help it adhere.
Place the chicken on a wire rack set inside a baking tray. Chill it, uncovered, in the refrigerator at least 4 hours, up to 1 day. Leaving the chicken uncovered ensures that the skin will get nice and dry which results in extra crisp skin after roasting. - Remove the chicken from the refrigerator 1 hour prior to cooking to bring the chicken to room temperature. If it is a hot day, remove it a half-hour ahead.
Prepare a roasting pan. For easier washing-up, you may like to line the pan with baking paper. Add the vegetables to the pan to form a base on which to place the chicken. Pat the chicken dry using paper towels. Do not rub off the salt mixture. Brush the skin with olive oil and stuff the cavity with onion. - Place the chicken in the prepared roasting pan on top of the vegetables and roast until the chicken is cooked and the skin crispy.
Set the chicken aside to rest on a warm plate, loosely covered with aluminium foil, for 10-15 minutes.
Tips for Success and FAQs:
Please keep in mind the size of the chicken that we have used, and as such, the timing in the recipe. If your chicken is a different size, adjust the time accordingly. If you have any queries regarding timing, please feel free to reach out to us anytime.
Please note, food safety experts advise that we should not wash chicken. Splashes from the water can spread campylobacter bacteria, increasing the risk of food poisoning. The heat of the oven will destroy any bacteria which may be on the chicken.
No. One of the great attributes of this recipe is its versatility. Just use the process to suit your time requirements.
If you are only able to leave your salted chicken in the fridge for an hour or so it will still improve the flavour and texture of the chicken. But it is a revelation if you leave it for 24 hours.
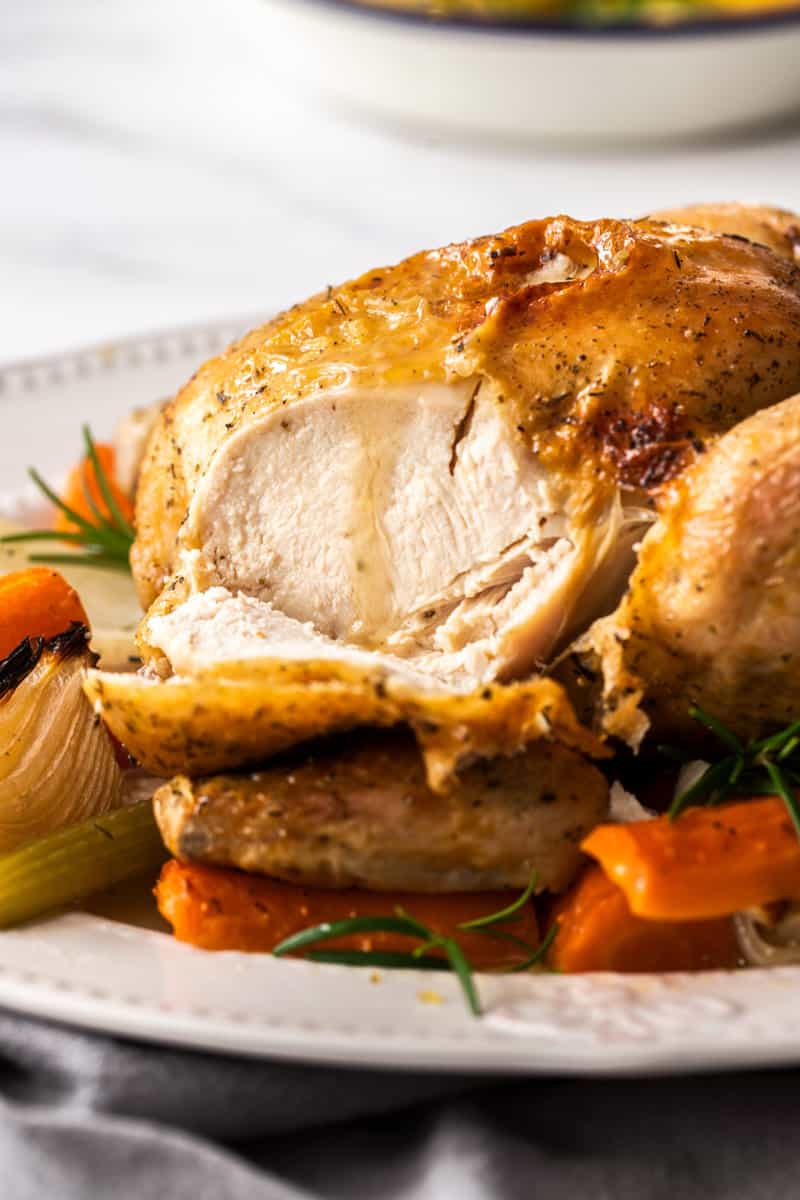
Do not be concerned that covering the chicken in salt will make it dry. Although the salt draws some moisture out of the meat, this is eventually re-absorbed along with the salt and spices. This means the chicken will be moist and beautifully seasoned throughout.
Using a sharp knife, pull the leg away from the body of the chicken. Insert the knife and if the juices run clear, the chicken is cooked. If the juice has a slight pink tinge to it, put the chicken back into the oven and cook for a further 10 minutes then check again.
Alternatively, you can use a thermometer. Push it into the thigh, avoiding the bone; it should measure 75 C/165 F when the chicken is cooked.
I use coarse kitchen sea salt and have found that 1 tablespoon is needed for a medium-size chicken. Regular table salt, on the other hand, has smaller grains and is not ideal for this process. The finer the grain, the easier it is to over-salt.
The amount of salt is a matter of taste and depends on the type that you use, so you will need to experiment.
If you’re concerned about the chicken tasting too salty, surprisingly, it doesn’t. It produces deeply flavourful, tender flesh. But as noted above, it is important to use a coarse grain salt.
A vegetable trivet is a selection of vegetables which are used as a bed for the chicken as it roasts. I have used onion, carrot and celery. The vegetables impart flavour to the chicken and can be served with the chicken or incorporated into a sauce.
How can I use the leftover chicken?
There is tremendous value with a roasted chicken. If you have any leftover meat, you can use it in a number of ways.
I use it to make sandwiches, salads or soups, to name just a few ways. Finally, I boil the carcass and the bones and make chicken stock.
When it comes to serving:
Roast chicken is classic comfort food. There are so many ways to enjoy it, from simple to elaborate.
I like to serve my chicken family-style. I carve it then lay it out on a platter and serve with some accompaniments.
For stress-free entertaining, I roast several chickens and serve with a variety of salads that I have prepared in advance, such as:
- Gluten-free Quinoa Tabouli
- Potato Salad with Peas and Mint
- Sweet Potato and Quinoa Salad
- Broccoli, Bacon and Cashew Salad
- Turmeric Roasted Cauliflower Salad
- Sweet and Sour Carrot Salad
If catering for a large group I often serve the chicken with:
I also love to serve the Roast Chicken with a variety of condiments, such as:
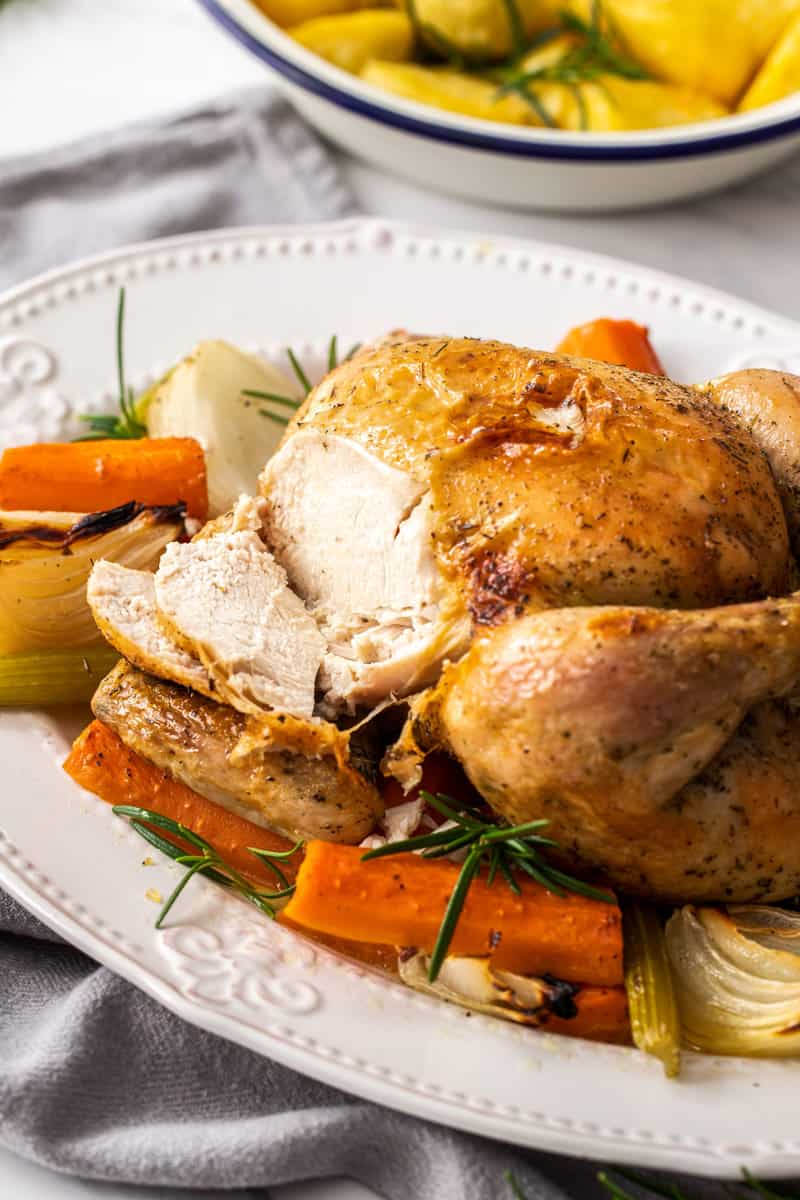
I do not know of a better way to achieve The Perfect Roast Chicken than using this very simple method. It is the ultimate, simple oven dish yet one that is very special.
It is a meal that is both satisfying and comforting. The aroma of chicken roasting in the oven is wonderful. It is warm and inviting, enticing everyone with the pleasure of the meal to come.
Please let me know in the comments below if you try this.
Alex xx
Perfect Roast Chicken
Please note:
For accuracy, when weights are provided, we recommend weighing your ingredients. This will produce the best results. All oven temperatures listed are for fan forced.
Ingredients
- 1.5 kg (3.3 lb) whole chicken See Notes 1 and 2
- 1 tablespoon coarse kitchen salt See Notes 3 and 4
- 1 teaspoon dried mixed herbs See Note 5
- ½ teaspoon freshly ground black pepper
- 2 medium onions (peeled and cut into quarters)
- 2 large carrots (washed, peeled and cut into large chunks)
- 2 sticks of celery (washed and cut into 7cm/2 ¾ inch lengths) See Note 6
- 2 ½ tablespoon olive oil, divided
Instructions
For the Dry Brine (The Day Before Roasting):
- One day before serving, I pat the chicken dry, inside and out, using paper towels. Remove any excess fat from the chicken’s cavity.
- Combine the salt, herbs and black pepper. Sprinkle evenly all over the chicken and inside the cavity and rub the mixture into the skin.
- Place the chicken on a rack which sits in a baking pan and place, uncovered, in the fridge overnight. See Note 7
Roasting the Chicken:
- Remove the chicken from the fridge about one hour before roasting to bring it to room temperature. If it is a hot day, remove it about a half hour before cooking.Meanwhile, line a roasting pan with non-stick baking paper. See Note 8
- Preheat your oven to 230C (450 F).
- Place two of the onion quarters inside the cavity of the chicken. Pat the chicken dry. Do not rub the salt off.
- For more even cooking, truss the chicken using your method of choice. I use a simple method. I tuck the wings behind the back of the chicken. Then, cross the legs and secure them firmly with kitchen twine.
- Place the remaining vegetables in the roasting pan and toss with 1 ½ tablespoons of olive oil. The vegetables form a trivet on which to place the chicken.
- Brush the chicken all over with the remaining tablespoon of olive oil and place, breast-side up, on the bed of vegetables.
- Put the chicken in the oven and reduce heat immediately to 200 C/400 F.Roast for about 1 hour 10 minutes. The cooking time will depend on the size of the chicken and varying temperatures of ovens.To check that the chicken is done, insert a sharp knife between the thigh and the chicken body. When cooked, the juices should run clear. Alternatively, use an instant-read thermometer. It should register at 75C (165 F) when inserted into the thickest part of the thigh, but not touching the bone.
- Once cooked, remove the chicken from the oven, transfer to a warm plate and cover loosely with foil. Let rest for 15 minutes before carving.
- Serve with the vegetables in the pan. If you wish, use the juices from the pan to make gravy.
Video
Notes
- Food safety experts advise that we should not wash chicken. Splashes from the water can spread campylobacter bacteria, increasing the risk of food poisoning. The heat of the oven will kill any bacteria which may be on the chicken.
- If you have a large chicken you may wish to increase your herb and spice mix a little. Please also note, the size of the chicken will vary the cooking time.
- Use coarse kitchen salt. Fine table salt is not suitable as it will be too concentrated.
- The Australian tablespoon is 20ml or 4 teaspoons. In many other countries, the tablespoon is 15ml or 3 teaspoons. You may have to adjust your measurement accordingly.
- I used a combination of sage, thyme and marjoram but you could use herbs of your choice.
- For large pieces, cut the celery in half lengthways.
- Ideally, the chicken should sit, uncovered, in the refrigerator overnight. This will dry out the moisture in the skin and this means that when cooked the skin will be crispier. However, if you can only leave it for one hour you will notice an improvement in the flavour and texture.
- I line the tray with baking paper to make cleaning up easier. If you are going to make gravy from the pan juices you may prefer to not use baking paper.
- The nutritional information is calculated as the chicken being quartered, and one quarter considered as one serving.
Nutrition Estimate:
Nutritional Disclaimer:
The nutritional information is an estimate only, and is derived from online calculators. For accurate results, we recommend calculating the nutritional information based on the ingredients and brands you use.








Chandra says
I made this chicken recipe for Thanksgiving as my family does not like turkey. This was one of the best chicken recipes I have ever tried. The entire family loved it! The only thing I did differently was add some chicken stock to the pan when the chicken was roasting. Thank you for this delicious recipe.
Alexandra Cook says
Hi Chandra!
Thank you so much for making, and I am so thrilled your family loved this recipe!
I appreciate you taking the time to let me know. Alex xo
Liz says
This is my new go-to roast chicken recipe. It was a hit with my family!!!
Alexandra Cook says
Thrilled to hear this, Liz! Thanks so much for taking the time to let me know 🙂 Alex xo
Michelle Lynch says
Today I’m making this for a second time, last time I brined overnight today I only have time for 4 hours and 1 more to get it to room temperature. Dry brine, who knew how crispy the skin becomes, reminds me of my youth!
Alexandra Cook says
Thank you, Michelle 🙂 we love the crispy skin too!
Appreciate you taking the time to comment!
Alex xo
Francisca Bonato says
this recipe looks amazing and can't wait to try it . I wanted to ask . if I wanted to cook the chicken with potatoes in the same baking tray would that be possible or would it affect the cooking time / crispiness of the skin ?
Alexandra Cook says
Hi Francisca,
You can cook the potatoes in the same tray as the chicken. It's unlikely to affect the chicken skin but the potatoes may not be crisp. Having a family that loves their crisp roast potatoes, I always cook them separately in another baking tray. If you do decide to cook them with the chicken, leave them in the oven when you take the chicken out to rest. This will help crisp them. I hope this helps.
Kind regards, Alex
Samantha says
10/10 - the salt brine is a game changer. Will never make roast chicken a different way again. Served with your tomato pasta. Winner!
Alexandra says
Hi Samantha, I am delighted to hear that you enjoy the salt brined Roast Chicken: the brine really does make a big difference. What a great idea to serve with the Roasted Cherry Tomato Pasta! 🙂
Diana says
Excellent easy and delicious recipe!
Alexandra says
Thank you, Diana!
Maria says
This was delicious! I made it for my family tonight and everyone loved it. I had some potatoes and Brussel sprouts so I added them to the mix!
Alexandra says
Thank you, Maria! I am so pleased you enjoyed it. The potatoes and brussel sprouts are a lovely addition!
tina says
Loved it
Alexandra says
Thank you so much, Tina!
Peter says
This recipe was perfect for the whole chicken I had in the freezer. All of these ingredients are staples most people would already have in their pantries or fridge! If you follow the recipe to a tee, there should be no issues!
Alexandra says
Thank you so much for the fabulous feedback, Peter. I am so pleased that you enjoyed the chicken. 🙂