


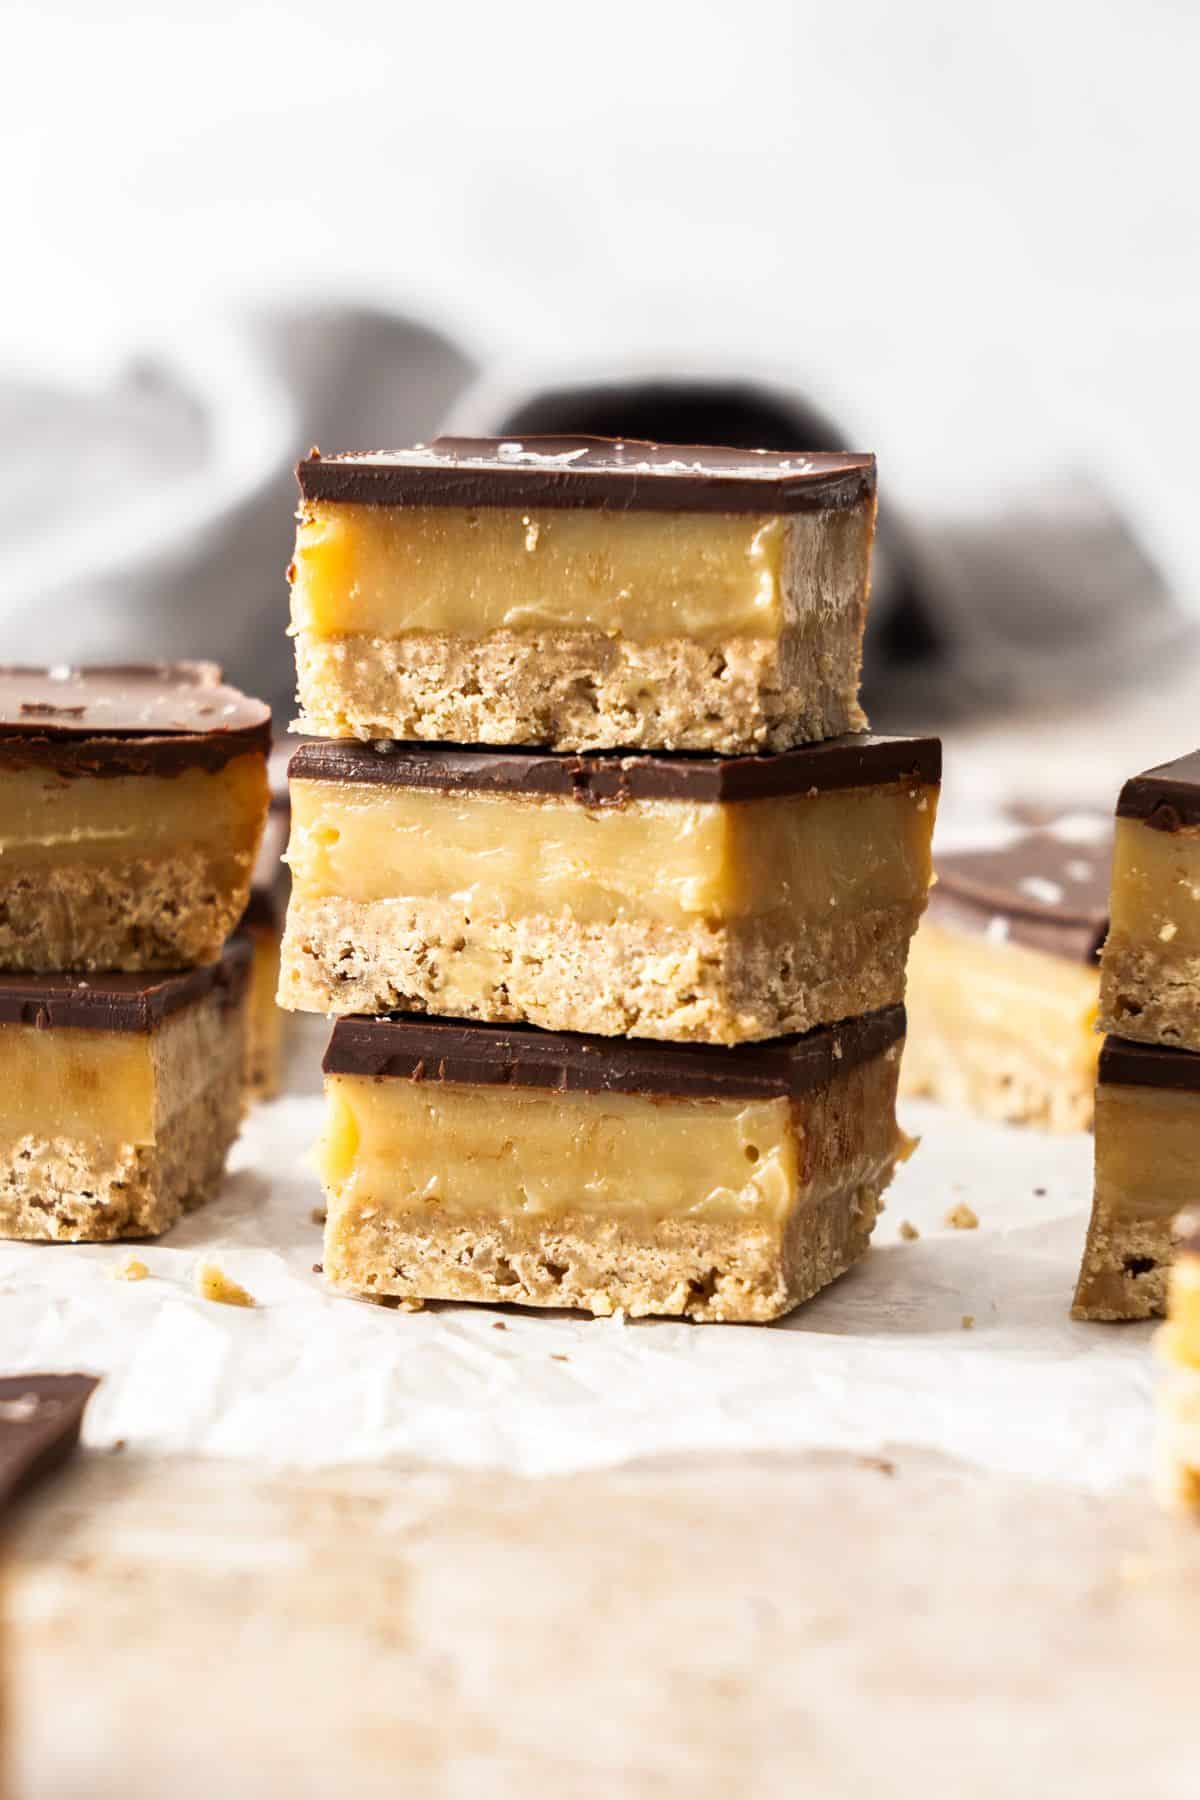
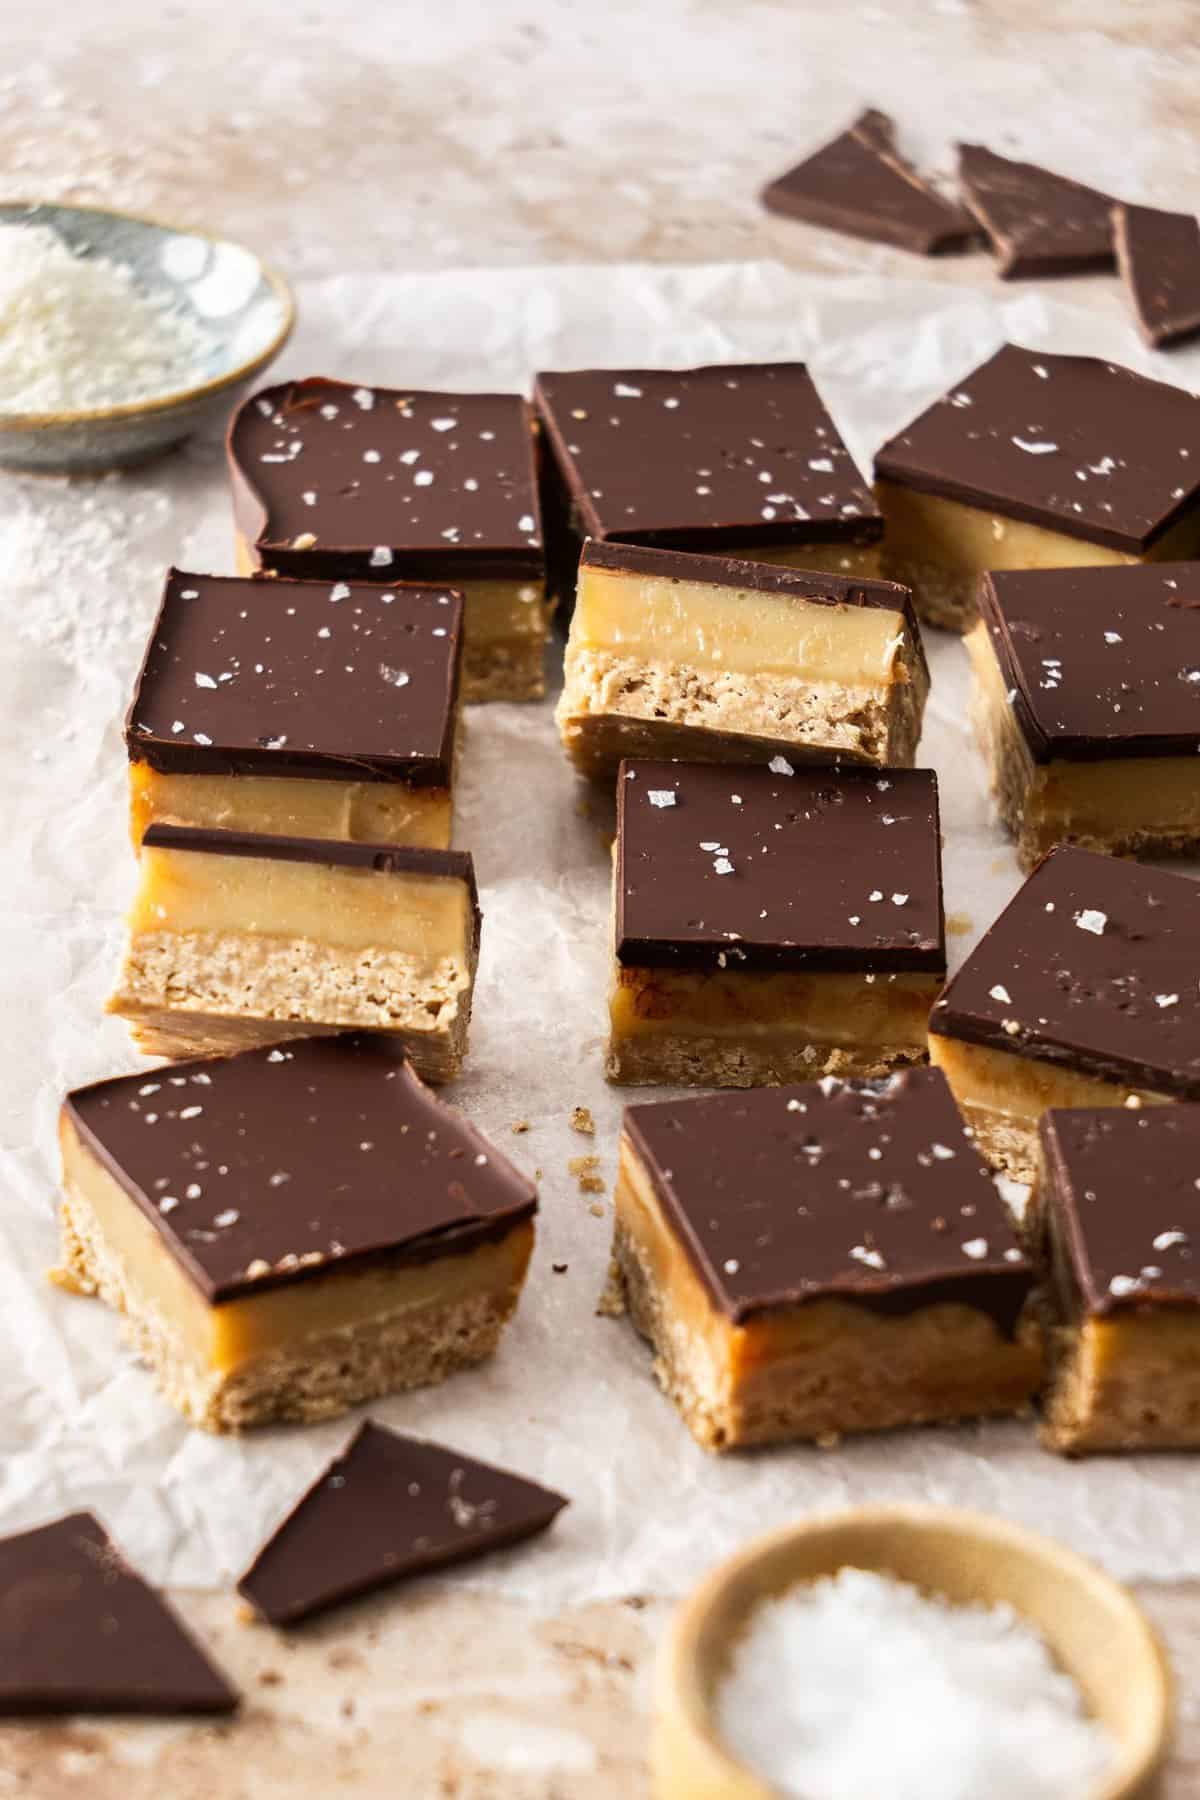
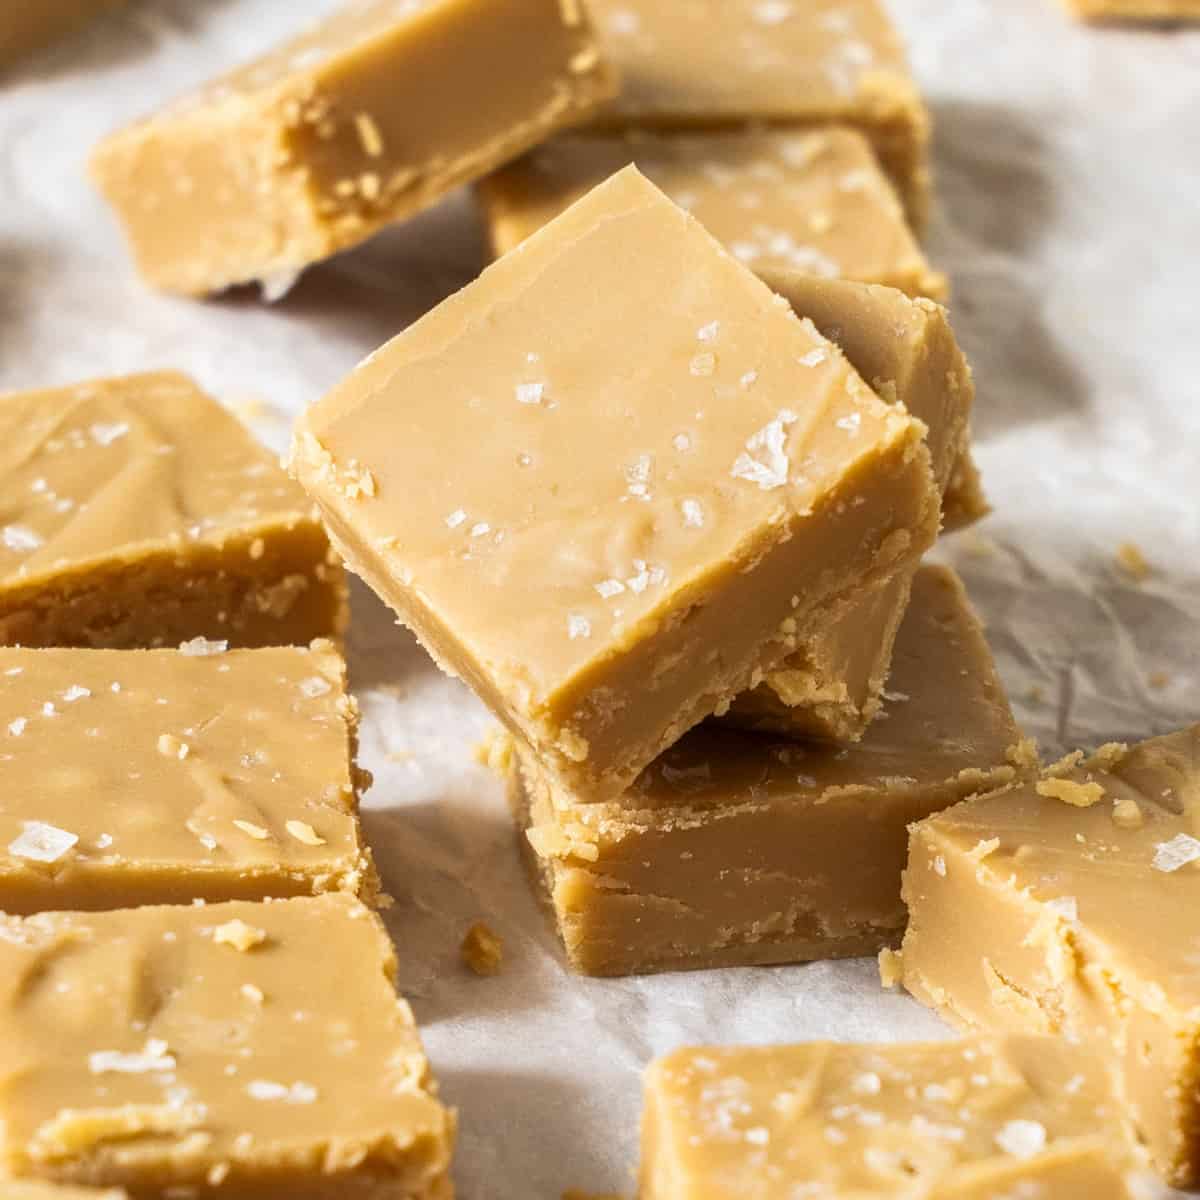
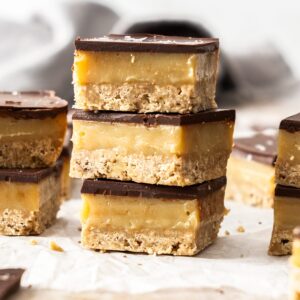
You will love this simple to prepare homemade Gluten-Free Salted Caramel Slice. The classic buttery biscuit base is topped with luscious, creamy salted caramel followed by a layer of rich dark chocolate. As a final flourish, we add a sprinkle of sea salt flakes to complement the caramel and dark chocolate. The sweet and salty combination is totally irresistible.
Why you’ll love this recipe:
It is made from simple ingredients which are readily available. The slice is gluten-free, but you can use regular flour if you prefer.
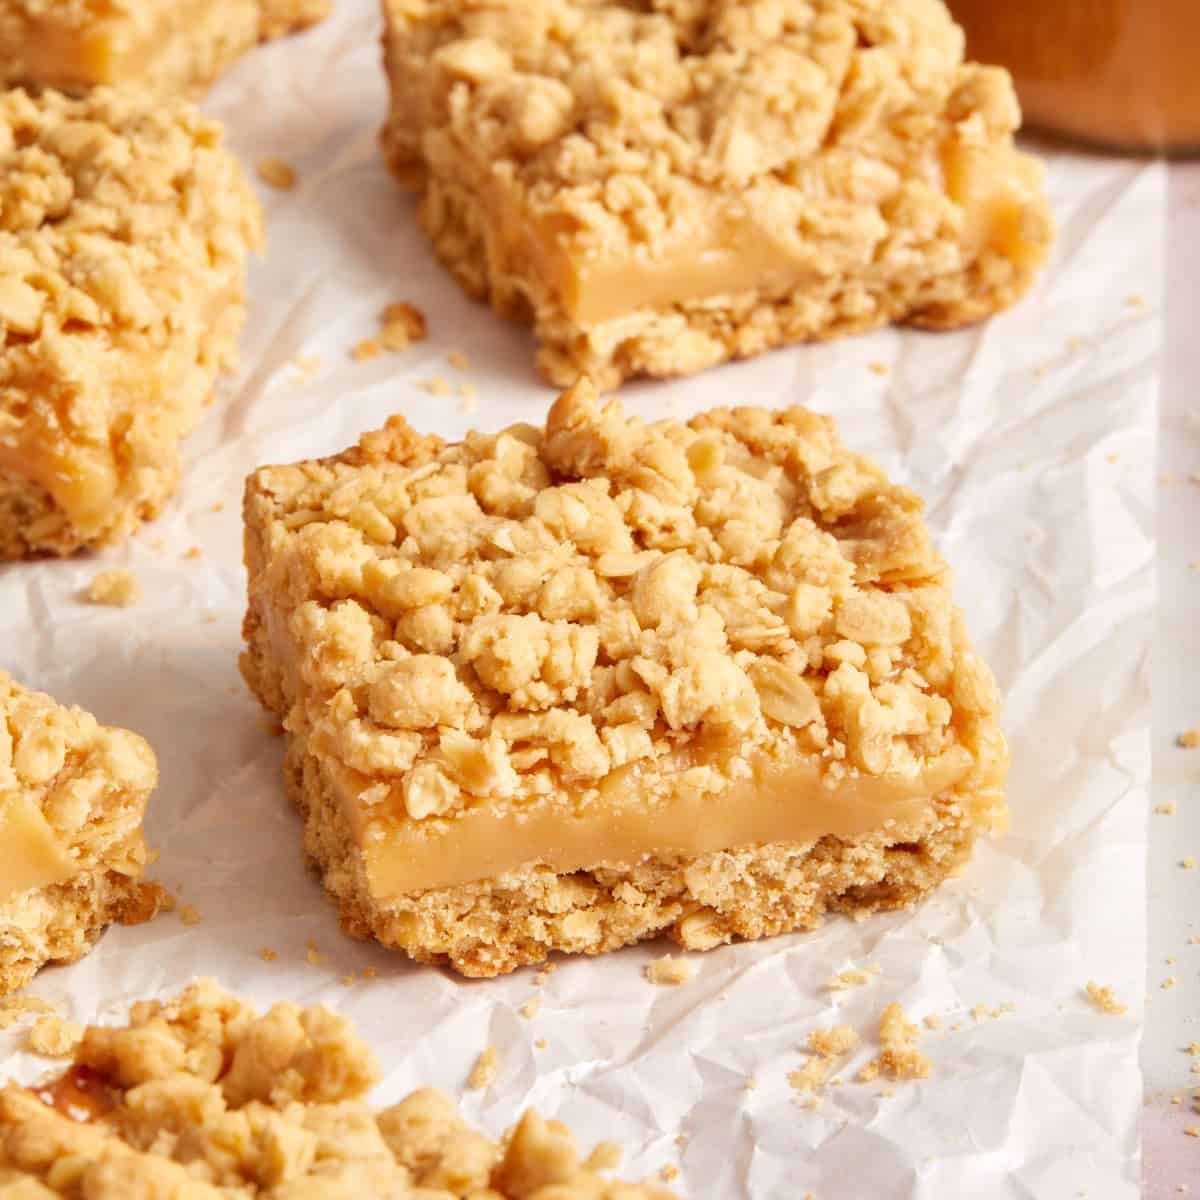
Chocolate and caramel is so good together – The caramel filling is simple; we combine butter, brown sugar and condensed milk in a saucepan and cook gently until it thickens and turns light golden brown. Melted chocolate is spread over the top and sprinkled with sea salt flakes.
You will love this Salted Caramel Slice because:
- Although there are a few steps, none of them are difficult. We start with a simple melt-and-mix base, so no pastry-making skills are required.
- Salted caramel is a popular flavour combination. Other favourites of ours are Salted Caramel Bliss Balls and Raw Salted Caramel Slice.
- You can confidently serve this Chocolate Caramel Slice at any gathering or celebration. Be assured, it is a crowd pleaser!
Ingredients in this recipe:
Please see the recipe card further along in the post for exact quantities of ingredients and the full method.
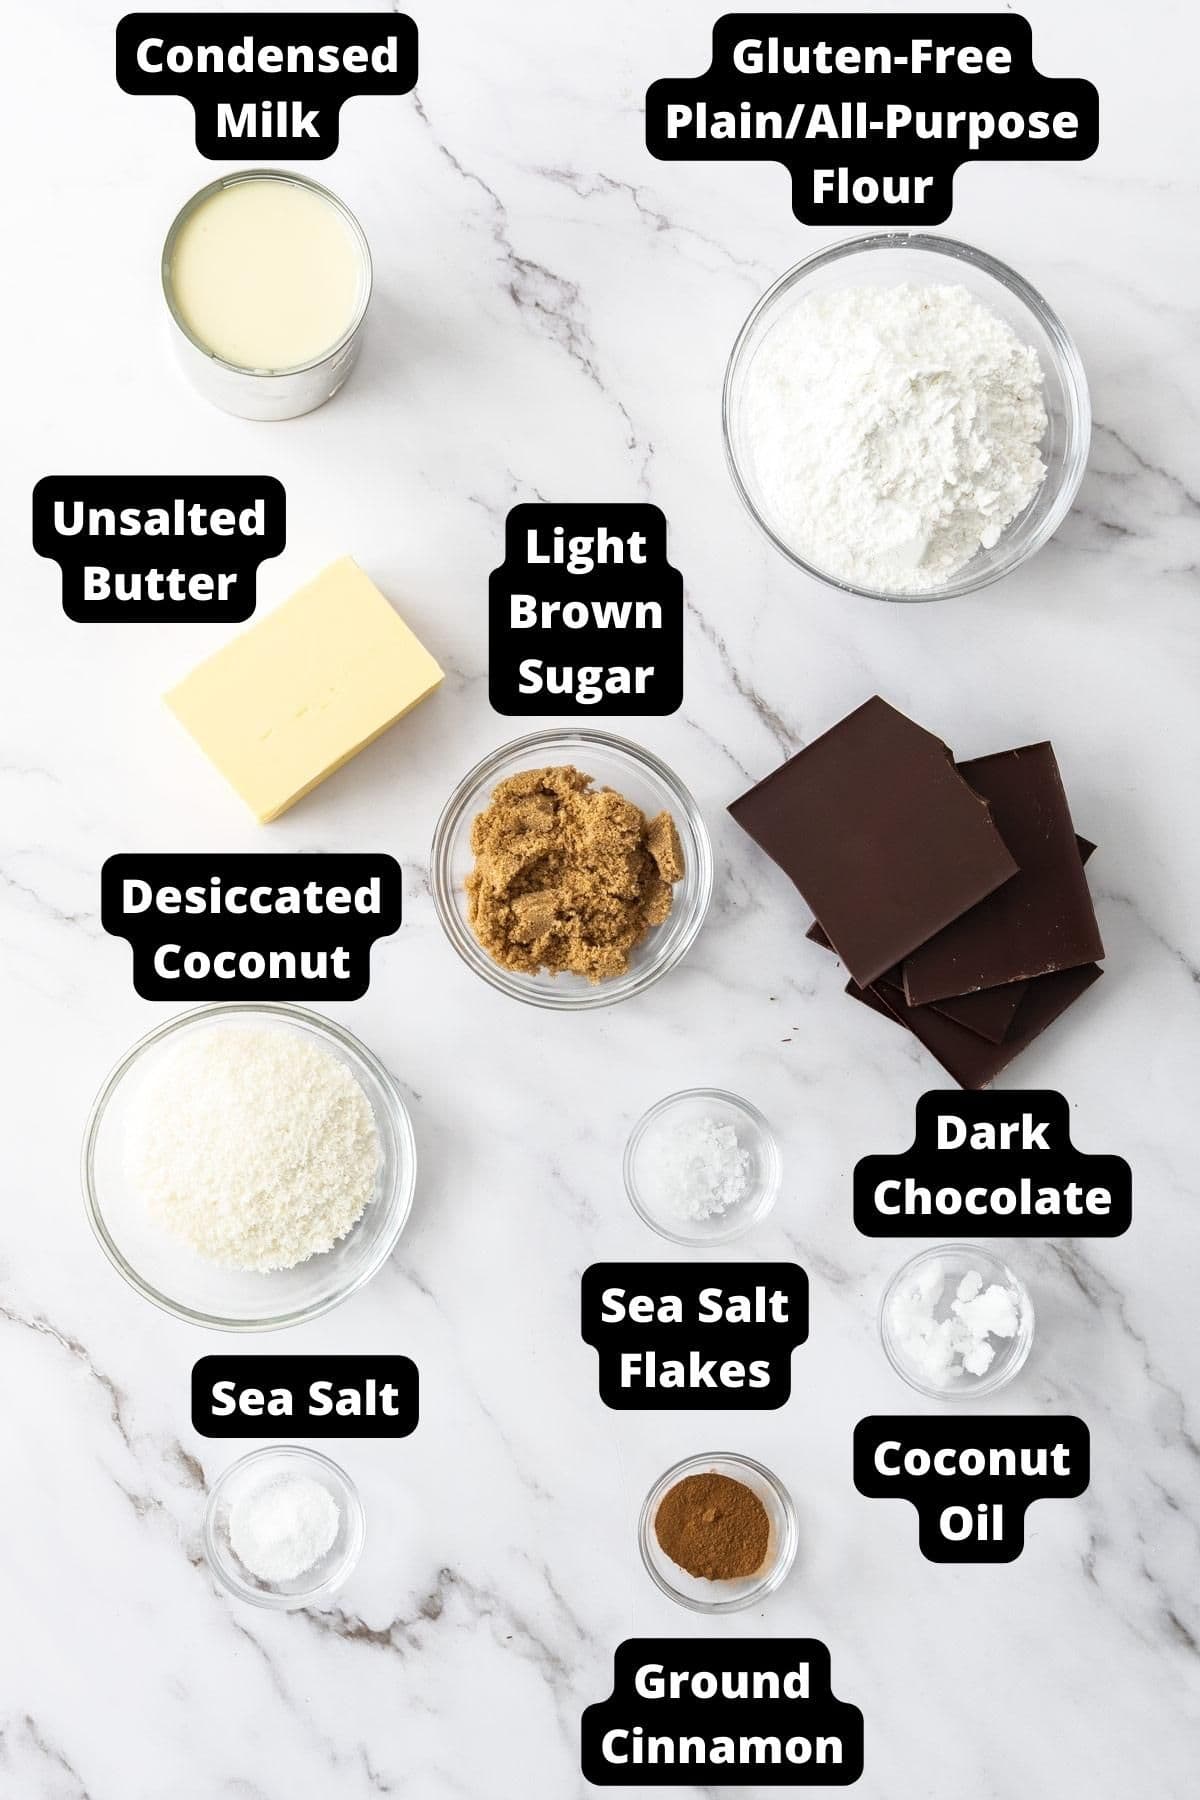
Plain/all-purpose flour – this recipe works well with both gluten-free and regular plain/all-purpose flour, so use whichever you prefer.
Unsalted butter – we use unsalted butter as the salt content varies enormously between brands and this way, we control the amount of salt used.
Ground cinnamon – this lovely warm spice adds gentle flavour to the base.
Desiccated coconut – the finely grated, unsweetened and dried flesh from the coconut adds texture and flavour.
Light brown sugar – this sweetener adds gentle caramel flavour.
Sweetened condensed milk – full fat is essential to use. Do not use low fat or skim as the caramel will not adequately thicken.
Salt – we use two kinds; the caramel contains a small amount of sea salt to boost the flavour, and sea salt flakes, sprinkled on the chocolate top, add crunch.
Dark chocolate – perfectly balances the sweetness of the caramel. Use milk chocolate if you prefer.
Coconut oil – helps melt the chocolate smoothly and gives it a sheen.
How To Make Salted Caramel Slice:
Please see the recipe card further along in the post for exact quantities of ingredients and the full method.
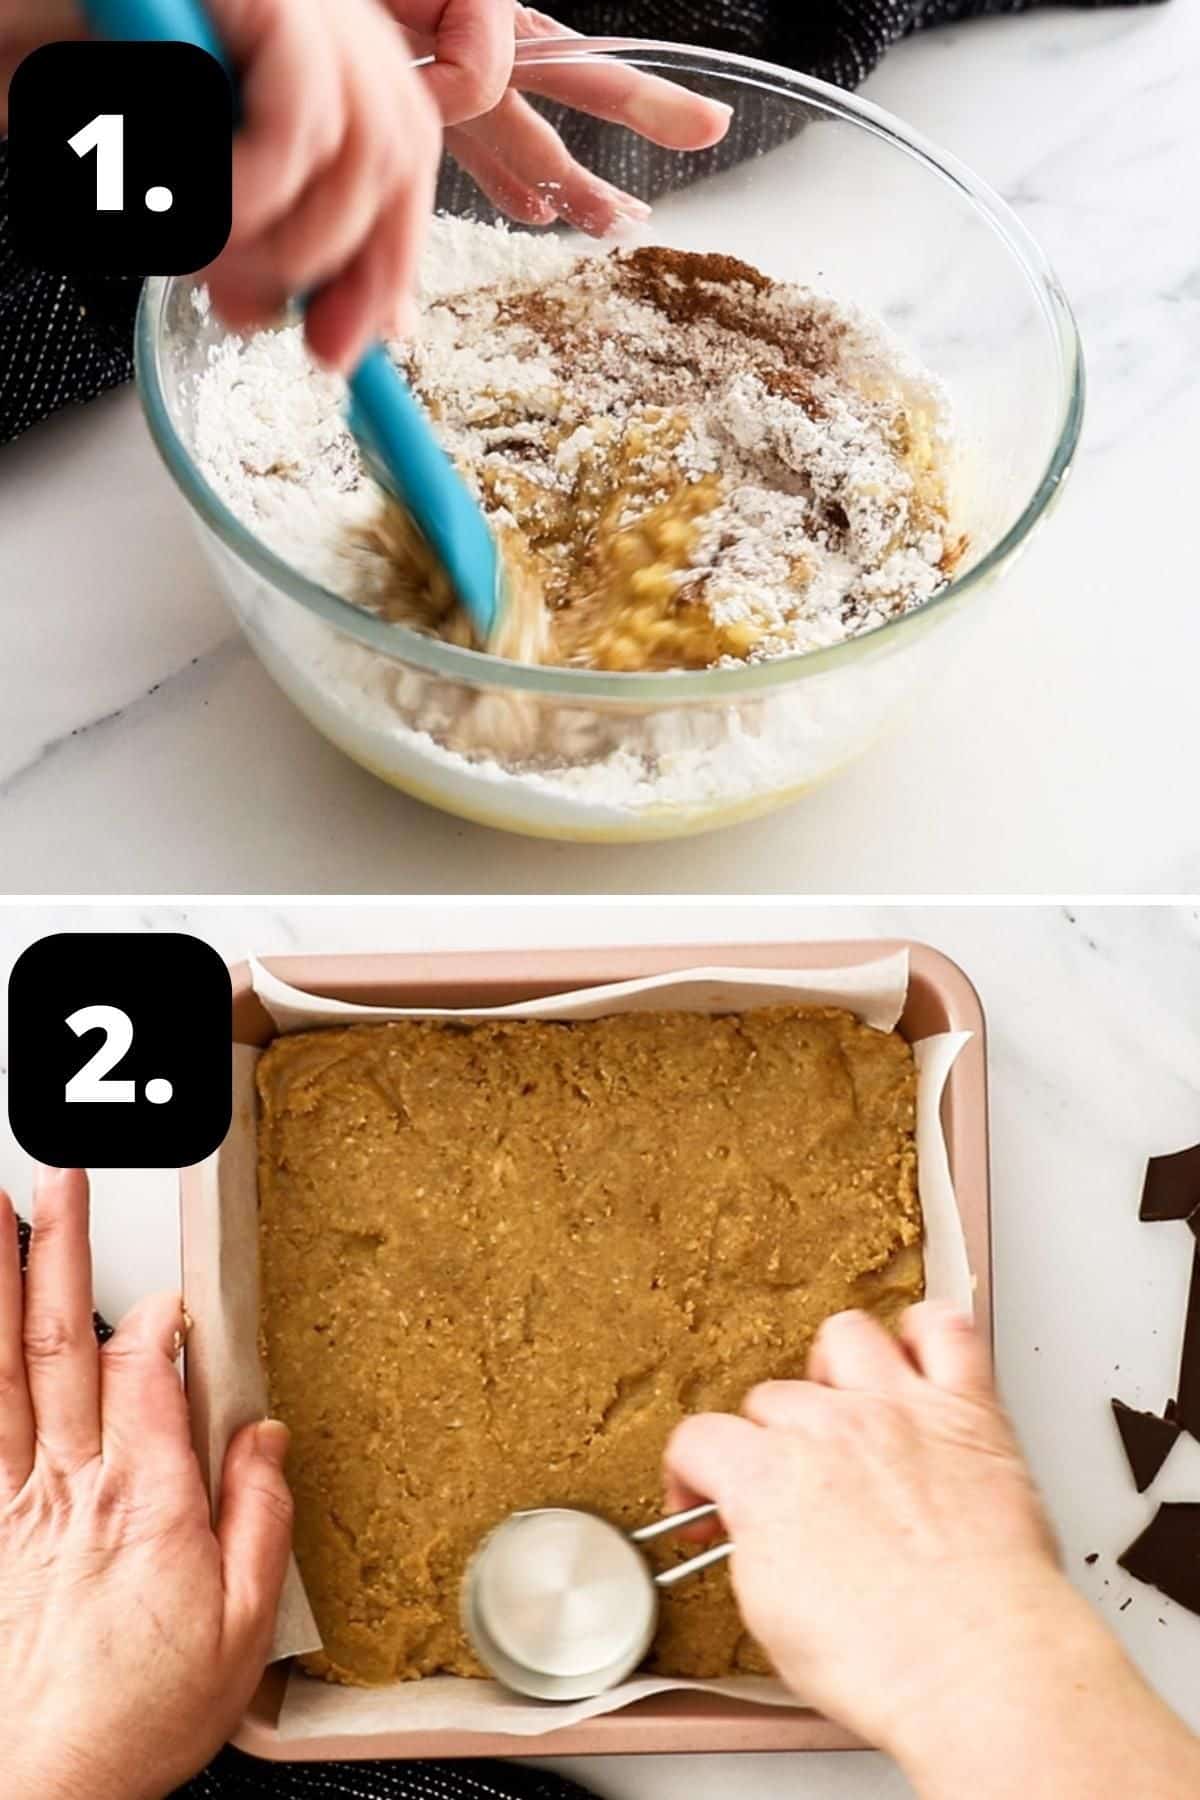
1 – Make your base:
In a small saucepan, melt the butter then add it to a medium size bowl along with the remaining base ingredients. Mix well to combine.
2 – Add your base mixture to the tin:
Press the mixture for the base firmly into the prepared tin.
Bake the base for 14-16 minutes until it is golden brown. Remove from the oven and set aside to cool slightly.
While the base cools, we make the caramel.
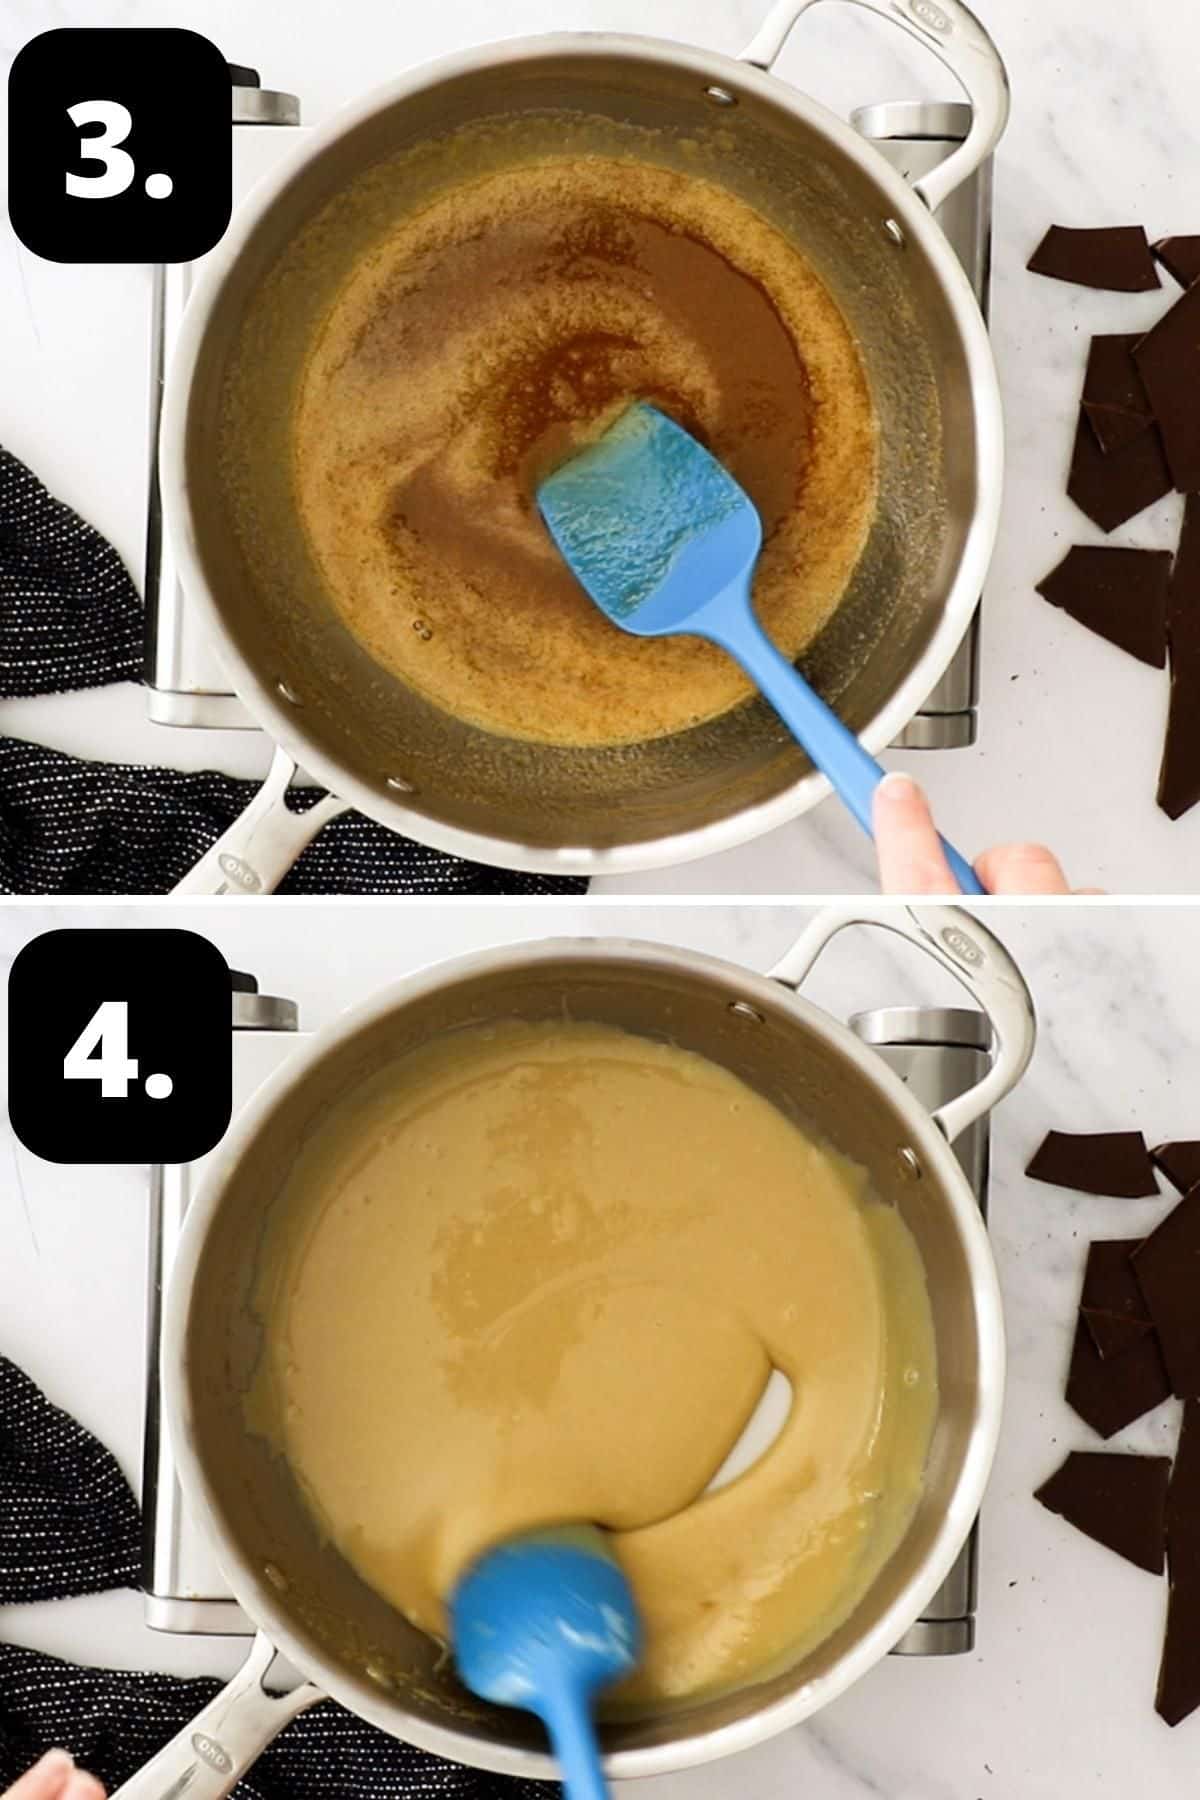
3 – Add your caramel ingredients to a saucepan:
Melt the butter in a medium size saucepan.
When the butter has melted, add the sugar, and stir with a wooden spoon or silicone spatula.
4 – Stir the caramel:
Once combined, add the condensed milk.
Stir constantly for 5 minutes until the caramel is slightly thicker and a light golden brown.
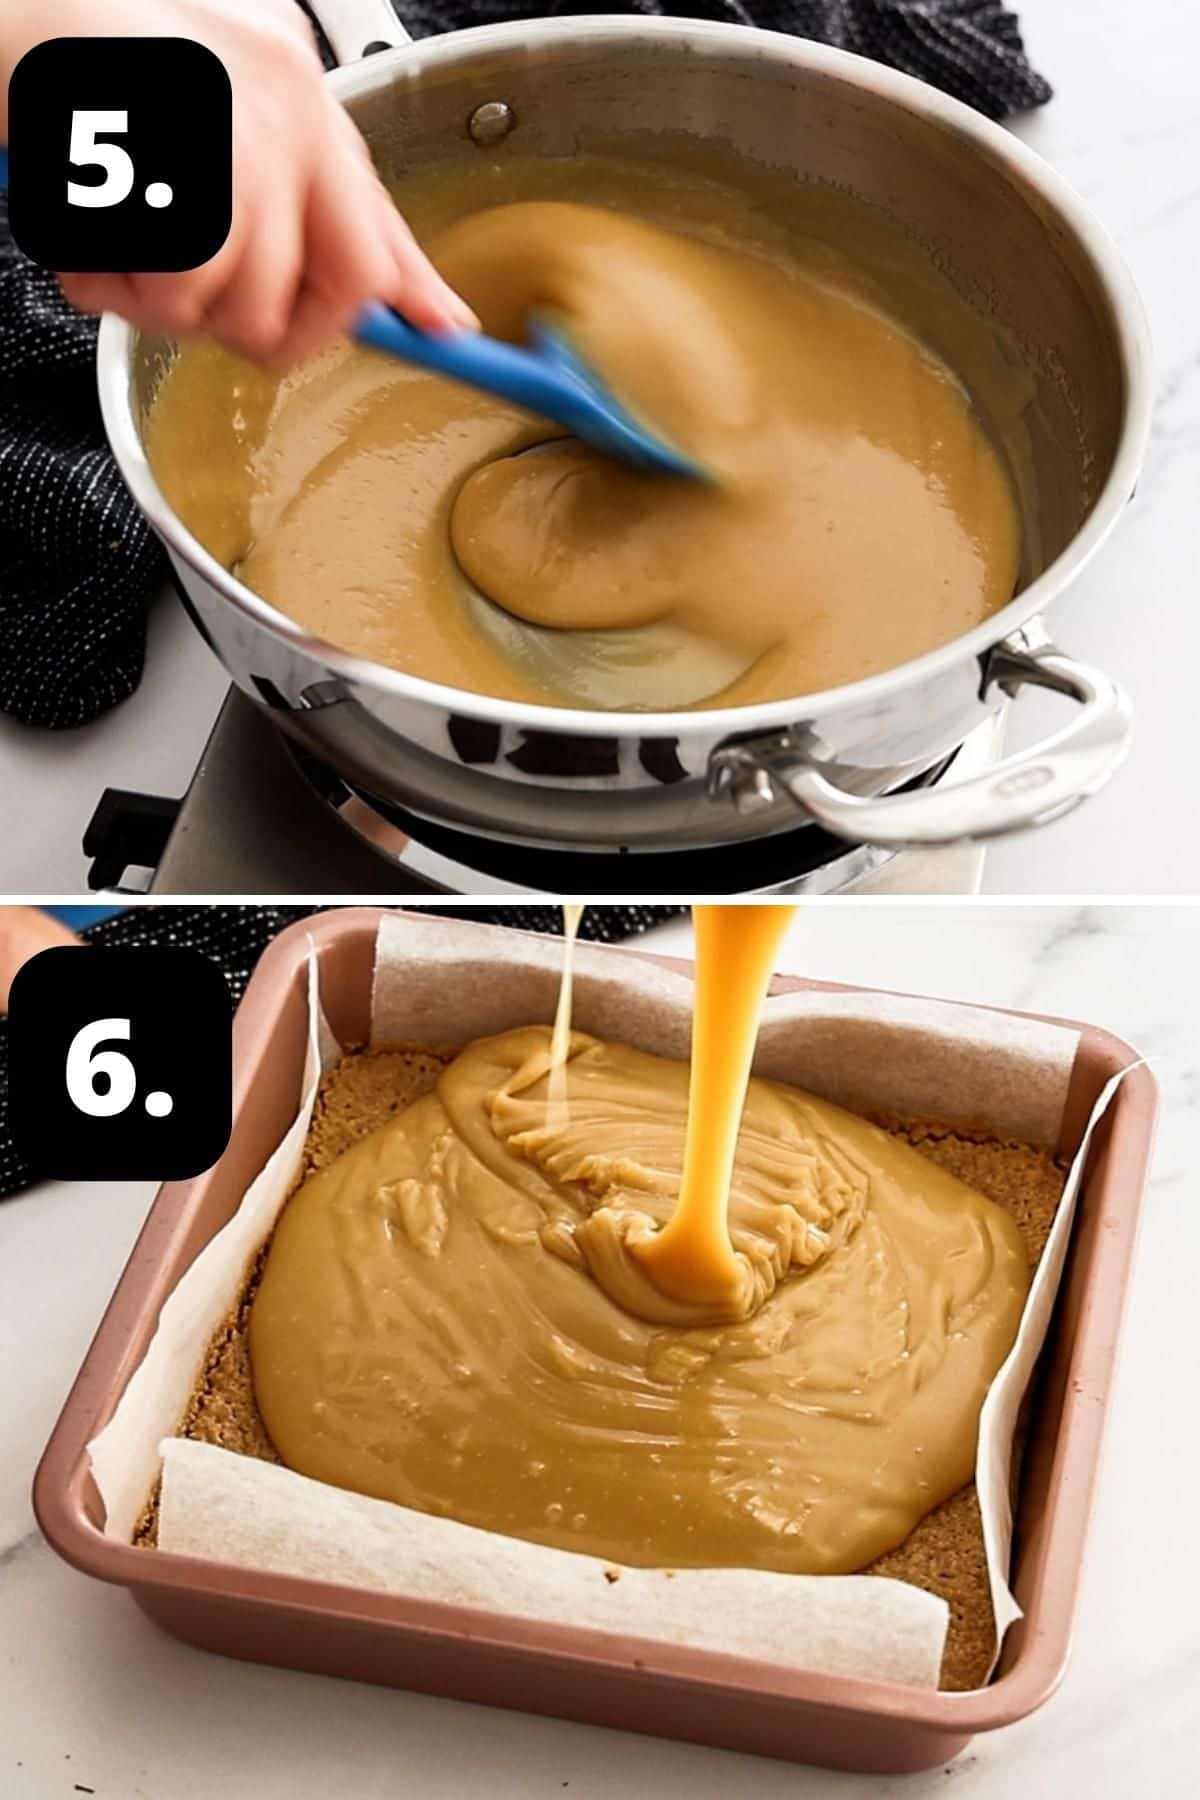
5 – The cooked caramel:
Turn off the heat and stir through the salt.
6 – Pour the caramel over the base:
Pour the caramel onto your biscuit base and gently tilt the tin to spread the caramel evenly.
Return to the oven and bake for 10-12 minutes.
Remove from the oven, and cool in the tin on your benchtop for 30 minutes before placing the tin in the fridge for a further 30 minutes.
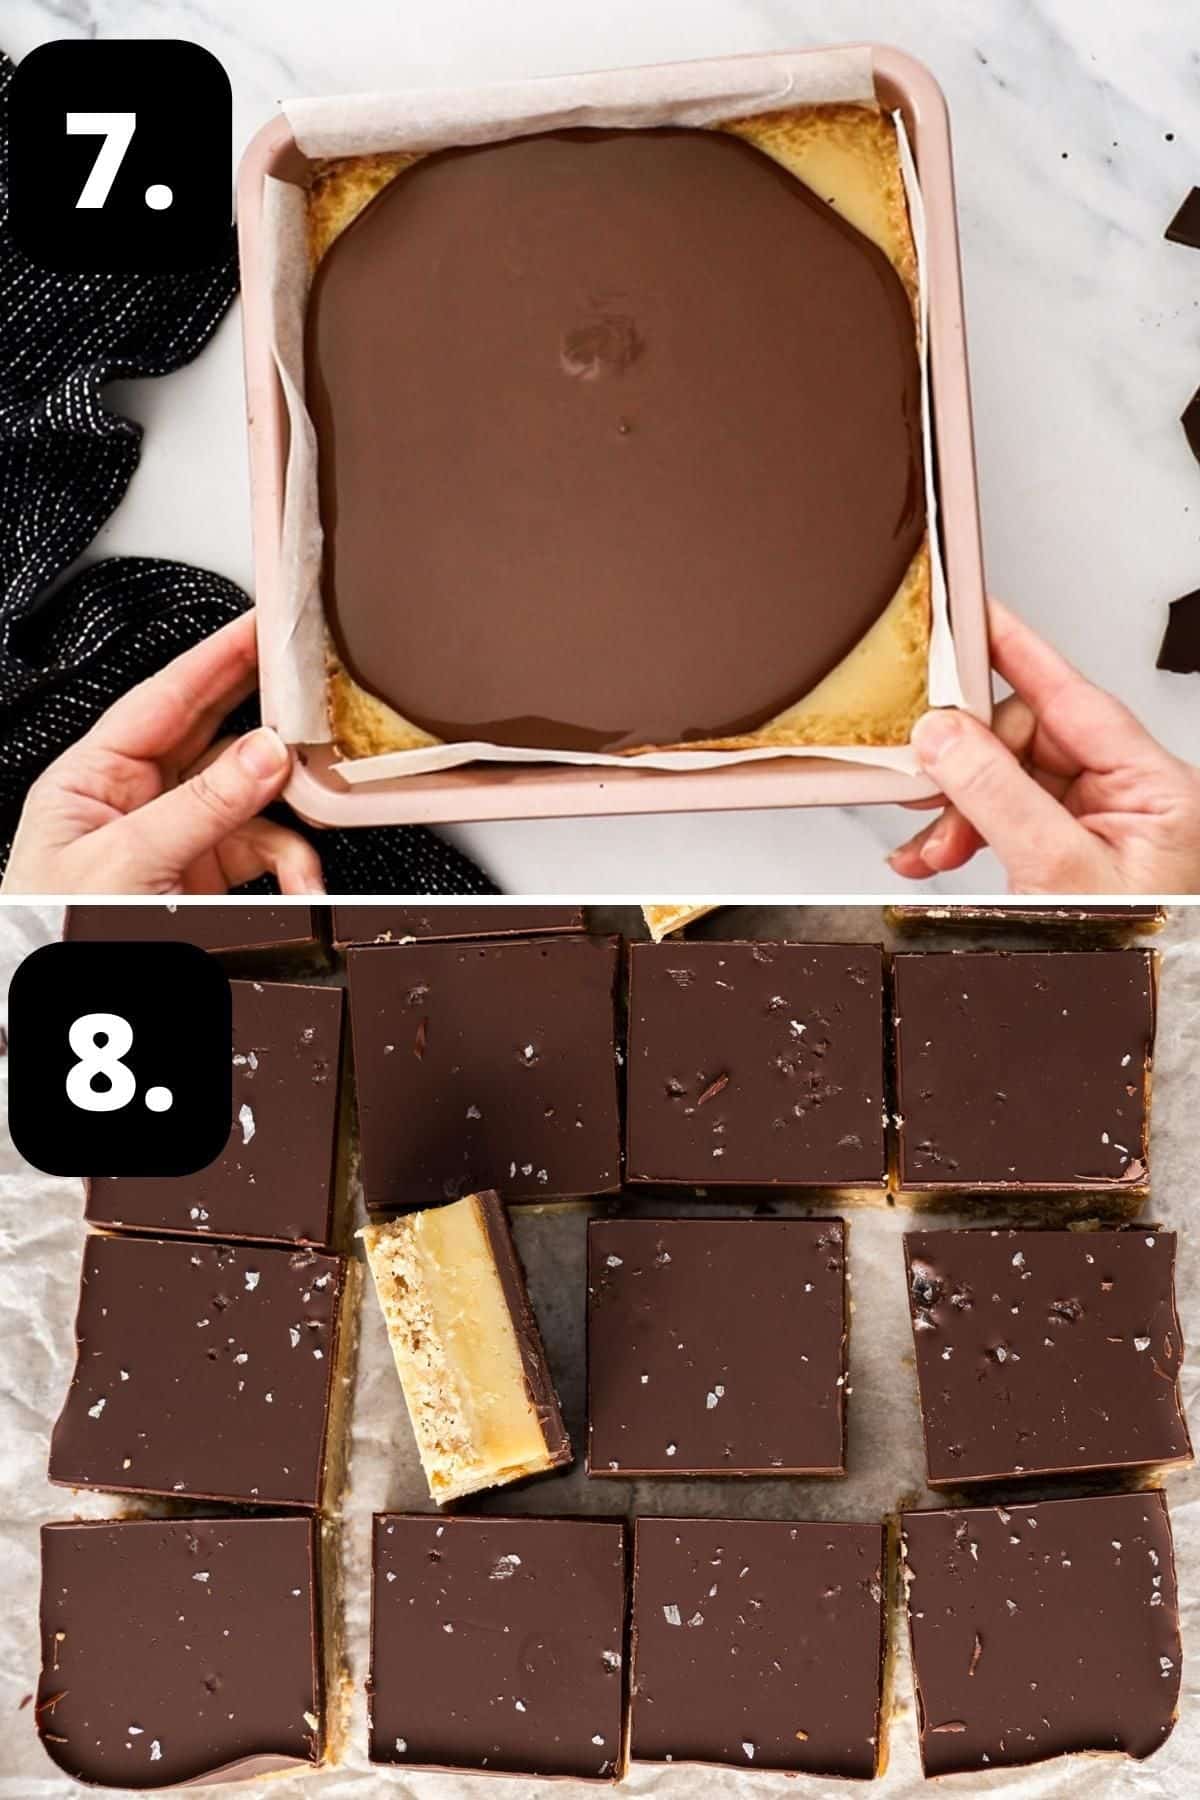
7 – Top with chocolate:
Melt the chocolate and coconut oil in a bowl over a saucepan of barely simmering water (or in the microwave if you prefer). Top the slice with the melted chocolate, tilting the tin slightly to ensure it covers evenly.
Sprinkle with sea salt flakes.
8 – Chill and cut the slice:
Return to the fridge for 2 hours or until set. Once set, remove from the fridge 10 minutes before cutting.
Tips for success and FAQs:
To ensure that you have a smooth, creamy caramel, make sure you stir the caramel well, getting into the edges of the saucepan so that it cooks evenly.
Yes, it is essential, as lower fat condensed milk will not set as firmly as full fat, and your caramel will be runny.
Store it in an airtight container in the fridge for up to a week. Remove from the fridge at least 10 minutes before serving.
Yes, it freezes well. Wrap in cling wrap and store in an airtight container to prevent freezer burn. It is best if eaten within 1 month. Thoroughly defrost in the fridge before serving.
If your slice is refrigerated, it will be easier to cut if you remove it from the fridge about 10 minutes in advance. Use a large, sharp knife. Dip in a jug of hot water and wipe the blade dry. It should slide through the chocolate smoothly. For a clean cut, you may need to do this between each cut.
Variations and substitutions:
Chocolate – we have used dark chocolate, but you can use milk if you prefer. I have covered the top of the slice with chocolate, but if you prefer, you could use a lesser amount and drizzle it over.
Salt – I love a generous amount of sea salt flakes, but adjust the amount according to your preference. Or leave them off altogether but include the small amount of salt in your caramel mixture.
Serving suggestions:
This all-time favourite Chocolate Caramel Slice can be enjoyed on many occasions. Some suggestions are:
- Put the kettle on and make a cup of tea or coffee – one of our favourite ways to enjoy the slice!
- It is a great addition to cookie platters during festive celebrations.
- Serve for morning or afternoon teas, birthday parties, or any time family or friends gather.
- Pack some in lunch boxes, for picnics, potlucks or bake sales.
- Wrap some in cellophane and tie with a pretty ribbon. They are a lovely edible gift which will be warmly welcomed by family and friends.
This Salted Chocolate Caramel Slice is the ultimate, easily made, homemade slice and a guaranteed crowd pleaser. If your household is like mine, it will not last long! I hope you’ll give it a try, and be sure to let me know in the comments below when you do.
Alex xx
More delicious recipes for you to try:


Stay in touch!
Follow me on Facebook, Pinterest and Instagram and subscribe to my newsletter.
Gluten-Free Salted Caramel Slice
Please note:
For accuracy, when weights are provided, we recommend weighing your ingredients. This will produce the best results. All oven temperatures listed are for fan forced.
Ingredients
For the Base:
- 190 g (1 ¼ cups) gluten-free plain/all-purpose flour See Note 1 and 2
- 150 g (½ cup + 5 tsp) unsalted butter – melted
- 1 teaspoon ground cinnamon
- 45 g (½ cup) desiccated coconut See Note 3
- 65 g (⅓ cup) light brown sugar
For the Salted Caramel
- 125 g (½ cup) unsalted butter
- 100 g (½ cup) light brown sugar
- 395 g (14 oz) can of condensed milk See Note 4
- ½ teaspoon sea salt
For the Topping:
- 1 teaspoon sea salt flakes See Note 5
- 180 g (6.5 oz) dark chocolate – melted
- 1 teaspoon coconut oil
Instructions
For the Base:
- Preheat your oven to 180 Degrees C (355 F).
- Line a 20 x 20cm (8 x 8 inch) baking dish with non-stick baking paper.(Allow an overhang with the baking paper – it makes it easier when removing the slice!)
- Melt the butter for the base. Add the melted butter to a medium-sized bowl, along with the flour, light brown sugar, cinnamon and desiccated coconut. Mix until combined.
- Press mixture firmly into your pan. Use the back of a cup measurement/or flat spatula to completely flatten.
- Bake the base for 14-16 minutes, until a light golden brown. Remove from the oven and set aside to cool slightly for 20 minutes.
For the Salted Caramel:
- In a medium-sized saucepan over medium-low heat, melt the butter. Once melted, add in the sugar and stir until it has dissolved.
- Add the condensed milk, and stir constantly for 6-8 minutes, or until the caramel has thickened slightly and is a light golden brown. Turn off the heat and stir through the salt.
- Pour the caramel onto your biscuit base. Gently tilt the tin to spread the caramel evenly. Return to the oven, and bake for 10-12 minutes.
- Remove from the oven, and allow to cool in the tin on your benchtop for 30 minutes before placing the tin in the fridge for a further 30 minutes.
For the Topping:
- Melt the chocolate and coconut oil in a bowl over a saucepan of barely simmering water (or in the microwave if you prefer).
- Top the slice with the melted chocolate, tilting the tin slightly to ensure it covers evenly.Sprinkle with sea salt flakes.Return to the fridge for 2 hours or until set. Once set, remove from the fridge 10 minutes before slicing into 12 pieces.
Video
Notes
- Measurements: for the most accurate measurements when baking, we suggest you weigh your ingredients.
- Flour: this recipe works fine with regular all-purpose/plain flour if you do not require the recipe to be gluten-free.
- Coconut: if you are not a fan of desiccated coconut, omit and add an extra ¼ cup of flour instead, so 225 g (1 ½ cups) in total.
- Sweetened condensed milk – full fat only, not low fat or skim.
- Sea salt flakes – add a lovely crunch for the top of the slice.
- Storage: keep in an airtight container in the fridge for up to a week. Remove from the fridge at least 10 minutes before serving.
- Freezing: wrap the Salted Caramel Slice in cling wrap and store in an airtight container to prevent freezer burn. It is best if eaten within 1 month. Defrost in the fridge before serving.
Nutrition Estimate:
Nutritional Disclaimer:
The nutritional information is an estimate only, and is derived from online calculators. For accurate results, we recommend calculating the nutritional information based on the ingredients and brands you use.
Bri
Is it possible to leave out the coconut oil from the melted chocolate? Or will it not set properly? I don’t have any and don’t want to buy. Thanks!
Alexandra Cook
Hello Bri,
You can omit altogether or use vegetable oil instead.
The chocolate will set fine – the oil actually helps it stay a smidgen softer, which means it won’t crack when you slice it.
If you don’t use any, just remove from the fridge a little earlier before cutting it, and you shouldn’t have any issues 🙂
Thanks, Alex
Bri
Thank you so much! Can’t wait to make it!
PIPPA FITZPATRICK
This recipe is the most divine slice imaginable, love it, it is my go to hands down the best, I add a little golden syrup and flour to the caramel and omit the cinnamon , sooooo good! Thank you!
Alexandra Cook
Hello Pippa,
Thank you so much for the lovely comment 🙂 I am so happy you enjoy it! Alex xo
JFH
We loved this delicious treat! As Spanish this was totally new for us, but still, the instructions were very clear, easy to follow and the result was perfect!
Thanks for sharing this recipe!
Alexandra
Thank you for your lovely comments on the GF Salted Caramel Slice. I am so pleased that you found the instructions easy to follow and enjoyed the Slice. I appreciate that you took the time to let me know. 🙂
Amanda
Any substitute for the coconut? We don’t like it!
Alexandra
Hi Amanda,
Add an extra 1/4 cup of flour instead – so, 1 1/2 cups in total (225 grams).
Hope you enjoy! Kind regards, Alex
Jeanie
The best caramel slice recipe there is!!! My daughter and I LOVE it!
Alexandra
Aww, I am so happy to hear that! Thank you, Jeanie!
Janelle
Alex you’ve done it again! Made this earlier in the week and the kids demolished it.
Alexandra
Hey Janelle! Thank you so much – I am so glad to hear it was a popular treat!
Susan
Third time making this and its amazing!
I top with slightly more chocolate and sprinkle with some flaked almonds for a bit of crunch. It’s easy, delicious and never lasts for long. My mum has requested it for her bday tomorrow!
Alexandra
Hi Susan!
Thank you so much – the almonds sound like a fantastic idea, and I am definitely going to try that next time!
I hope your Mum had a very happy birthday too! Kind regards, Alex
Lauren
I followed the recipe exactly, measuring the ingredients with a digital kitchen scale. The caramel is delicious but needed closer to 20 minutes in the oven, but the base is far too buttery. I used the Edmonds gluten free flour blend so I’m not sure what went wrong.
Alexandra
Hi Lauren!
We are sorry to hear about your experience.
We’d love to help figure out why this may have happened.
All ovens do vary, but the caramel should never take 20 minutes in the oven – I am thinking that this extra time has maybe caused the caramel sauce to split slightly and the butter seep into the base. The caramel will firm after it has chilled, and should only take approximately 12 minutes in the oven.
We haven’t ever used Edmonds gluten free flour, but this recipe has been tested with 3 gluten free brands and 2 regular, but I wouldn’t have thought it would have made a huge difference in this recipe.
We hope this helps for next time!
Kind regards, Alex
Barb
This slice is the best. I add a handful of chopped almonds to the base which gives a slightly more crumbly delicious twist (thanks to the suggestion by my s-I-law). Soooo good
Alexandra
Hi Barb, I am delighted to hear that you enjoy the Salted Caramel Slice; the addition of chopped almonds to the base sounds like a great idea. Thank you for taking the time to let me know. 🙂
Jen Talley
Creamy and delicious! You can’t even tell it is gluten free!
Alexandra
Hi Jen, I am so pleased that you enjoyed the Salted Caramel Slice; thank you so much for letting me know. 🙂
Alison M
This is GF goodness – it is AMAZING!
Alexandra
Thank you!!