


My Chocolate Covered Marshmallows are a sweet treat, suitable for all occasions and enjoyed by all ages. With just 3-4 ingredients, and easy to make, they are ideal for people who lack confidence in the kitchen. No baking skills are required; if you can melt chocolate, you can easily make these. And if you’ve never melted chocolate, we will show you how easy it is and give you tips for success.
Jump to:
Why we love this recipe:
This is a great way to engage with children, they will love to help with dipping the marshmallows in chocolate and decorating with sprinkles of their choice.
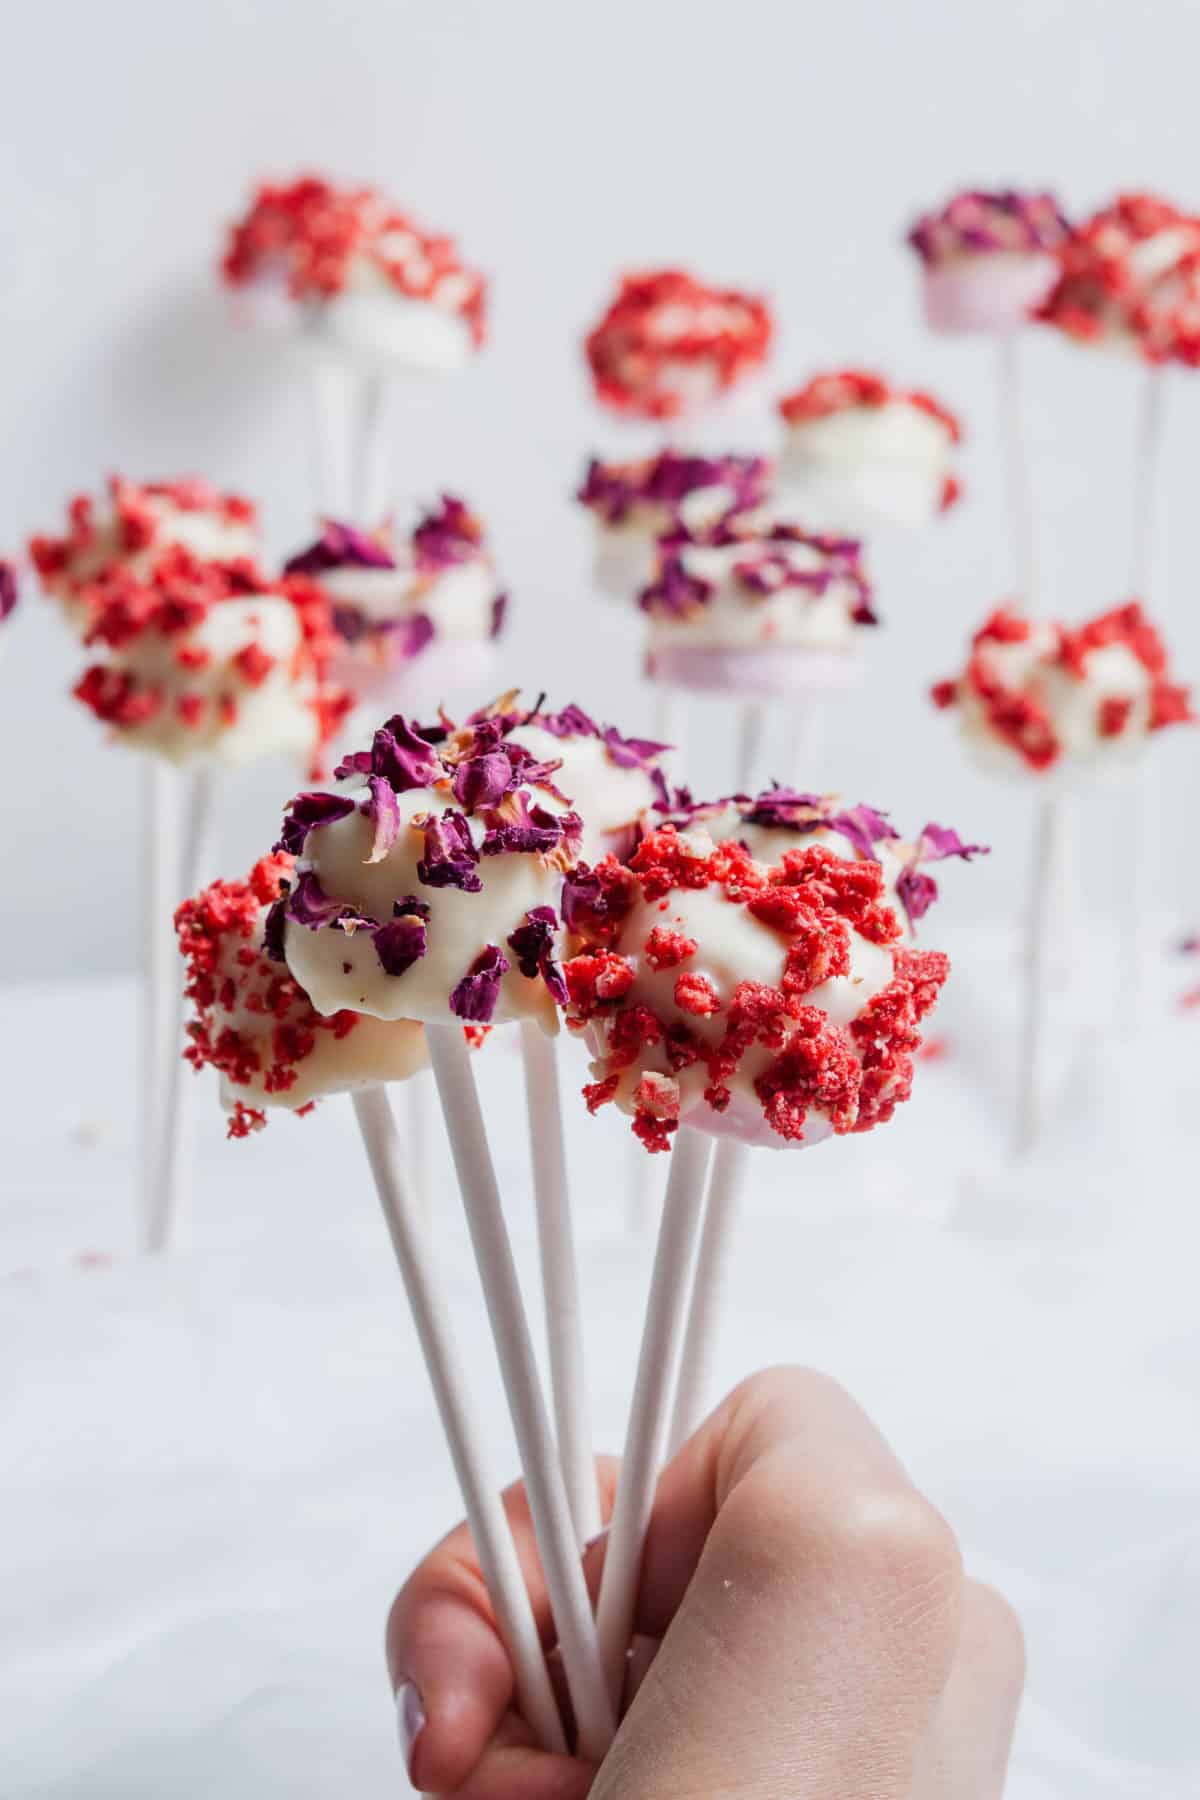
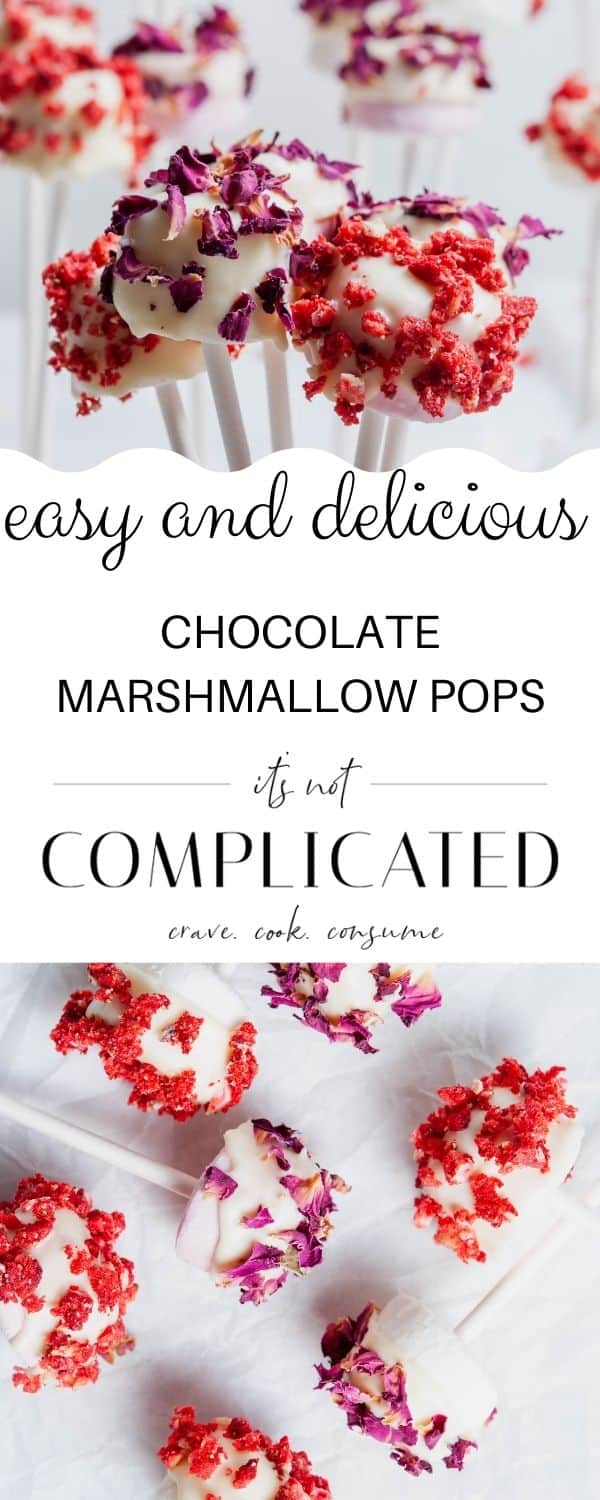
My Chocolate Covered Marshmallows are easily customised to suit any occasion. They can be dipped in your choice of chocolate and decorated according to a particular theme. Use decorations and colours which will suit the theme of the occasion; it could be Valentine’s Day, Mother’s Day, Easter, a baby shower, Halloween, Christmas or for no particular celebration.
For a children’s birthday party, set up a table with marshmallows, bowls of melted milk and white chocolate and an assortment of decorations. This will be a fun activity, albeit a messy one, and I don’t imagine the pops will be put aside for the chocolate to set but it will be popular.
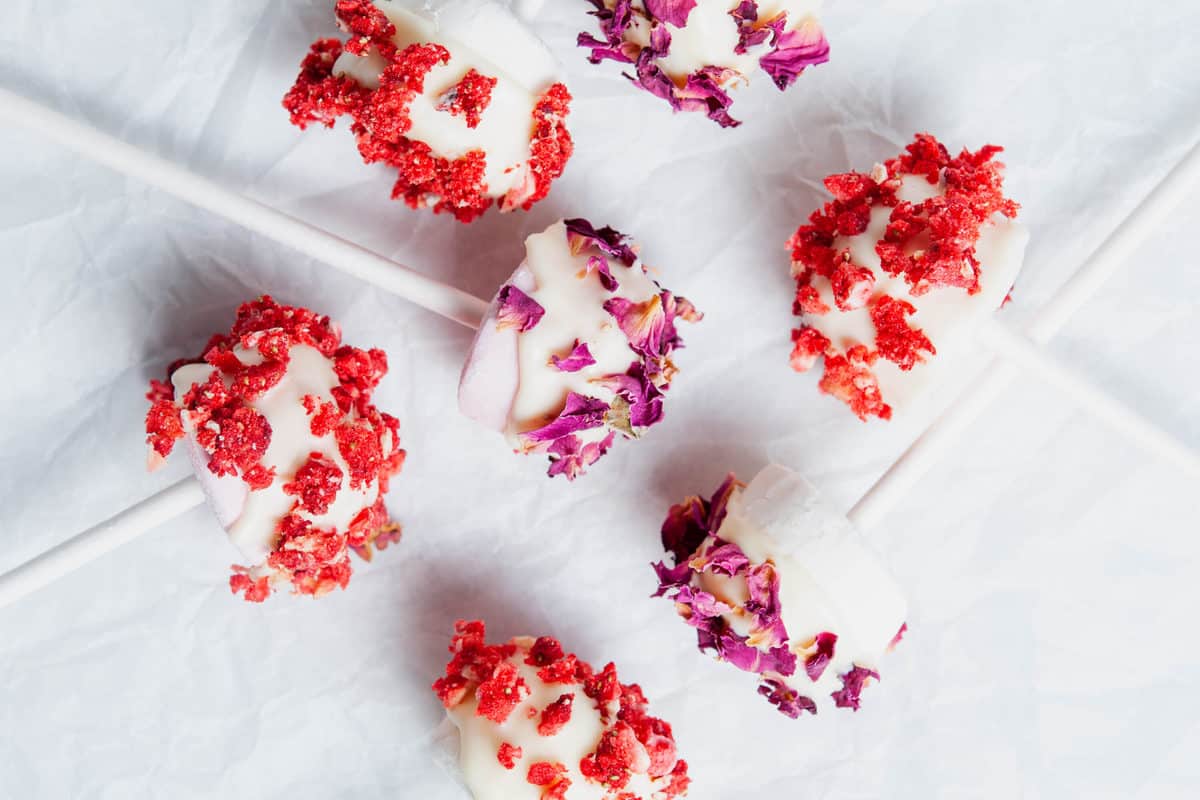
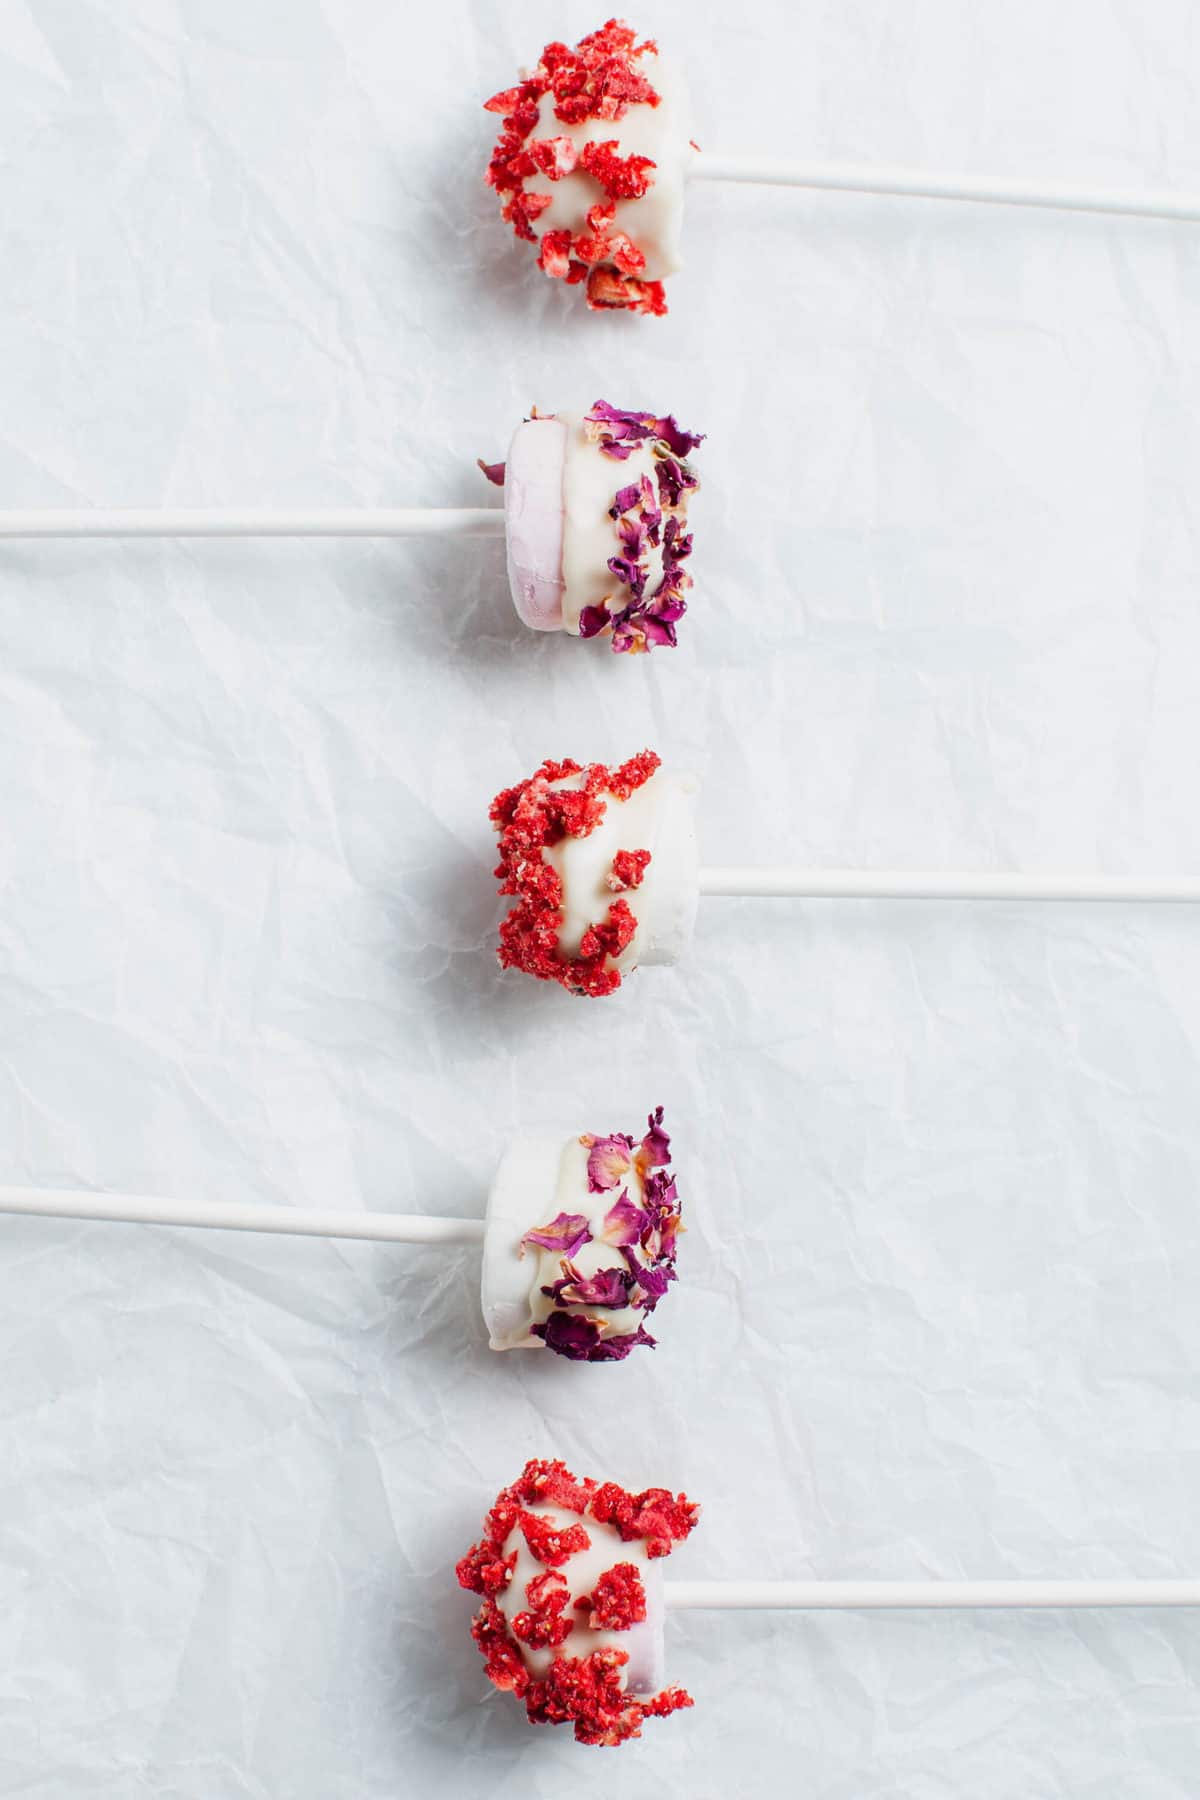
There are so many options to use as decorations on these Chocolate Covered Marshmallows. I have made these suitable for a special occasion and used freeze-dried strawberries and dried, edible rose petals. You could substitute these with multi-coloured sprinkles, chopped nuts, coloured sugar, toasted coconut or mini sweets/candies.
They make great party favours or gifts. To wrap the pops, place them in cellophane bags and secure with a pretty ribbon. Alternatively, place some cellophane over the marshmallows, but not covering the sticks, and tie with a ribbon.
Ingredients in this recipe:
Please see the recipe card further along in the post for exact quantities of ingredients and the full method.
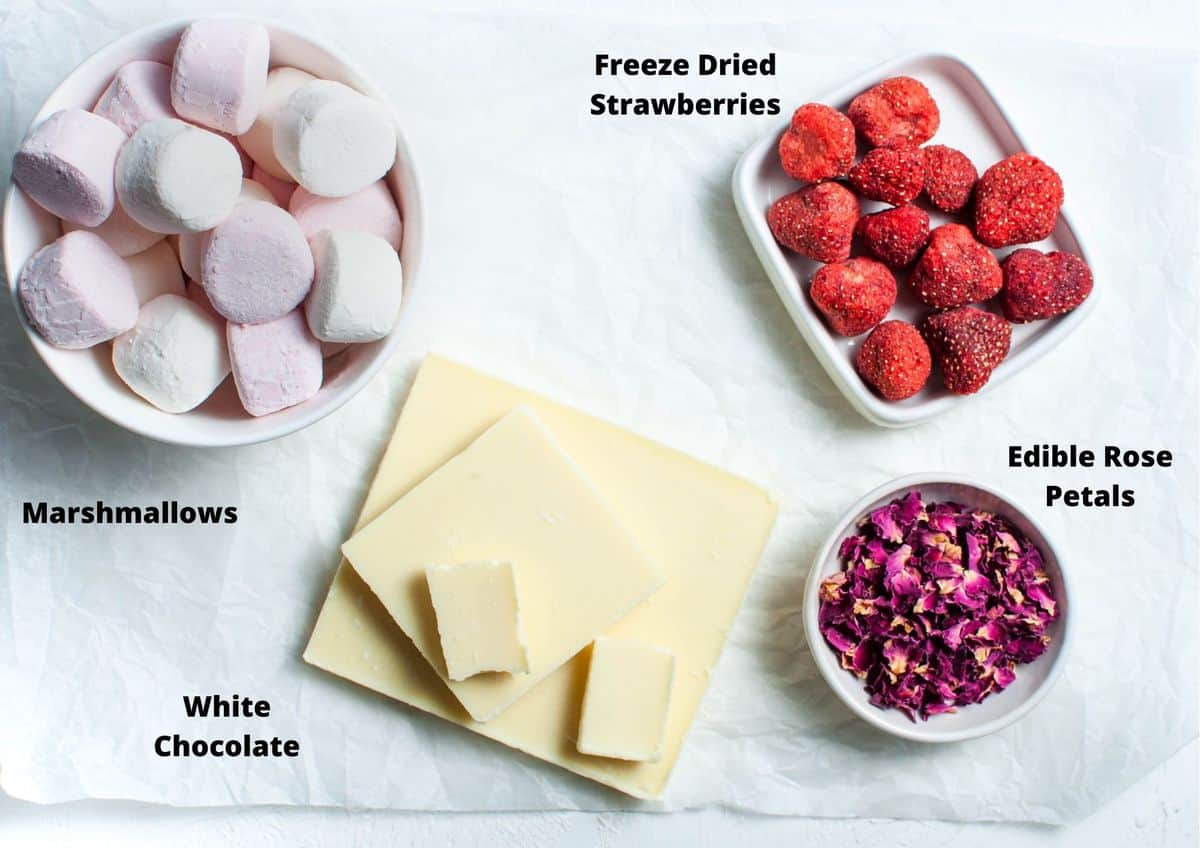
Marshmallows – I have used a combination of pink and white marshmallows, with a diameter of about 2 ½ cm (1 inch).
White chocolate – use the best quality you can. Cheaper varieties tend to be sickeningly sweet.
Freeze-dried strawberries – these are slightly crisp with sweet, tangy, concentrated strawberry flavour.
Edible rose petals – add a gentle, slightly sweet, exotic, floral flavour.
OR – get creative with the toppings! There are so many different options that you can use.
Step by step instructions:
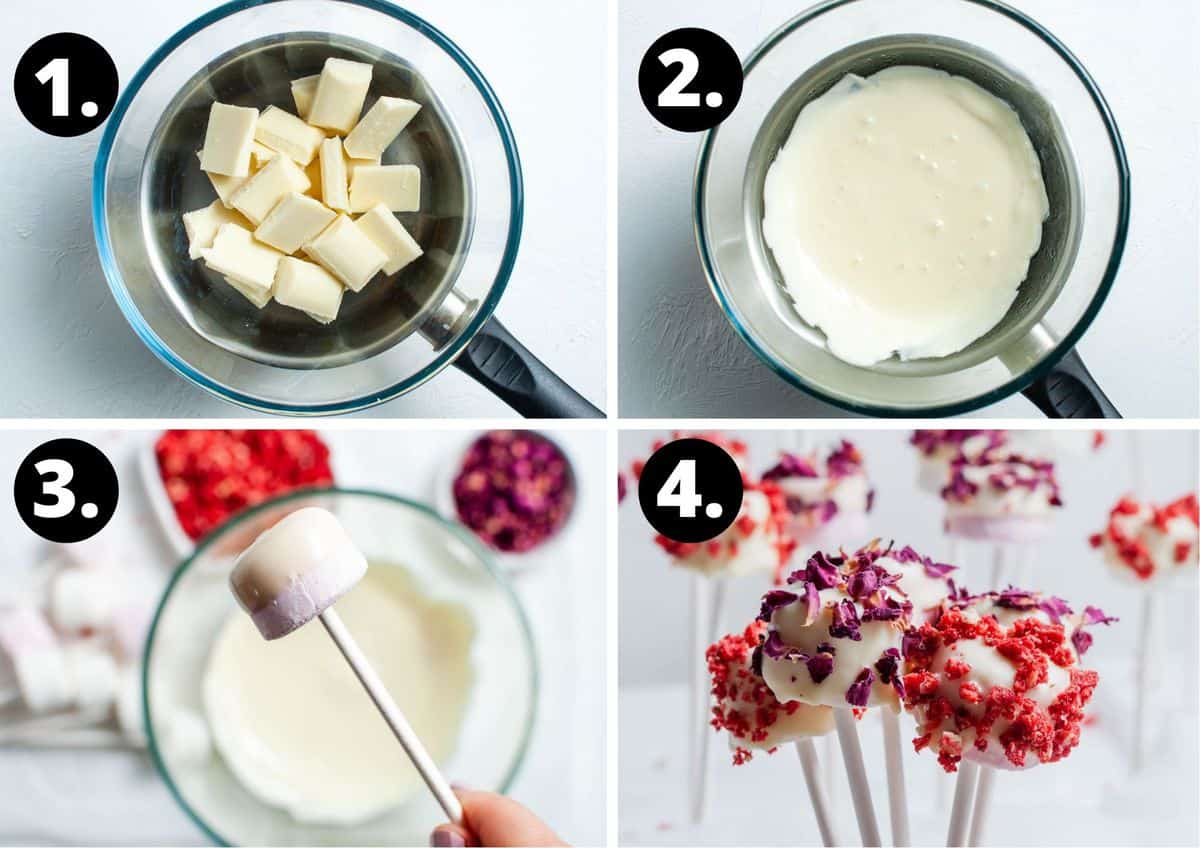
- To begin, prepare the chocolate. Chop it to even-sized pieces and place into the top of a double boiler or a heatproof bowl set over a pan of barely simmering water. Make sure that the bowl doesn’t touch the water and steam does not get into the chocolate.
- Stir occasionally with a metal spoon or spatula until the chocolate has almost melted. Then, remove the bowl from the heat; the residual heat will melt the remaining chocolate. Give it a final stir. Set the chocolate aside for about 5 minutes to allow the chocolate to cool. If you have used a heavy glass bowl, it will retain the heat for longer. If you try to dip the marshmallow into the chocolate while it is still hot, the marshmallow will start to melt and the chocolate will not adhere.
- Whilst waiting, insert the lollipop sticks into the marshmallows, taking care to not to push them right through. Place the rose petals and freeze-dried strawberries into two separate shallow bowls or plates. Dip a marshmallow into the chocolate, and swirl, allowing excess chocolate to drip off and then sprinkle with the rose petals and strawberries.
- Stand in a tall glass or jug, a cake pop stand, in a block of florist foam or styrofoam or in a bowl filled with rice.
Repeat with the remaining marshmallows and leave them to set. If it is a hot day, you may need to place them in the refrigerator for about 10 minutes.
Store in an airtight container, ideally in a cool, dry place. If the weather is hot you may need to store them in the refrigerator.
Tips for success and FAQs:
With so few ingredients, use good quality white chocolate. Use chocolate that you will enjoy eating. This is especially important with white chocolate as some cheaper brands are sickeningly sweet.
My preference is the stovetop method. A double boiler gives the best control over the heat. When using a double boiler, ie, a bowl placed over a saucepan of water which has just begun to simmer, care must be taken to ensure that not a drop of water gets into the bowl or the chocolate will seize. Further, the bowl must not touch the water in the saucepan or the chocolate may burn. To stir the chocolate, I use a metal spatula or spoon. Wooden spoons can retain moisture. For the best result you should not rush the process. Chocolate melts readily at a lower temperature than you may expect. Just think of what happens to it on a hot day. Special care must be taken with white chocolate as it has a low burn point; minimal heat is required.
You can use a microwave. Melt the chocolate in 20 second increments, stirring occasionally. Keep an eye on it, however, as it is easier to burn white chocolate in the microwave.
Ideally, allow the chocolate to set at room temperature. However, if it is a hot day and the chocolate won’t set put it in the fridge for about 10 minutes.
The chocolate dipped marshmallows are at their best the day they are made, but they can be kept in an airtight container in a cool, dry place for up to 3 days. I don’t recommend that you freeze the Marshmallows. They don’t respond well as their texture deteriorates.
More delicious recipes for you to try:
If you’re like us, and cannot resist a delicious chocolate treat, you’ll love some of these other favourite recipes:
- Chilli Chocolate Clusters
- Easy Rocky Road
- Candy Cane Chocolate Bark
- Chocolate Coated Strawberries
- Decadent Chocolate Brownies
- Chocolate and Raspberry Brownies
- Strawberry White Chocolate Bark
- Chocolate Sour Cream Cake
- Cranberry Pistachio Bark
- Vegan Chocolate Cupcakes with Chocolate Frosting
- Chocolate Raspberry Tarts
- Or check out our complete collection of chocolate recipes here.
When you’re short of time, and you want a sweet treat which is quickly and easily made, try our Chocolate Covered Marshmallows. This is a fun piece of confectionery which will brighten any occasion.
Customise them to your celebrations throughout the year. Use chocolate of your choice – dark, milk or white. There are so many options to use as decorations. I have made these suitable for a special occasion and used dried, edible rose petals and freeze-dried strawberries. You could choose one colour theme, use multi-colours, chopped nuts, coloured sugar, toasted coconut or mini sweets/candies. For a distinctly adult touch, use dark chocolate and a sprinkle of sea salt flakes.
Alex xx

Chocolate Covered Marshmallows
Equipment
- 20 lollipop/cake pop sticks – available from the baking section of some supermarkets.
- Shallow jug/glasses in which to stand the marshmallows. You could also use a bowl of rice, a cake pop stand, new florist foam or Styrofoam.
Please note:
For accuracy, when weights are provided, we recommend weighing your ingredients. This will produce the best results. All oven temperatures listed are for fan forced.
Ingredients
- 20 marshmallows (pink and white) See Note 1
- 100 g (3.5 oz) white chocolate, chopped into even-size pieces See Note 2
- 3 tablespoon edible rose petals (optional) See Note 3
- 25 g (⅓ cup) freeze-dried strawberries, finely chopped See Note 4
Instructions
- Place the chocolate into a bain-marie or heatproof bowl which sits over a pan of barely simmering water. Make sure the bowl does not touch the water or the chocolate may burn. As well, be careful that no steam or water gets into the chocolate or it will seize, becoming thick and grainy and not suitable to use in this recipe.Stir with a spatula or metal spoon until the chocolate has almost melted. Do not use a wooden spoon as it may have retained moisture. Remove the bowl from the saucepan and stir once or twice. The residual heat will melt the remaining chocolate.
- Set the chocolate aside for about 5-10 minutes to cool before dipping the marshmallows. If you have melted the chocolate in a heavy, glass bowl, it may take longer to cool. If the chocolate is not cool it will run off the marshmallows or may even begin to melt them.
- Meanwhile, place the lollipop/cake pop sticks into the marshmallows being careful to not go all the way through.
- Place the rose petals into a small bowl and place the finely chopped, freeze-dried strawberries into a separate small bowl.
- Dip a marshmallow into the chocolate and swirl. Remove from the chocolate, continue to slowly swirl and allow the excess chocolate to drip off.
- Wait for a minute or two for the chocolate to solidify slightly, then sprinkle the marshmallow with the rose petals or strawberries. Stand in a shallow jug/glass or, you could also use a bowl of rice, a cake pop stand, new florist foam or Styrofoam.Repeat for each marshmallow.
- The Chocolate Covered Marshmallows are best eaten the day they are made but can be kept in an airtight container in a cool, dry place for 3 days. Store in the refrigerator in hot weather.
Notes
- Marshmallows: use regular size, about 2 ½ cm (1 inch) diameter.
- Use good quality white chocolate, one that you like to eat. Cheap white chocolate can sometimes be sickeningly sweet.
- If you use rose petals, make sure they are intended for culinary use.
- Freeze dried strawberries are available in some supermarkets or specialty food stores.
- Please note, the nutritional information is based on one chocolate covered marshmallow. The nutritional information is an estimate only.
Nutrition Estimate:
Nutritional Disclaimer:
The nutritional information is an estimate only, and is derived from online calculators. For accurate results, we recommend calculating the nutritional information based on the ingredients and brands you use.
Aysha
Hi, I have one problem, my chocolate just didn’t set. Could it be the temperature outside ? Or do you think I didn’t let my chocolate cool long enough ? Thanks for the recipe by the way
Alexandra
Hi Aysha!
If it is hot outside, this could certainly make it harder for the chocolate to set.
Perhaps try placing them in the fridge to harden for a short time?
Let me know how you get on 🙂 Thanks, Alex
Jamie
These are great for my sweet tooth and look so pretty too!
Alexandra
Thank you so much, Jamie!