


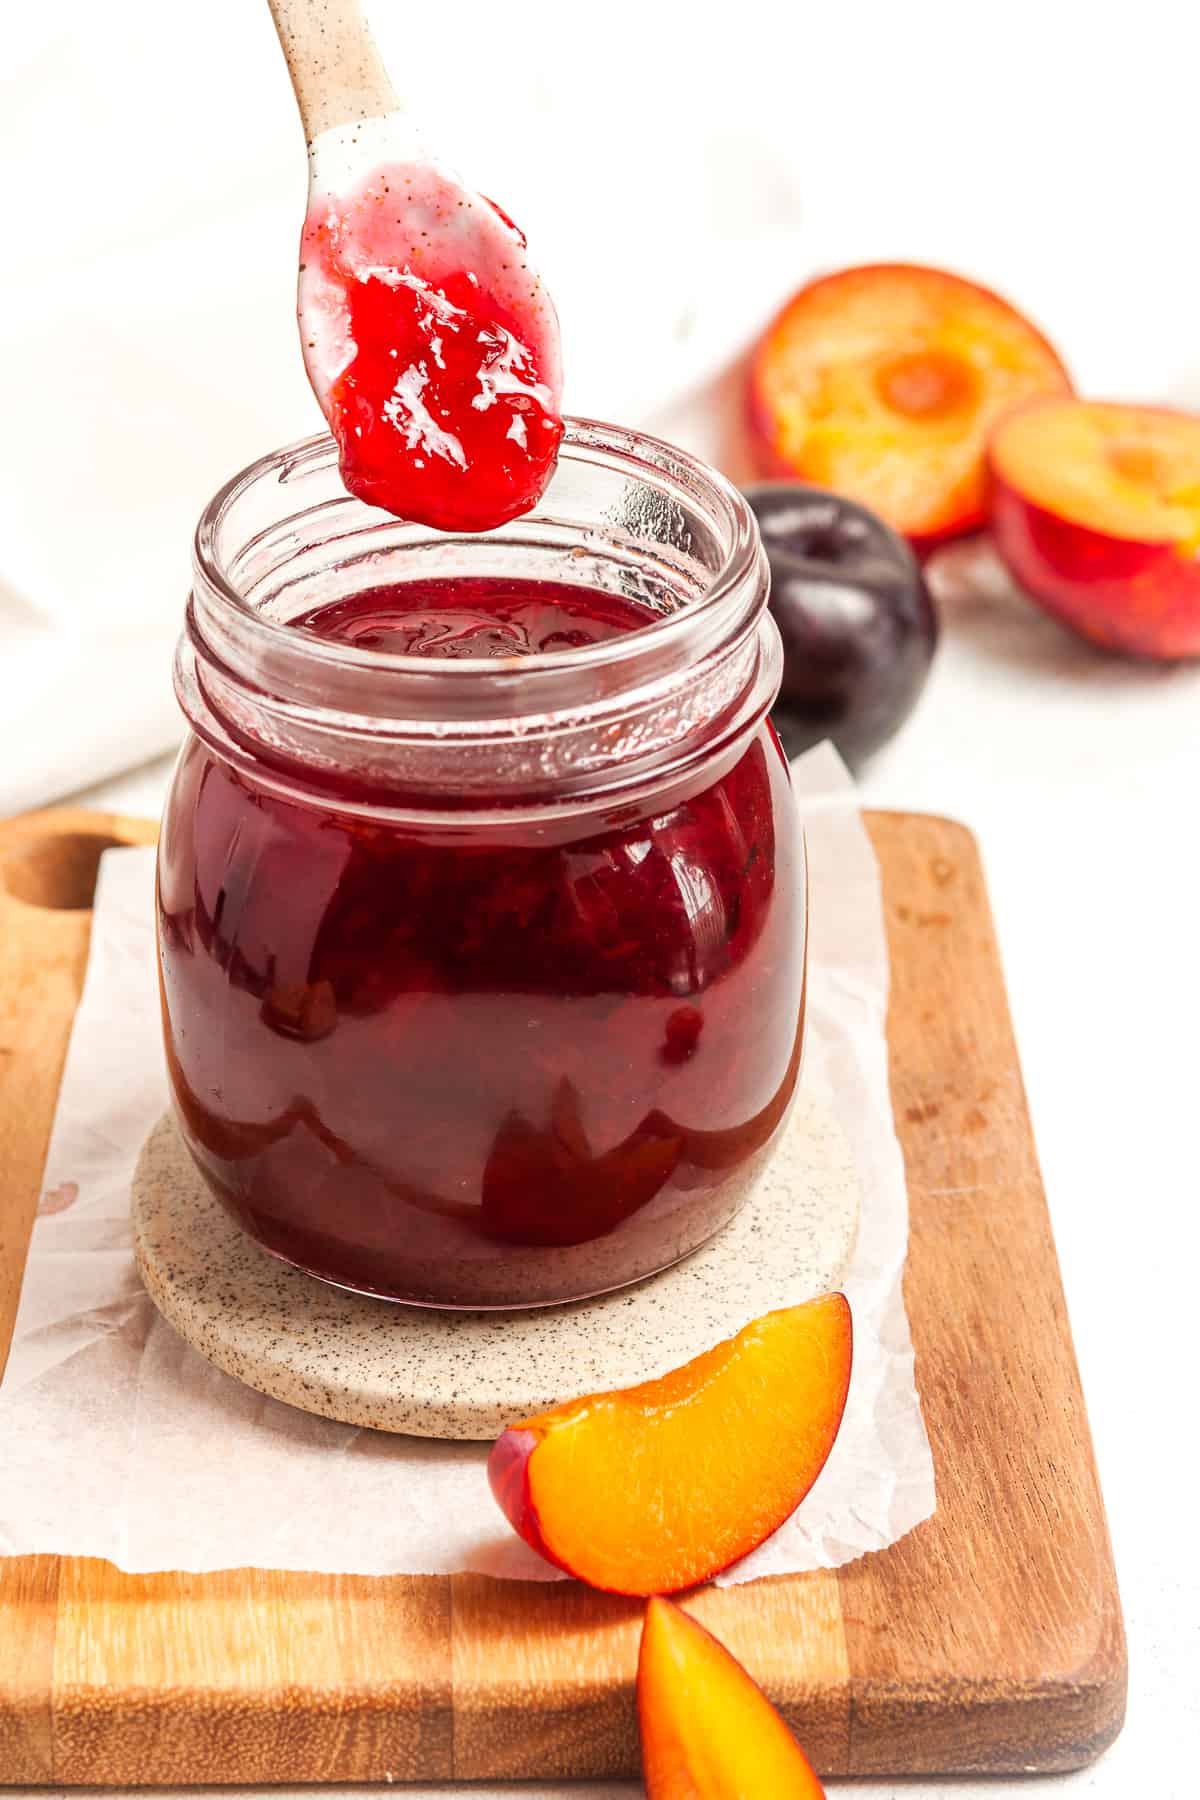
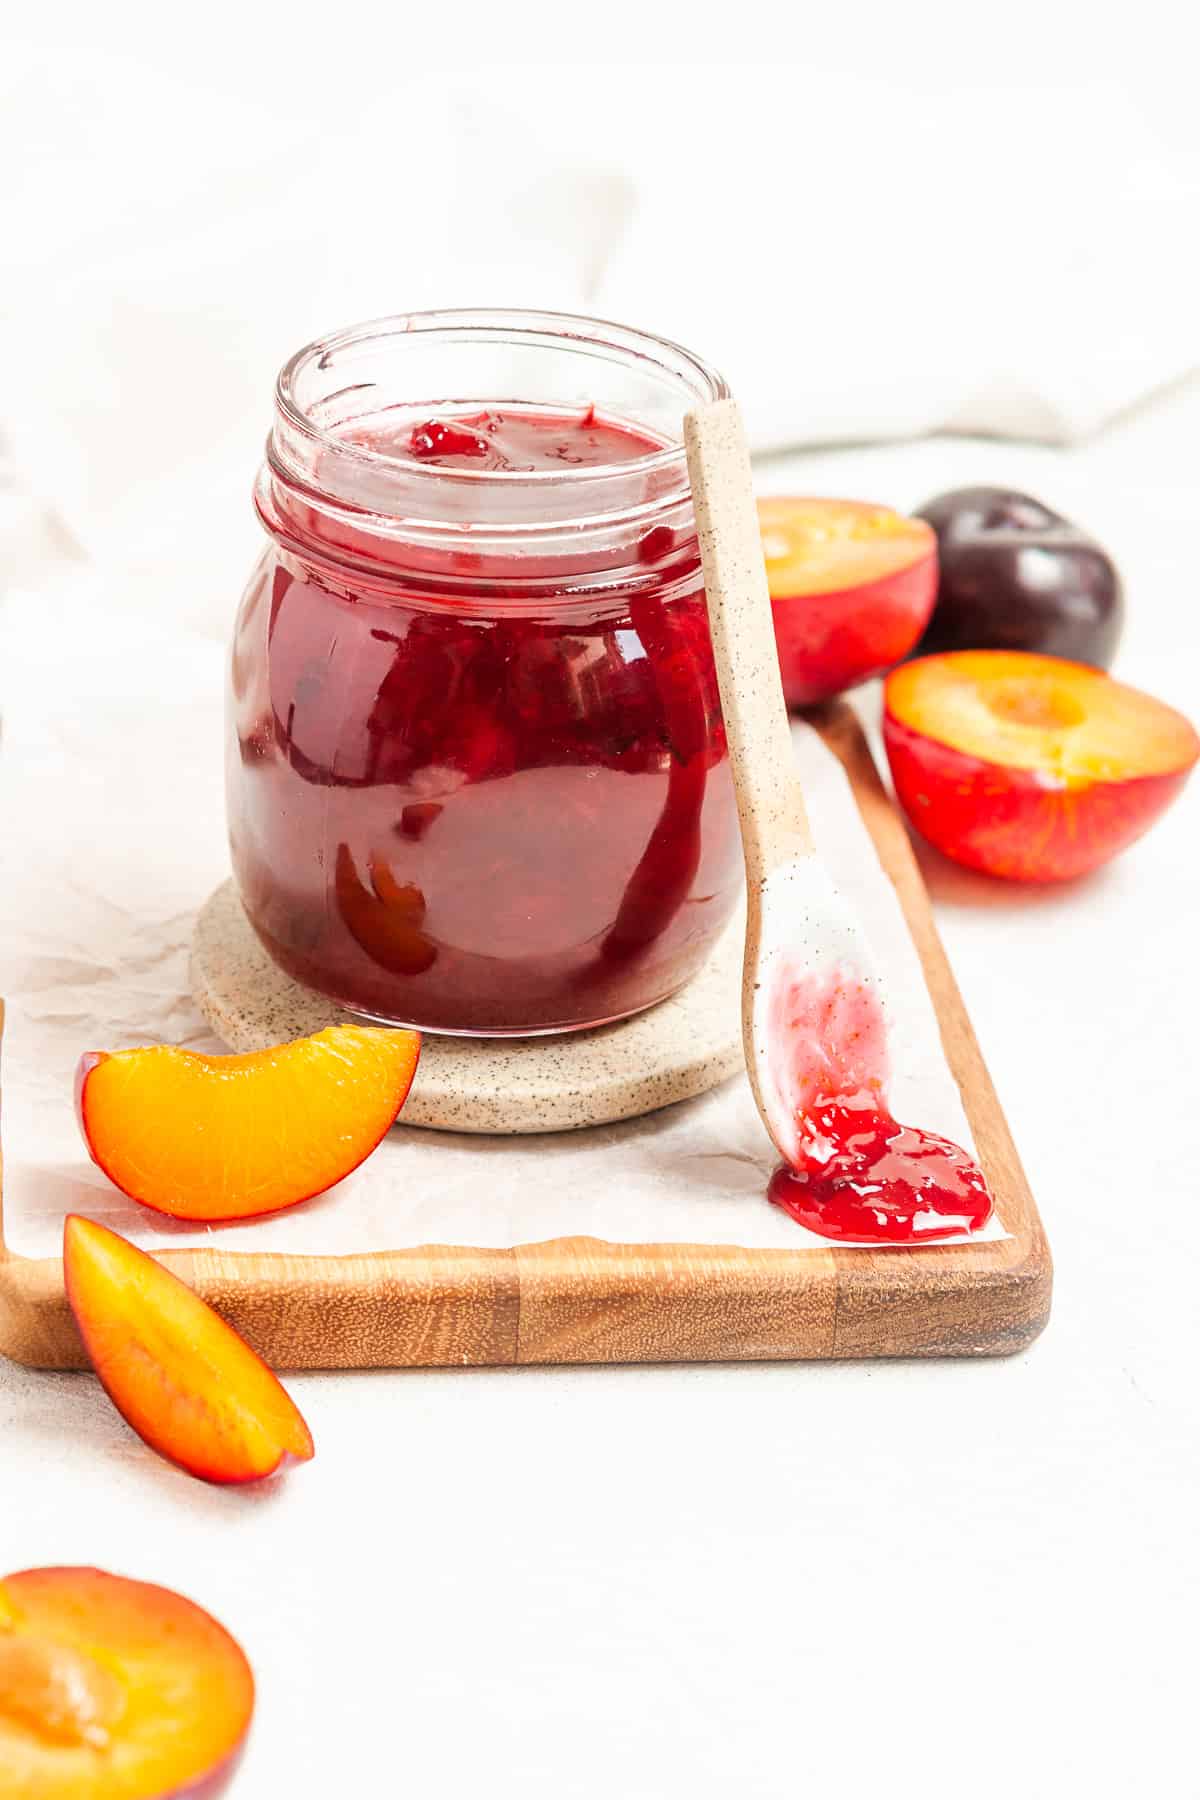
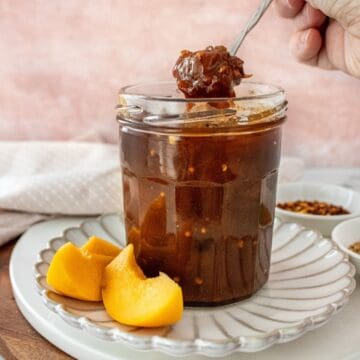
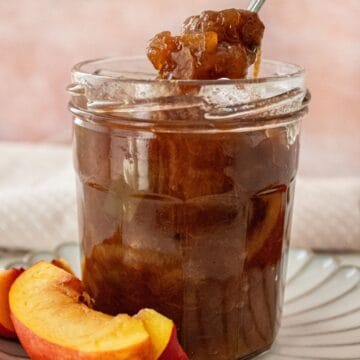
You will love this classic recipe for Easy Plum Jam, made with sweet, ripe, juicy plums at the height of their season. It is the ultimate way to preserve this delicious stone fruit to enjoy throughout the coming months.
Jump to:
Why we love this recipe:
My simple, traditional recipe contains just four ingredients - plums, sugar, lemon juice and water. It does not require the addition of pectin.
In this recipe I will show you, with step-by-step instructions, how easy it is to make homemade Plum Jam.
You'll love it because:
- Jam making is a great way to preserve some of nature's seasonal bounty to enjoy throughout the cooler months ahead - if it lasts that long.
- Homemade jam is infinitely superior to shop-bought. There are no unwelcome additives, artificial preservatives or thickeners that you may find in a commercially prepared jam. For me, one of the most important parts of home cooking is the knowledge that I control the quality of the ingredients.
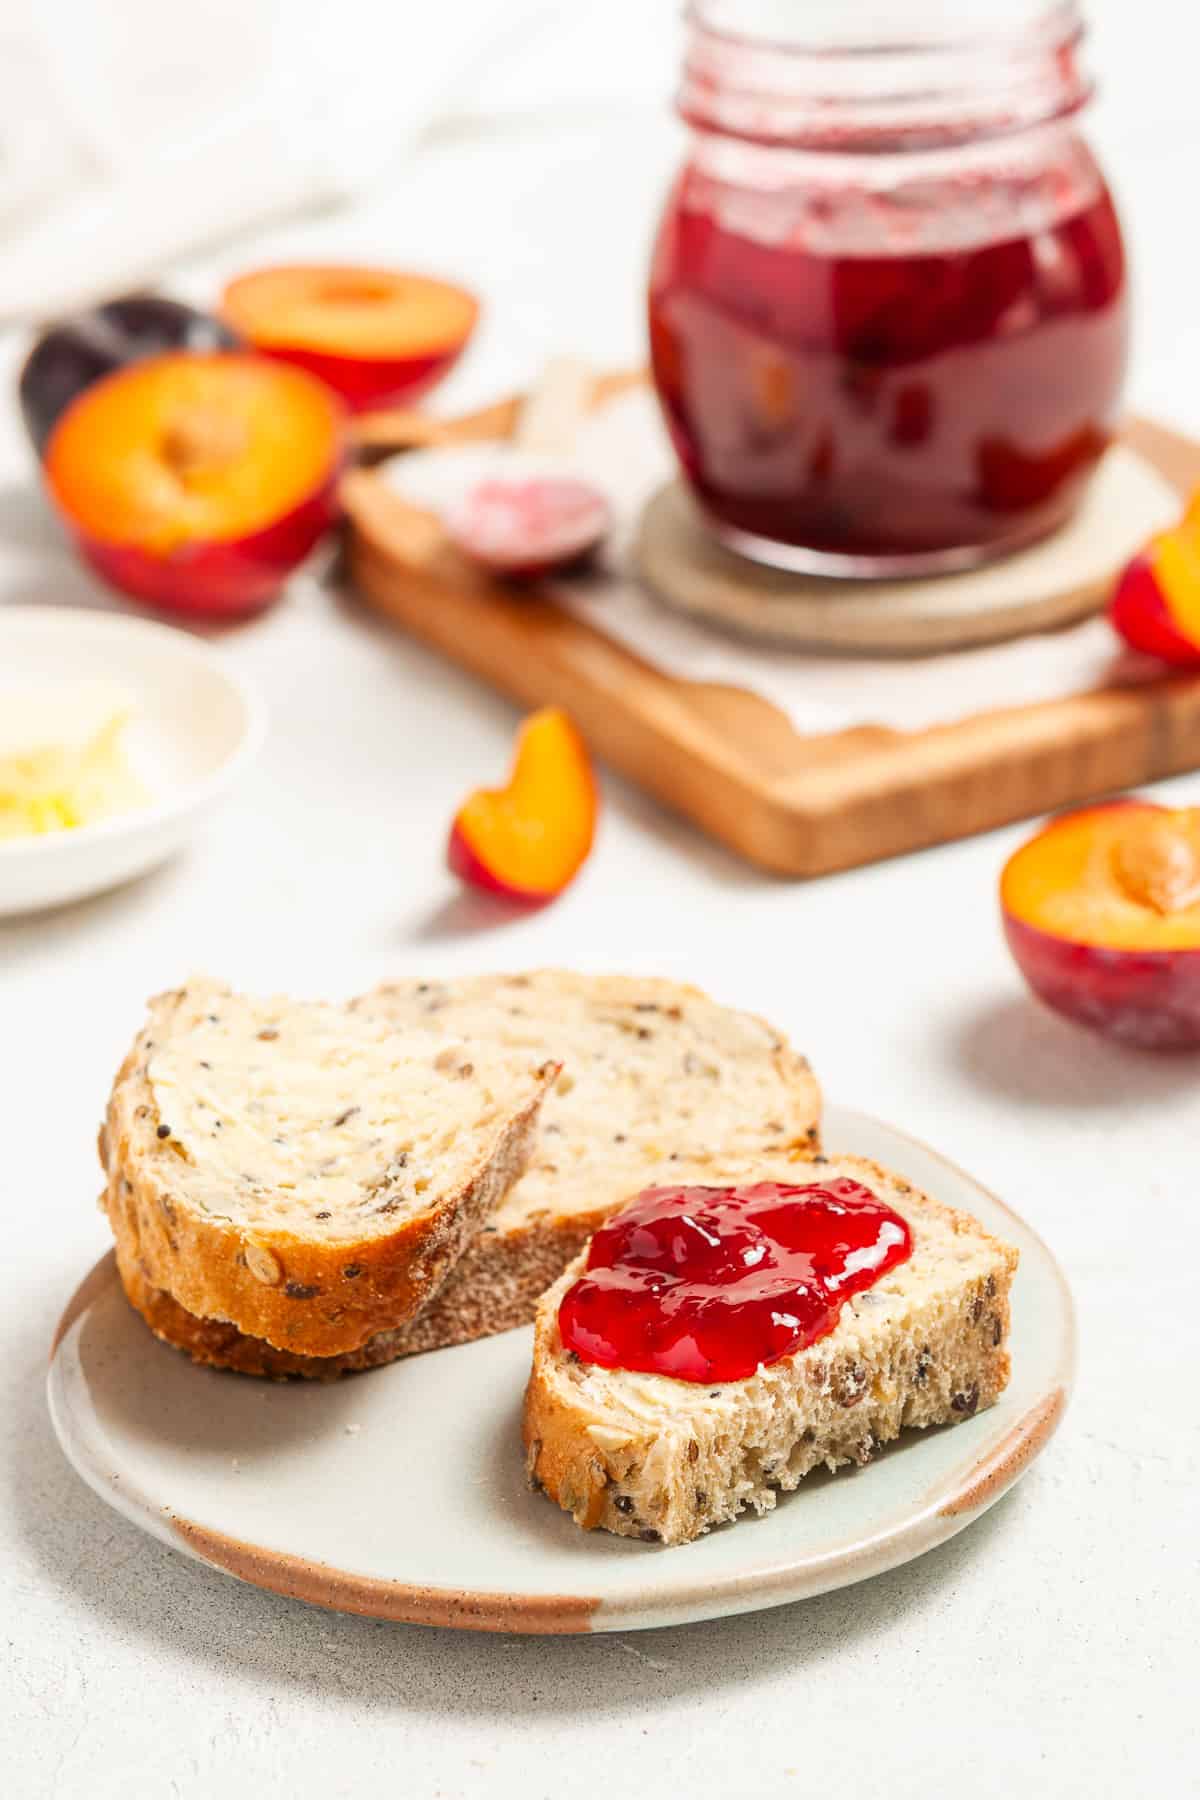
- You can use this Plum Jam in so many ways. Spread it on toast, serve with scones and cream (delicious!), make mini tarts, fill sponge cakes or drizzle over our No-Churn Vanilla Ice Cream. You are only limited by your imagination.
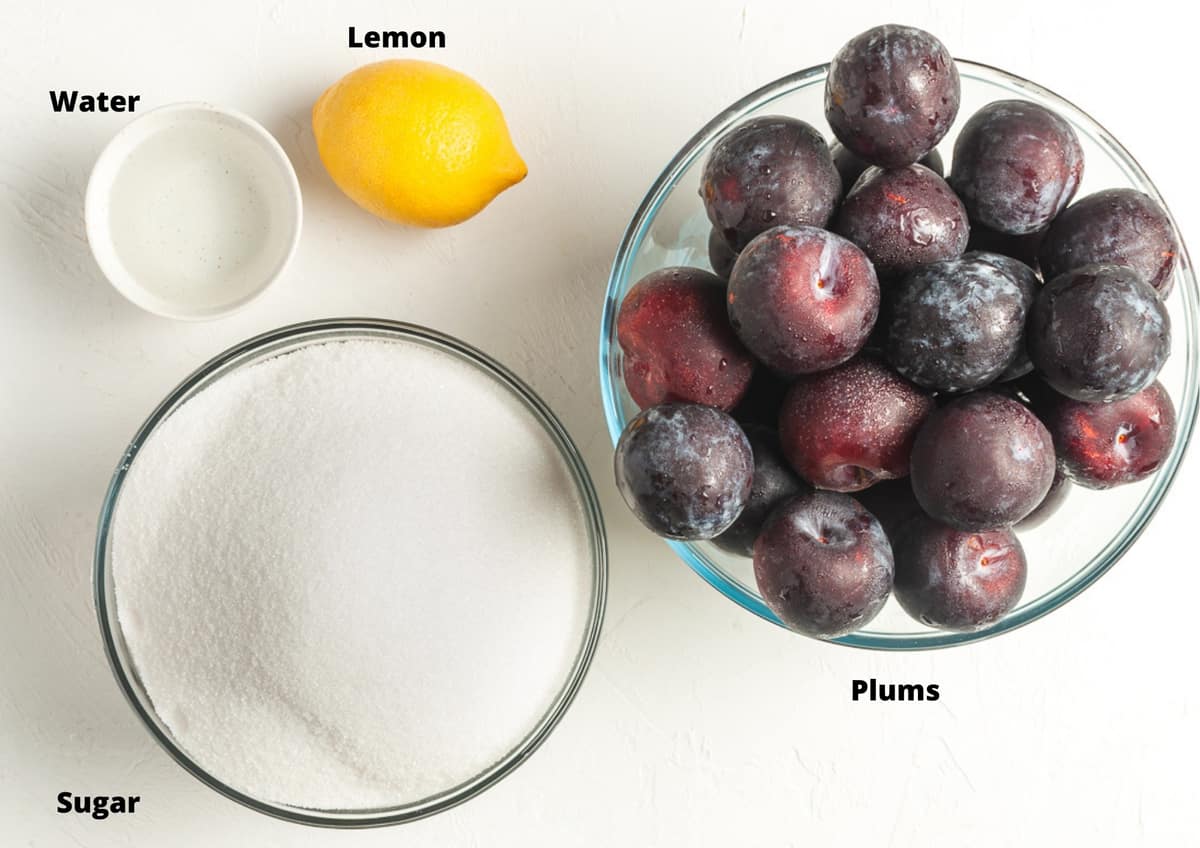
Ingredients in this recipe:
Please see the recipe card further along in the post for exact quantities of ingredients and the full method.
Plums - I often use a red plum with ruby-red flesh. It gives the jam a beautiful colour. However, you can, of course, use the plum variety of your choice, as shown below.
Sugar - regular granulated sugar is best.
Lemon juice - use freshly squeezed lemon juice. The juice is vital as it aids in the setting of the jam and balances the sweetness.
Water - filtered tap water.
Step by Step Instructions:
To begin, place two small saucers or plates in the freezer. You will use these to test when the jam is set.
Sterilise the jars by heating in the oven. Full directions are in the recipe below.
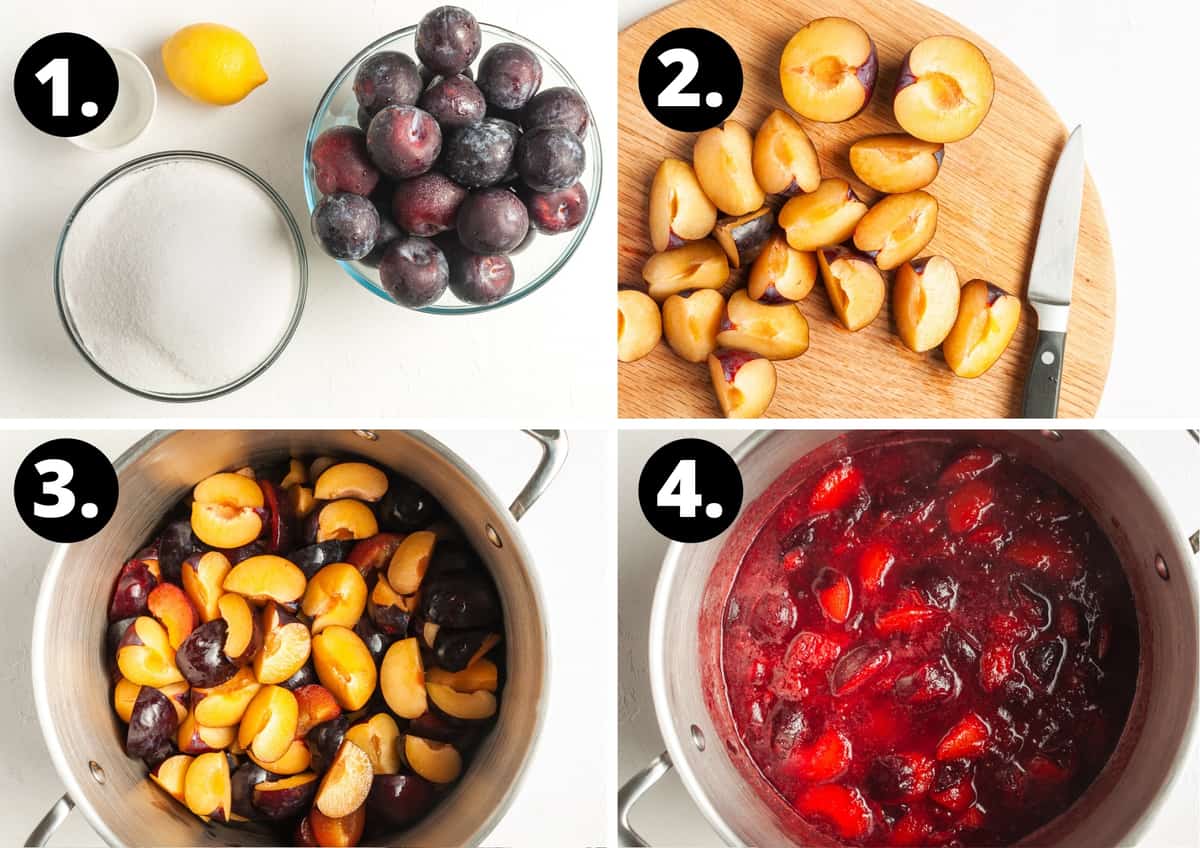
- Gather all of your ingredients.
- Wash the plums and remove any blemishes. Cut the fruit in half, remove the stone and cut the pieces in half again.
- Add the quartered plums, along with water, to a large, wide saucepan.
- Bring the fruit to a gentle simmer, stirring occasionally. Cook with the lid on until the fruit is soft.
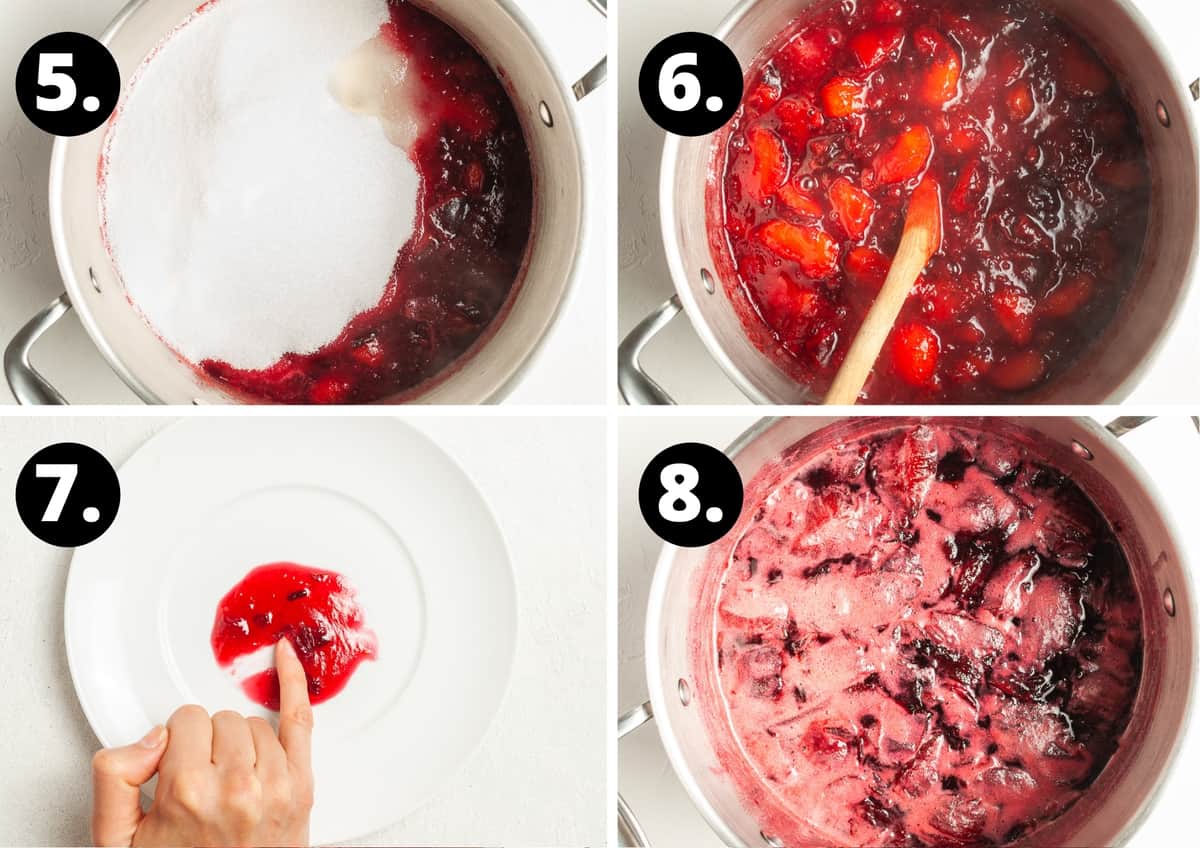
- Then, add the sugar and lemon juice and stir until the sugar dissolves.
- Bring the fruit to a rolling boil, stirring frequently.
- After about 5 minutes, start to check for setting point. You will not have any trouble getting this jam to set as plums are high in pectin.
- If your jam has any scum, remove it with a spoon.
- Alternatively, add a knob of butter and stir to remove the scum.
- Allow the jam to sit for 5 minutes to allow the fruit to settle.
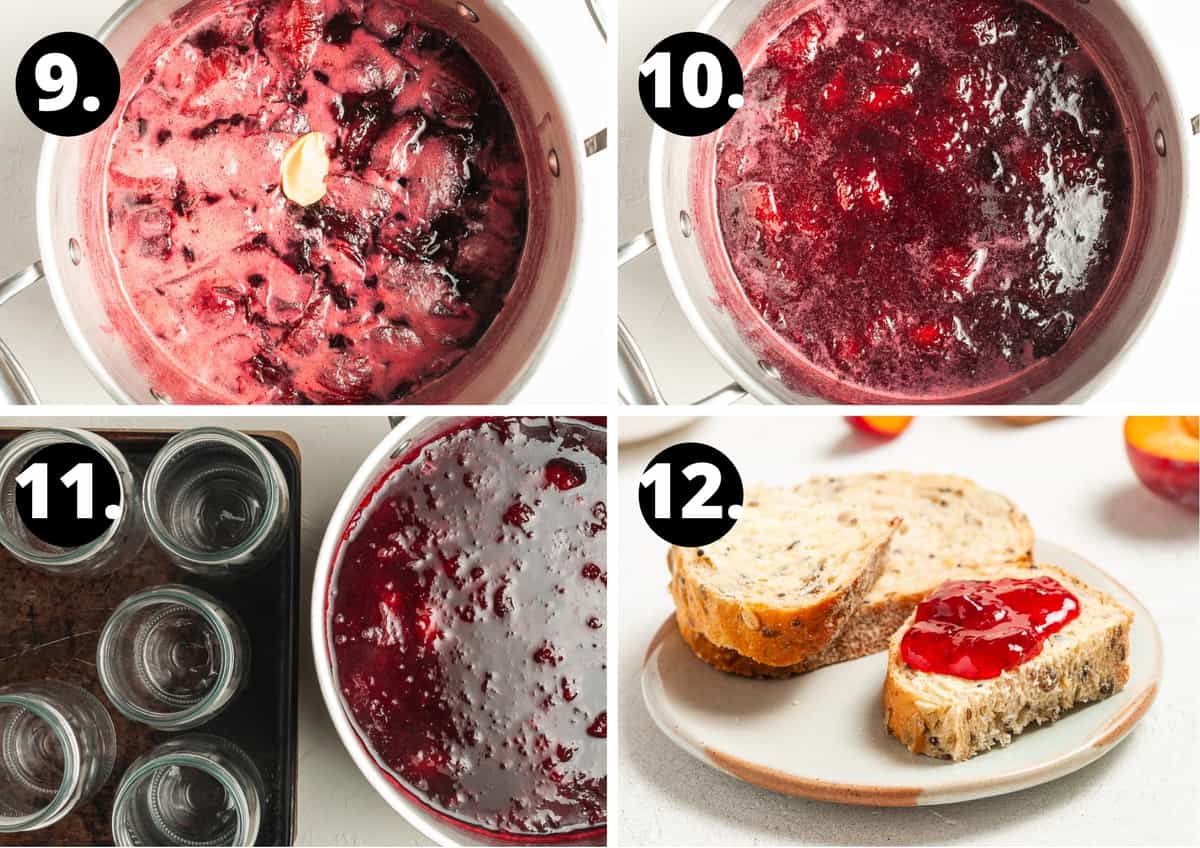
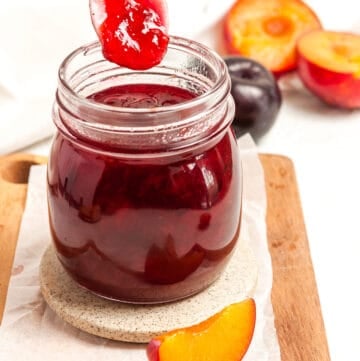
- When ready, ladle the Plum Jam into hot, sterilised jars and seal with the lids. After cooling, wipe the jars to remove any spills, label with the date and jam variety and store in a cool, dark place.
- Enjoy your homemade Easy Plum Jam!
Equipment needed:
When making your own preserves, always ensure you are sterilising the jars you will store them in. This is very simple to do:
- Choose glass jars with an airtight, metal lid and ensure they have been washed in the dishwasher or by hand in hot soapy water then rinsed well.
- Check that the metal lids do not have rubber inserts, as these could melt in the oven.
- Preheat the oven to 130 Degrees C (270 F) and leave the jars for 15-20 minutes.
You can use recycled glass jars with metal lids that are in good condition or purchase new ones. Jars which have contained pickles are generally not suitable as they often hold the aroma. Save these for your own chutneys or pickles.
You will not need any special equipment to make this recipe. You need a large, wide saucepan. The large surface area allows faster water evaporation, giving the jam a concentrated flavour. Without a large saucepan, there is the risk of it boiling over.
Avoid aluminium, copper or iron pans; the acid in the fruit may react with the pan, giving the jam a metallic taste.
As well, I use a long-handled wooden spoon to keep my hand away from the bubbling jam.
Tips for success and FAQs:
Choose good quality, freshly picked fruit. Ripe plums with firm skins will contain more pectin and give the best result. Do not use plums that are over-ripe, soft or bruised as they may cause the jam to spoil.
If you follow the recipe instructions precisely and your jars are thoroughly sterilised, the Plum Jam should be shelf-stable for a year, possibly longer. No canning is required. When you open a jar, store it in the fridge. Always use a clean spoon to remove the jam.
No, you don't need to peel the plums. The skins contain high amounts of pectin which aids with getting the jam to set.
Conventional jam requires a lot of sugar. When you see it weighed out it is slightly alarming but please don't reduce the amount of sugar. The sugar not only sweetens the fruit but it helps the jam to set and acts as a preservative. If you reduce the sugar, your jam may not be shelf stable.
Lemon plays an important role in jam-making. It is high in acid and pectin, both essential for the setting of the jam. As well, the acidity of the lemon helps balance the sweetness.
Pectin is a naturally occurring starch that is found in varying degrees in fruits and vegetables. It is what makes jams and jellies firm when they are cool. When combined with acid and sugar, and cooked to a high temperature, it forms a gel.
More delicious recipes for you to try:
We absolutely love making the most of in-season produce to enjoy all year round. Here are some more of our favourite preserve recipes:
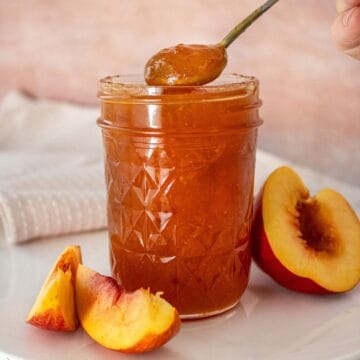
- Apricot Jam
- Preserved Chillies in Oil
- Fresh Peach Chutney
- Lemon Marmalade
- Sweet Chilli Sauce
- Grapefruit Marmalade
- Blueberry Jam
My Easy Plum Jam recipe is a great place to start if this is your first time making jam as plums are high in pectin. Once you've perfected your jam making technique you will have the ability and equipment to make fresh jam for years to come. You just need to invest a little of your time; when you finish and see your own produce lined up, you will know that it was time well spent.
Alex xx
This post was originally published in April 2019. It has been updated with new photos and more information. The recipe remains the same.
Easy Plum Jam
Equipment
- 11 x 250ml (8.5 oz) jars (See notes)
Please note:
For accuracy, when weights are provided, we recommend weighing your ingredients. This will produce the best results. All oven temperatures listed are for fan forced.
Ingredients
- 2 kg (4 ½ pounds) plums - prepared weight See Note 1
- ½ cup (125 ml) water
- 1 ½ kg (3 ⅓ pounds) granulated sugar See Notes 2 and 3
- 1 ½ tablespoon (30 ml) lemon juice See Notes 4 and 5
Instructions
To Sterilise the Jars:
- Preheat the oven to 130 Degrees C (270F).Use glass jars, either new or recycled, with an airtight, metal lid. If recycling jars, ensure that the jars do not have cracks or chips and the lids are in good condition. Discard any lids that are pitted or rusted. Ensure your lids are oven safe or see our notes if they are not. (See Note 6.)Wash the jars and lids. If washing by hand, use hot, soapy water and then rinse them well. Alternatively, wash them in the dishwasher.Place jars and lids on a baking tray. Heat in the oven for at least 20 minutes. The jars and lids should be completely dry and remain very hot.
To Make the Jam:
- Place 2 small plates or saucers in the freezer to chill - see Note 7.
- Wash the plums and remove any blemishes. To halve the plums, start at the stem end and run a sharp knife around the plum, following the naturally occurring marking. Use the tip of the knife to remove the stones.Cut the halves in half again. If you don't want your jam to have chunks of fruit, cut the plums into eighths.
- Place the plums and water in a large, wide saucepan. See Note 8.
- Bring the plums to a simmer over low-medium heat. Stir occasionally using a long-handled wooden spoon. See Note 9.
- Cover the pot and cook, stirring occasionally, until the plums are soft, 15-20 minutes. At this stage, if you prefer less chunky jam, you could blend it using a hand-held stick blender. Take off the heat to do this.
- Add the sugar and lemon juice. Stir frequently, with the saucepan uncovered, until the sugar dissolves.
- Increase the heat and bring to a rolling boil for 5-15 minutes. You need to be vigilant at this point. Stir frequently to avoid the jam catching and burning on the bottom of the pan. Boiling time will vary depending on the size of your saucepan and the heat that you apply.
- After about 5 minutes rapid boiling, turn the heat off under the jam. Spoon a small amount of jam onto a chilled plate or saucer to check if it is starting to set. I use the wrinkle test. When the jam has cooled, push it gently with your fingertip. If it wrinkles, even slightly, it is ready. If it remains liquid, put the jam back on the heat for a further 5 minutes and check again. See Note 10.
- You can also use a thermometer to check for setting point. To use this method, you will need a sugar thermometer. Clip the thermometer to the side of your pan. When the thermometer reads 104C (220F) the jam is ready.
- When the jam reaches setting point, remove the pan from the heat. If there is any scum on the surface of the jam, add a teaspoon of butter and stir well. It will dissolve the scum.
- Let the jam stand for about 10 minutes to allow the fruit to settle. This will ensure that any pieces of fruit will be evenly distributed throughout the jam. Without standing, the fruit will rise to the top of the jar.
- The jam will still be liquid when you ladle it into your jars. It can take up to 48 hours to completely set.
- Stir the jam and carefully ladle it into the heated, sterilised jars. You need to be very careful. A splash or spill from hot jam would result in a serious burn. I recommend that you wear clothing with long sleeves. Additionally, this is not the occasion to have children nearby.Immediately seal the jars tightly with sterilised lids.
- When cool, remove any spills from the jars and label with the date and name. Store the jam in a cool, dark place. When using the jam, always use a clean, dry spoon to avoid contamination. After opening a jar, as a further precaution, store it in the refrigerator.
Notes
- Ensure your fruit is freshly picked and of good quality. Avoid fruit that is bruised or over-ripe. The plums contain pectin which aids in the jam setting. If your fruit is older, it will contain less pectin. The colour of the jam will vary depending on the variety of fruit that you use.
- My plums were perfectly ripe and sweet so I used a fruit/jam ratio of 1 kilo of fruit to ¾ kilo sugar (1 pound fruit to ¾ pound of sugar). If the fruit you use is slightly unripe and quite tart you may need to use a ratio of equal weight fruit and sugar.
- Do not reduce the amount of sugar. Whilst the sugar sweetens the fruit it also acts as a preservative and helps the jam to set. If you reduce the sugar, your jam may not be shelf-stable and may become mouldy.
- The Australian tablespoon is 20ml or 4 teaspoons. In many other countries, the tablespoon is 15ml or 3 teaspoons. Please adjust the measurement if necessary.
- Lemon juice not only balances the sweetness of the sugar, but it also contains acid and pectin which help to set the jam.
- Properly sterilising your jars is an essential process to remove bacteria that could cause your preserves to spoil. Wash the jars and lids either in the dishwasher or by hand in hot soapy water, and rinse well. Do not dry them with a tea towel. Place jars and lids on a baking tray. If you are using Kilner jars with rubber seals, be sure to remove the seals before placing the jars in the oven. The dry heat of the oven would damage the seals. Boil the seals separately in a saucepan for about 10 minutes. If your lids are not oven safe, boil them for 10 minutes and allow them to air dry. Heat the jars in the oven for at least 20 minutes. When your preserves are ready to bottle, use thick oven mitts or jar tongs to remove the jars. Do not place them on a cold surface as they may shatter. I place mine on a wooden chopping board which I cover with a tea towel. Always sterilise a few more jars than you think you will need. It is better to have too many jars than not enough.
- The chilled plates are used to quickly cool the jam when testing the setting point.
- Always choose your widest saucepan that has enough height to enable the jam to boil vigorously. More surface area means the liquid will evaporate faster; having sufficient height means you can boil the jam at a higher heat and maintain the fresh flavour of the plums. Avoid aluminium, copper or iron pans; the acid in the fruit may react with the pan, giving the jam a metallic taste.
- Do not use a metal spoon, it will become very hot. A long-handled wooden spoon is important to avoid being burnt by a splash from boiling jam.
- My jam reaches its setting point about 5 minutes after it begins to boil rapidly. Boiling time will vary depending on the size of your saucepan and the heat that you apply.
- Please note, the nutritional information is based on one whole jar. The nutritional information is an estimate only.
Nutrition Estimate:
Nutritional Disclaimer:
The nutritional information is an estimate only, and is derived from online calculators. For accurate results, we recommend calculating the nutritional information based on the ingredients and brands you use.
Fran says
I have never made Jam before. I have now made 3 batches and my neighbour who supplied the plums said that it was the best he had ever tasted. Praise indeed for a complete novice.
Your instructions are so easy to follow. I am a complete convert to jam making now that I know how easy it can be.
Thank you Alex.
Alexandra Cook says
Hello Fran,
It is so lovely to read such fantastic feedback. I am thrilled you have had such good success and also already made multiple batches.
I really appreciate you taking the time to let me know 🙂
Alex xo
Stacy says
I am going to make plum jam this afternoon. How long can you store the jam in a cool dark place without it going bad. I was thinking of giving it to some of my loves for Christmas.
Alexandra Cook says
Hi Stacy,
Assuming the jars are prepared properly and are thoroughly sterilised, the Plum Jam will last for about a year 🙂
Once you open a jar, keep it in the fridge.
Alex xo
Donald O'Hara says
I've just made this, it worked out really well. I've never made jam before, your instructions are really easy to follow and answered all my questions. Thanks very much.
Alexandra Cook says
Hello Donald,
Thank you so much. I am so happy to hear this.
Enjoy your jam 🙂 Alex xo
Dawn Davies says
Thank you for your plum jam recipe. We have enjoyed a bumper harvest from the plum tree in our garden this year. So I have made some jam this morning for the very first time. The recipe was easy to follow and the ingredients were on hand. How long would you suggest before my can use the jam? I did sample whilst cooking it and it tasted delicious. Thank you
Alexandra Cook says
Hello Dawn,
Thank you for giving the recipe a try 🙂
Once it has cooled and set, you are able to enjoy it immediately. I usually enjoy it the following morning with my breakfast 🙂
Thanks so much! Alex xo
Ann Coffey says
I always cut up the plums and put the pips/stones/bones/pits and water in a pan and warm the mixture on the stove. I then leave it overnight. The stones contain pectin so why remove them when pectin helps the jam set? The next day, I warm the mixture again and add the sugar and stir it until it has dissolved. I then leave it to soak again. By the time I am ready to make the jam the mixture has already thickened and it takes only about 10 minutes for the jam to reach setting point. I pick out most of the stones that are now free of pulp while the jam is cooking. I don't remove them all for sentimental reasons. I always enjoyed finding the odd one in my mother's jam when I was a child, a bit like finding a silver sixpenny piece in a helping of Christmas pudding.
Alexandra Cook says
Sounds like a special family recipe, Ann!
Likewise, the one I have shared here is also. 🙂
My great grandparents and grandparents were stone fruit growers and would make many batches of jam. We find this method works very well, sets easily and is very fast.
Alex xo
Sandra says
a friend just gave me 4 kg of plums so jam is my adventure today. I am a bit nervous with your recipe because I have read that the skins make the jam bitter; does the acid of the lemon reduce that bitterness?
Alexandra Cook says
Hello Sandra,
Thank you for your question!
I have made plum jam dozens of times over the years with a variety of plums, and never found that the skin makes the jam bitter, and I don't recall this ever being raised by any others readers before either.
Have you tasted the plums fresh, and is there any sign of bitterness?
The lemon is there to add pectin and allow the jam to set.
Please let me know how you get on! Alex xo
Sue Pierce says
Hi and good morning to your family!! Question- my daughter rents a house with two wild plum trees how would your plum jam recipe work with wild plums? I would love to try this recipe !!
Alexandra Cook says
Hello Sue,
Thank you for the question! I personally haven't tried this recipe with wild plums, but several readers have used just wild plums or a combination of plums, and it has been very successful 🙂
Please let me know how you get on! Alex xo
Fausto says
Recently moved into a nice village, had a very warm welcome, Just received a couple of kilos of plums from a nice chap a few doors down from me, my mum was very busy during the autumn months making jams and chutneys out of every fruit and vegetable available on the farm where I grew up, well this is my first attempt at making jam I hope I took notice and remember the methods my mum used.
Your recepie looks great I am looking forward to making some lovely plum jam.
Alexandra Cook says
Hello Fausto,
Oh, that sounds so lovely! A nice welcome to your new home 🙂
I hope you'll have great success with your first time making jam! Please reach out if you have any queries.
Alex xo
Karen says
I have a question before I make this recipe. I have no idea what variety my plums are. They have a tougher skin, then what you would buy from a grocery store. Will that matter? Will it have chewy pieces in the jam, or will it soften the skin?
Alexandra Cook says
Hi Karen,
It is difficult to say without seeing them, but there are a couple of options.
Firstly, you could try just stewing a couple on the stove top, and seeing how the skins break down.
Or, you could make the jam and if they haven't broken down to your liking, you could use an immersion blender to puree the mixture, which is an option in the recipe.
Please let me know how you get on! Alex xo
ANGELA BRITTON says
Very easy recipe. I used small Mirabelle plums from my garden and jam sugar rather than caster. I scaled down the recipe to 1/5 so used 400g fruit, 300g sugar, 1 tsp lemon. Worked well. Made 2.5 smallish jars which suits me fine.
Alexandra Cook says
Hi Angela,
Thanks so much for sharing 🙂
Enjoy your jam, Alex xo
Claire Wiltshire says
The first jam I’ve ever made that tastes amazing and actually sets! Thank you!!
Alexandra Cook says
Thank you so much, Claire!
So happy to hear 🙂 Alex xo
Donna says
Made this yesterday with 1 kg or plums so halved the recipe. It was my first time making jam and am so pleased with the results. Thank you, I will definitely be doing this again!
Alexandra Cook says
Hello Donna,
Thank you so much - so happy you had success with your first time making jam 🙂
Pleased you will be making it again too!
Alex xo
Shirley Ludlam says
Made this recipe a week ago for the first time. Halved all the ingredients as I only had 1kg of plums. Very pleased with the result. It set really well. So pleased with it I’m in the middle of making some more. Thank you.
Alexandra Cook says
Hi Shirley!
Fantastic to hear this 🙂 And so happy you're making a second batch!
Thanks so much for taking the time out to leave a comment, Alex xo
Matt says
Really lovely jam. Just made a batch with very ripe plums (1kg) and very pleased with the result. I’m heading back up the tree right now to make some more.
Alexandra Cook says
Thank you, Matt! 🙂
Great to hear you're already making another batch! Alex xo
Janice Lowry says
We have a plum tree in our yard and this is the first year it produced my daughter showed me where it was in the orchard so I picked enough to make jam. This is my first attempt to make plum jam. In the past I did it with someone so this was a test to see if I can do it alone. I converted the recipe to 9 cups Plums 6 1/2 cups sugar and 2tblsp. lemon juice. It turned out with delicious taste and jelled perfectly. I got 11 jars of jam and they all sealed. I am glad I discovered this recipe it is easy to make and my daughter was happy to see that I did something with the fruit when she came home from work. I am retired and she works as a Pharmacist in a hospital.
Alexandra Cook says
Hello Janice,
Thank you so much for giving the recipe a try.
I am so happy you had success 🙂 I appreciate you taking the time to leave a comment.
Alex xo
J says
Where are the quantities. Lots of reading but could not find the quantities
Alexandra Cook says
Hello J,
The quantities can be found in the recipe card, which is just above the comment section.
For ease, we have a ‘jump to recipe’ button at the top of the page that will take you directly there.
Kind regards,
Alex
Chrissy says
I made this yesterday, it was so easy to do and tastes gorgeous. I’m sure my husband and young grandsons are going to love it!
Alexandra Cook says
Hi Chrissy,
Thank you so much for making the recipe and taking the time to leave a comment.
I hope your family will love the jam as much as you 🙂 Alex xo
John says
I made this jam today it is ever so easy. tsst absolutely beautiful 😍
Alexandra Cook says
Thank you so much, John!
So happy to hear this 🙂 Alex xo
Julia says
Just made this.... easy and it tastes amazing!!!!!
Alexandra Cook says
Thank you so much, Julia!
Alex xo
Jeanie says
Haven't made it yet but I'm about to get started. I am a total novice - - - never made jam before - - - but the instructions look really clear
Alexandra Cook says
Please reach out if you have any issues, Jeanie - I am here to help 🙂
Happy jam making! Alex xo
Debbra says
Found your recipe and can't wait to try it as I have a plum tree with loads of plums. Unfortunately my plums are slightly on the over ripe side. Can I just add a bit of pectin sugar replacing 200 grams of the granulated sugar with pectin sugar?
Alexandra Cook says
Hi there Debbra,
How lovely to have a plum tree 🙂
I personally haven't used pectin when making jam before, so I'd follow the instructions for the packet to see how much is recommended.
Let me know how you get on! Alex xo