


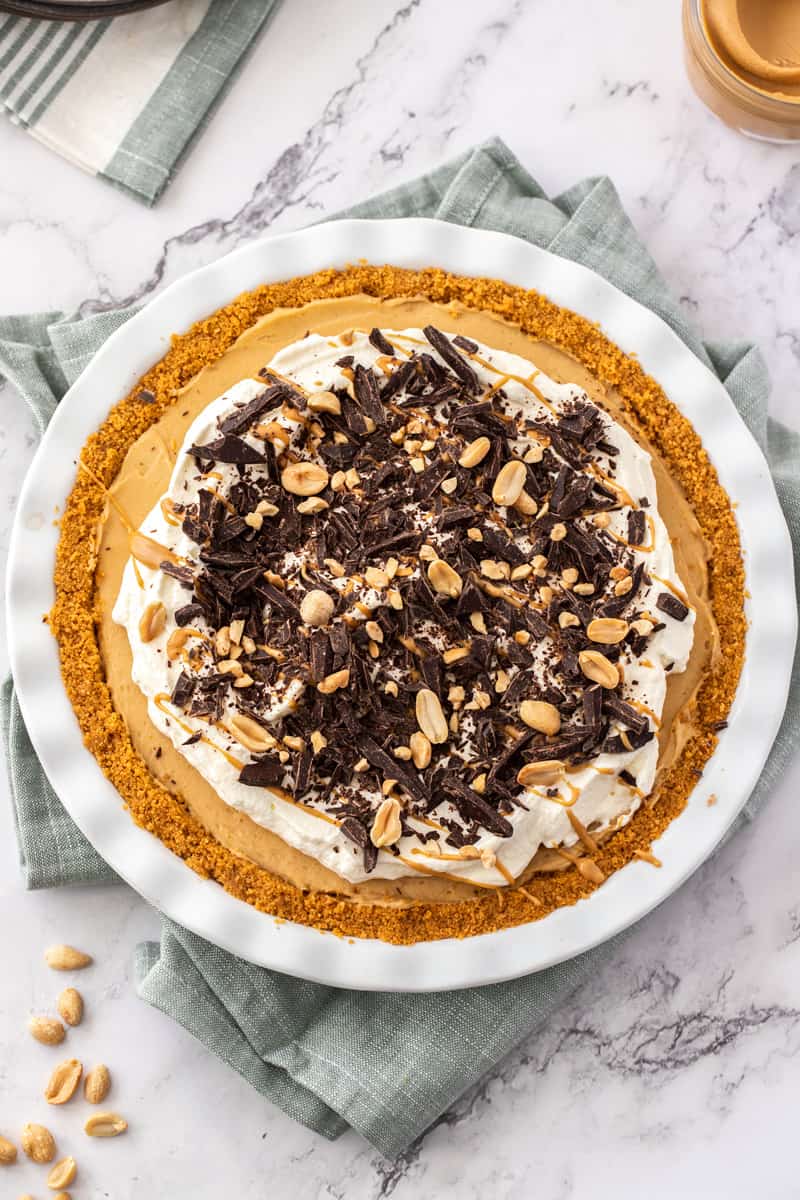
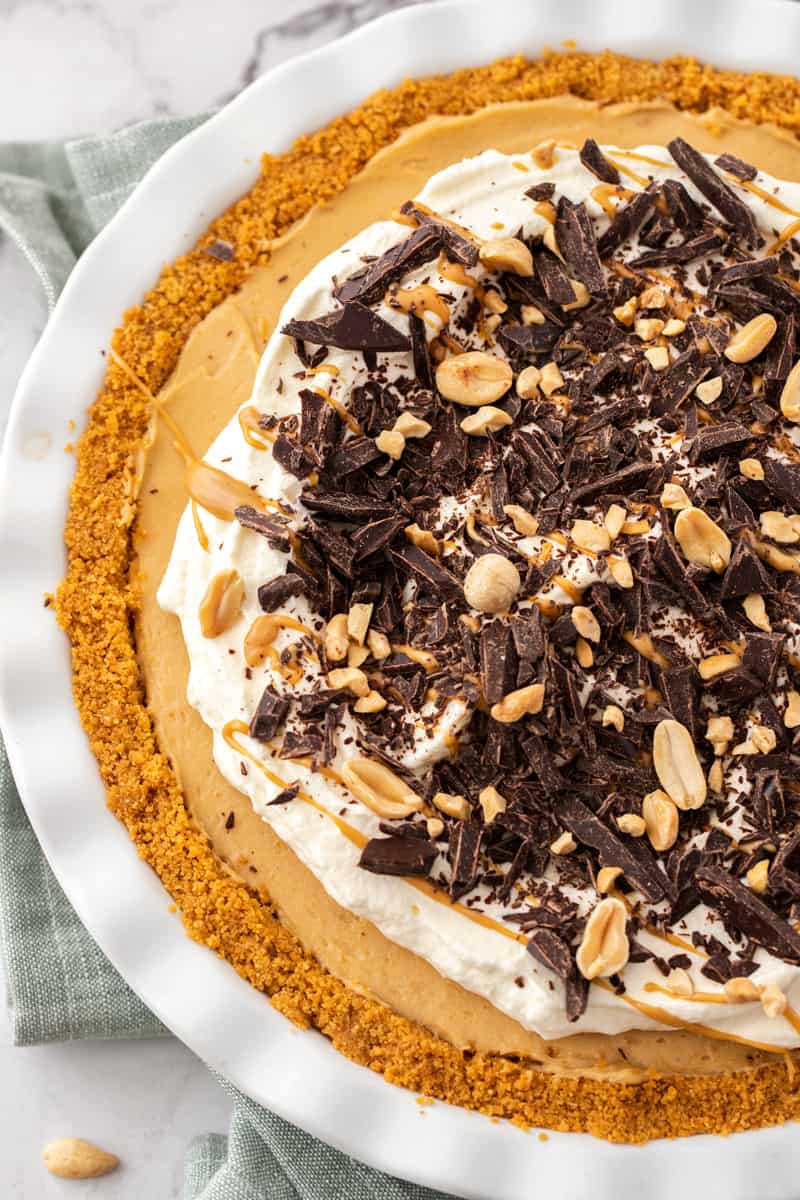
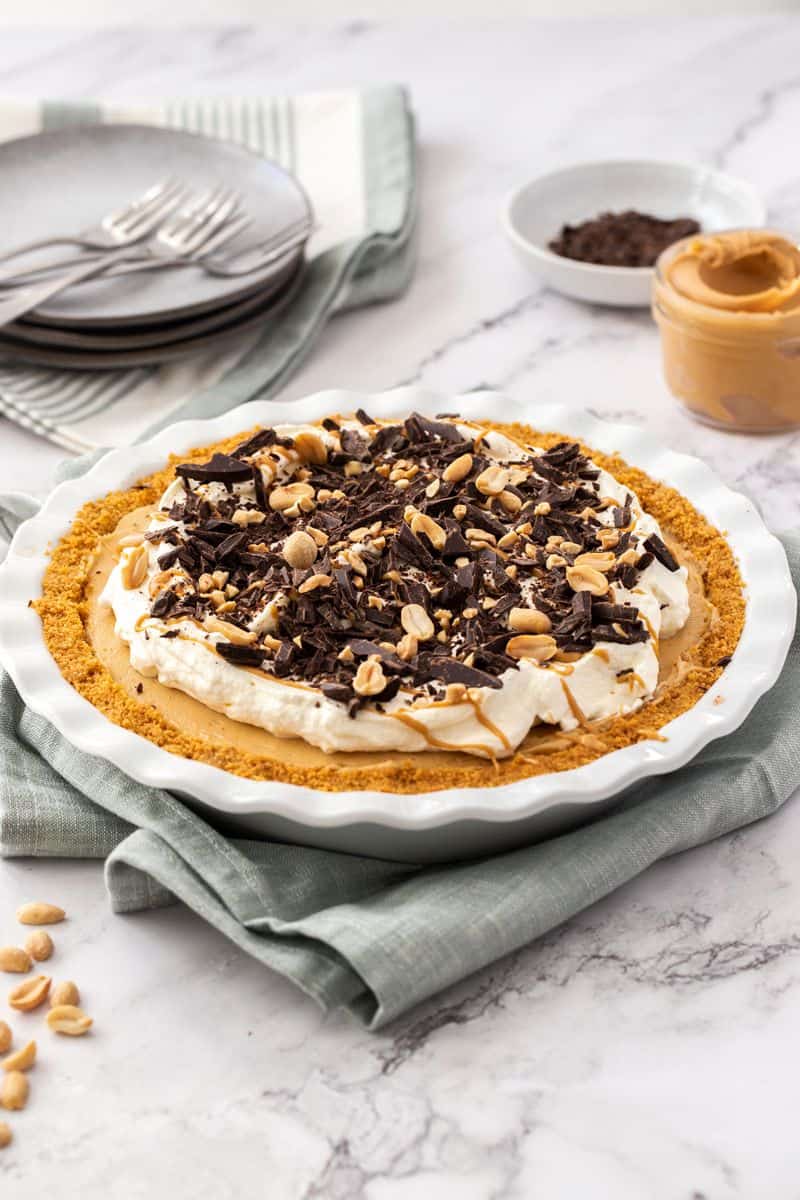
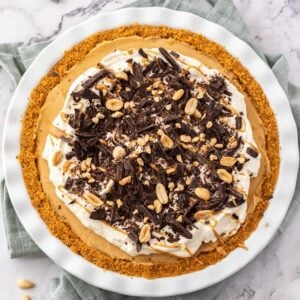
This super creamy Peanut Butter Pie is one of the easiest, and most enjoyable desserts you can make. Peanut butter fans will love this easily prepared dessert. A buttery biscuit crust holds a creamy, decadent filling. Top the pie with whipped cream and chocolate shavings, and watch it quickly disappear at your next gathering!
This was an absolute dream of a pie, so easy to put together, and I made it in advance, putting the cream on the top on the day. It disappeared almost straight away!
– Freya
Why You’ll Love This Recipe:
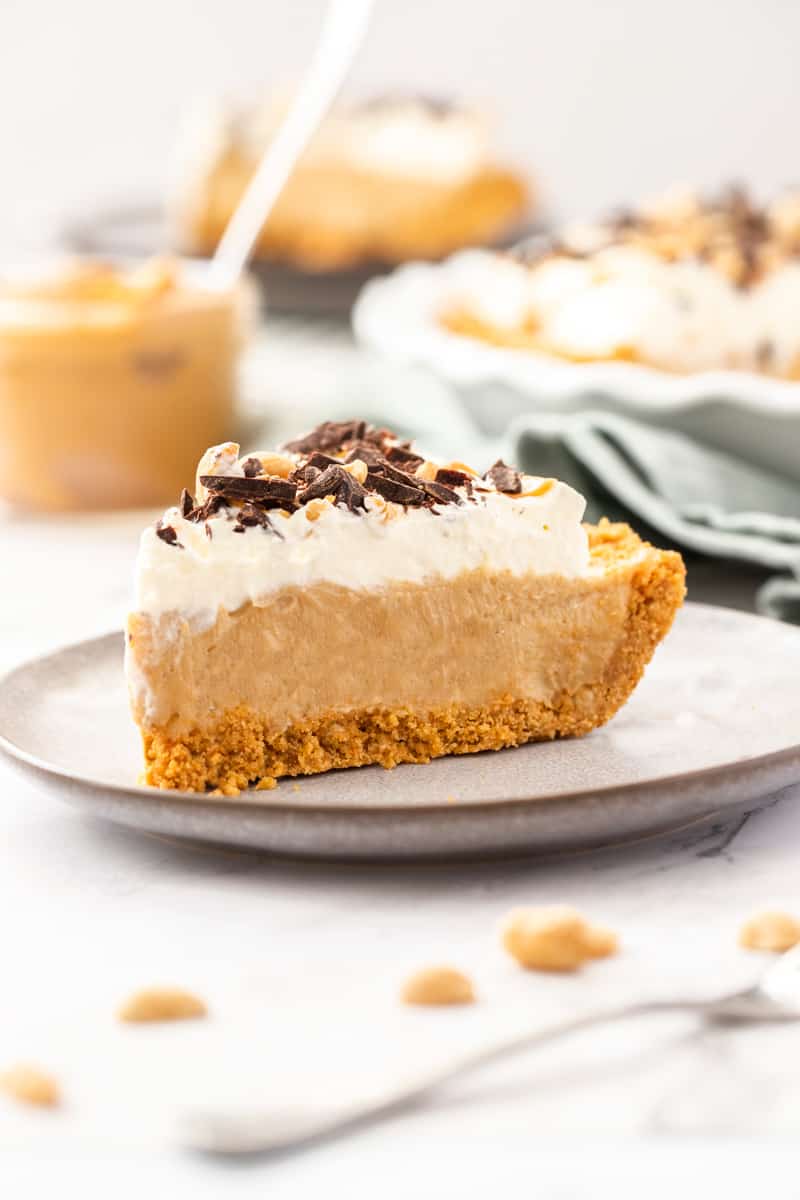
- This pie is everything a dessert should be. It is quick and easy to prepare and with each bite there is a lovely contrast of flavours and textures. The crust is crunchy and buttery, and the peanut butter filling is smooth, deliciously rich and creamy.
- It can easily be gluten-free; just use appropriate biscuits/cookies in the base.
- This Peanut Butter Pie is so simple to make that you can serve it for almost any occasion.
- It is ideal for entertaining – this pie can be made the day before you need it and stored in the refrigerator until you are ready to serve.
- Easy to transport, the pie is ideal if you’ve offered to take a dessert to a friend’s home.
- You can customise the decorations – when I initially started to make this recipe some (20!) years ago, we drizzled melted chocolate on top and served with ice cream.
Recipe Inspiration: a recipe that my Mum and I developed for a cafe many years ago – it is still one we like to make regularly today.
Ingredients and Substitutions:
Please see the recipe card further along in the post for exact quantities of ingredients and the full method.
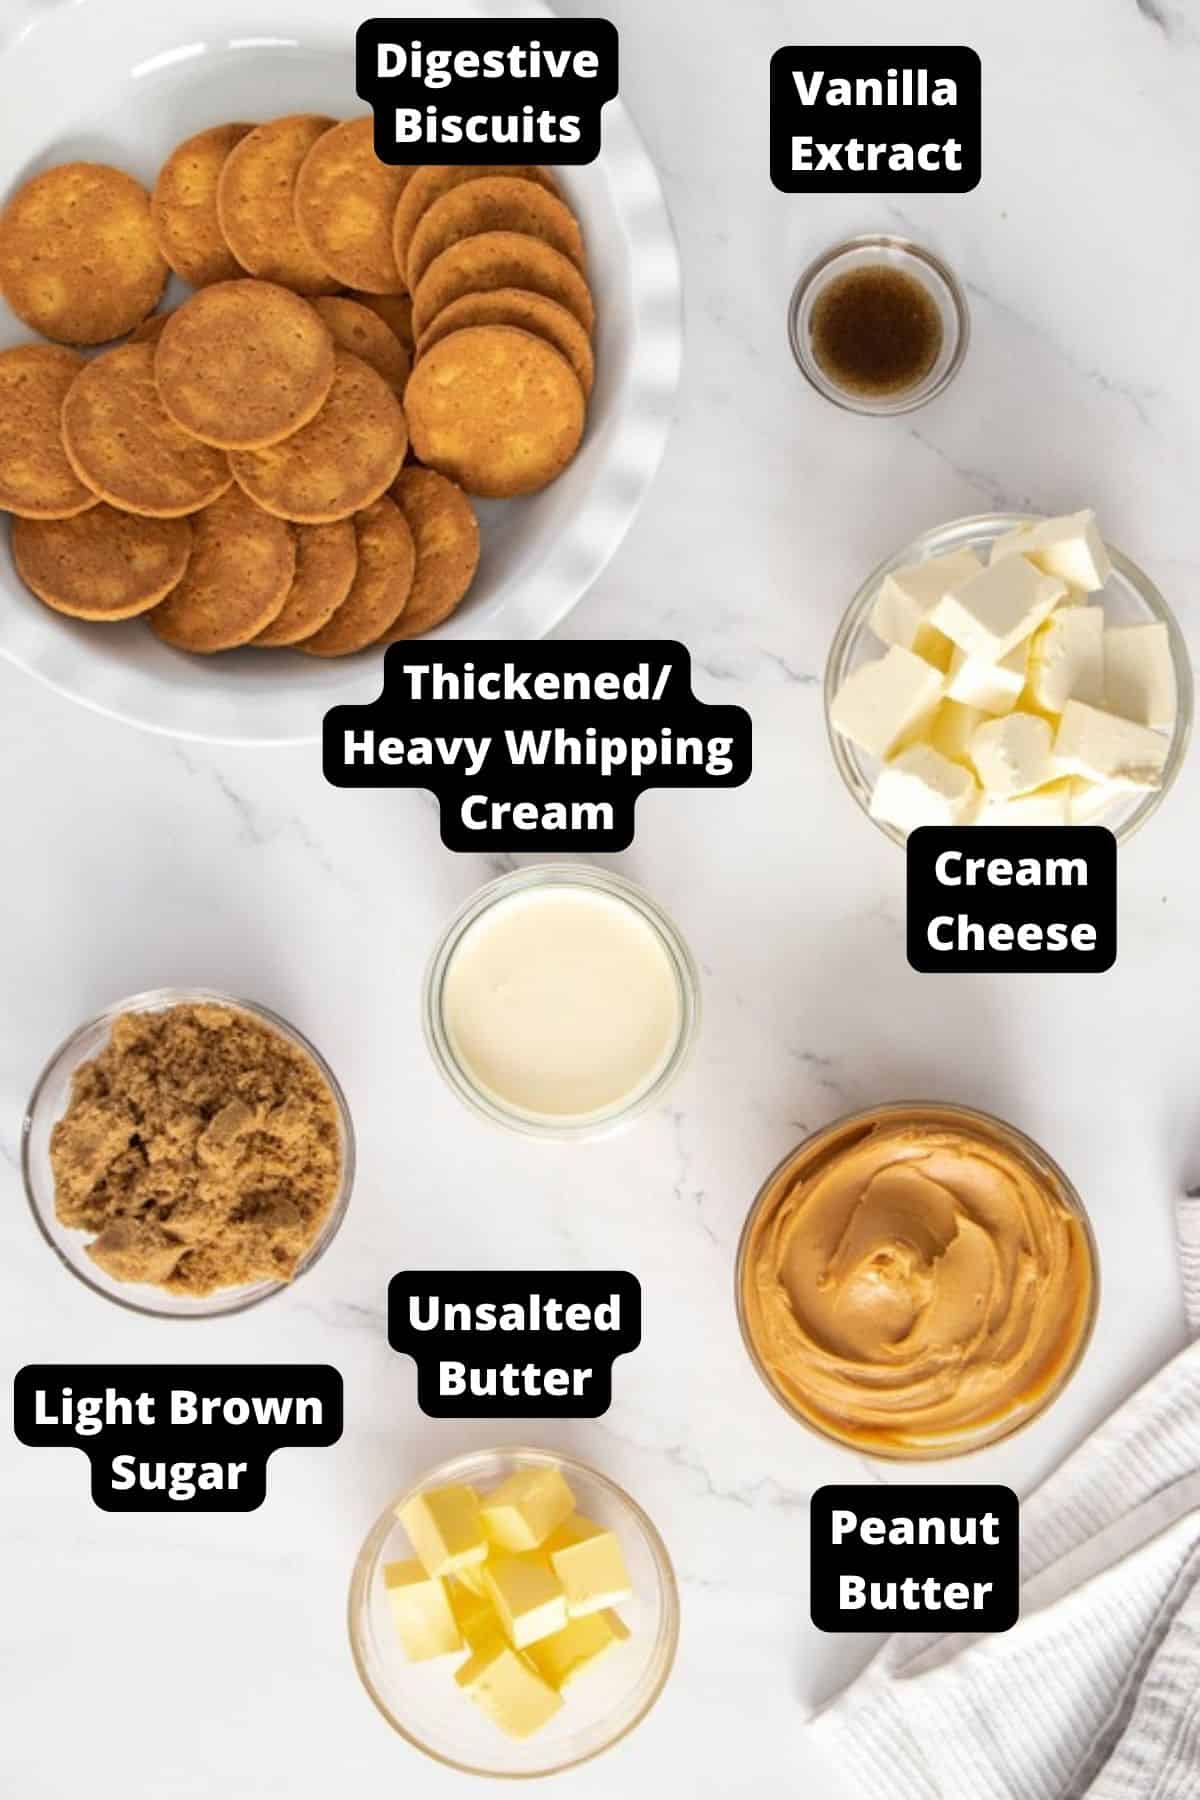
- Plain sweet cookies/biscuits – I have tested this recipe using digestive and granita biscuits. I have also made with gluten-free rice flour cookies. Gluten-free cookies tend to require a little more butter, but this will vary depending on the brand. You can also use Graham crackers, but again, you may need a little more butter.
- Butter – the melted butter combines with the crushed biscuits/cookies to form a crispy crust.
- Whipping cream – Use a whipping cream/heavy cream that has 35% milk fat.
- Cream cheese – use full-fat in block form.
- Peanut butter – I use an all-natural, unsweetened, smooth/creamy variety.
- Light brown sugar – has a slight, caramel flavour.
- Vanilla extract – I use a natural extract. You can also use vanilla bean paste.
Variations:
Decoration – top the pie with fresh berries for serving or drizzle with melted chocolate.
How To Make Peanut Butter Pie:
Please see the recipe card further along in the post for exact quantities of ingredients and the full method.
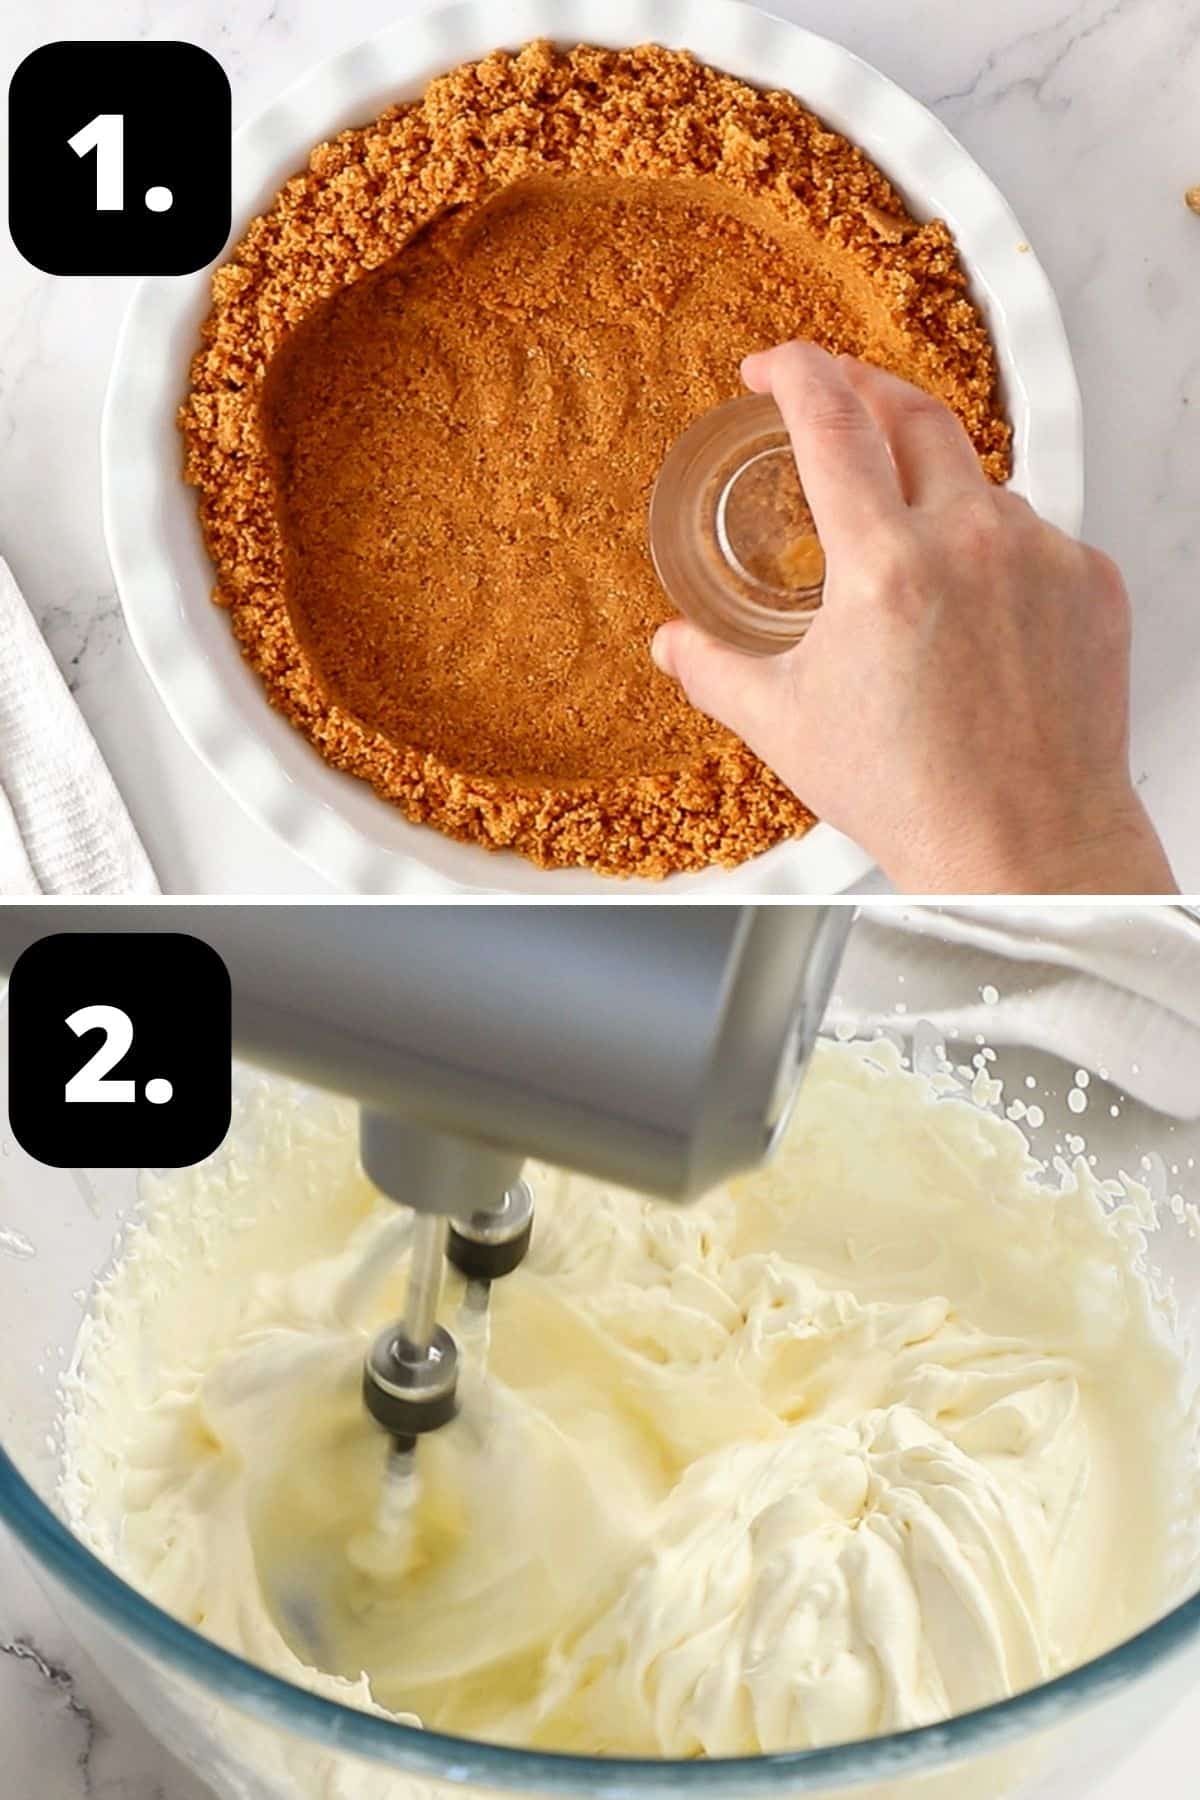
1 – Prepare the biscuit base:
To begin, I make the base. Whiz the biscuits/cookies to fine crumbs in a food processor and then blend with melted butter.
Press the biscuit base into a pie plate and bake for about 8-10 minutes. Set the base aside to cool while you prepare the filling.
2 – Whip the cream:
For the filling, start by whipping up some cream.
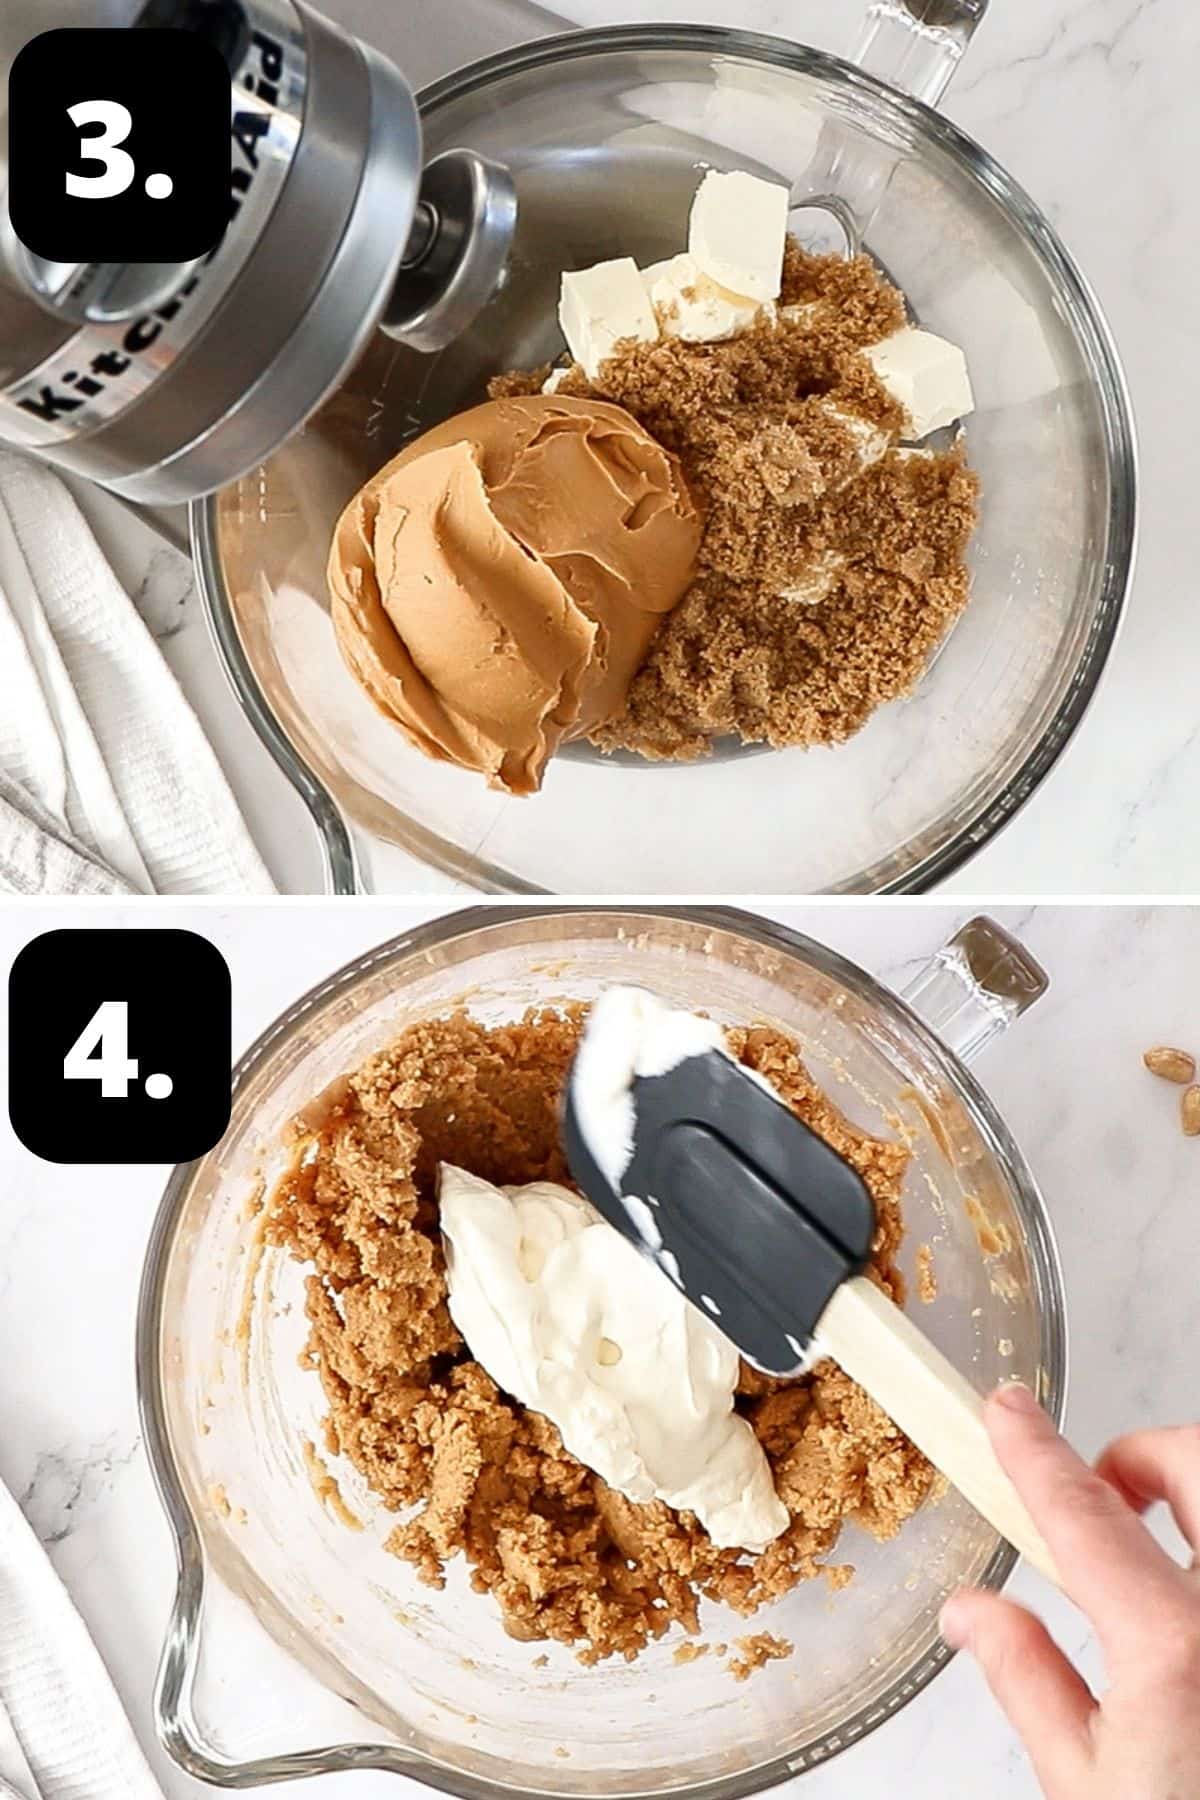
3 – Prepare the peanut butter filling:
Then, in the bowl of a stand mixer, blend cream cheese, peanut butter, brown sugar and vanilla.
4 – Fold through the whipped cream:
Once that is combined, you’ll add in the cream.
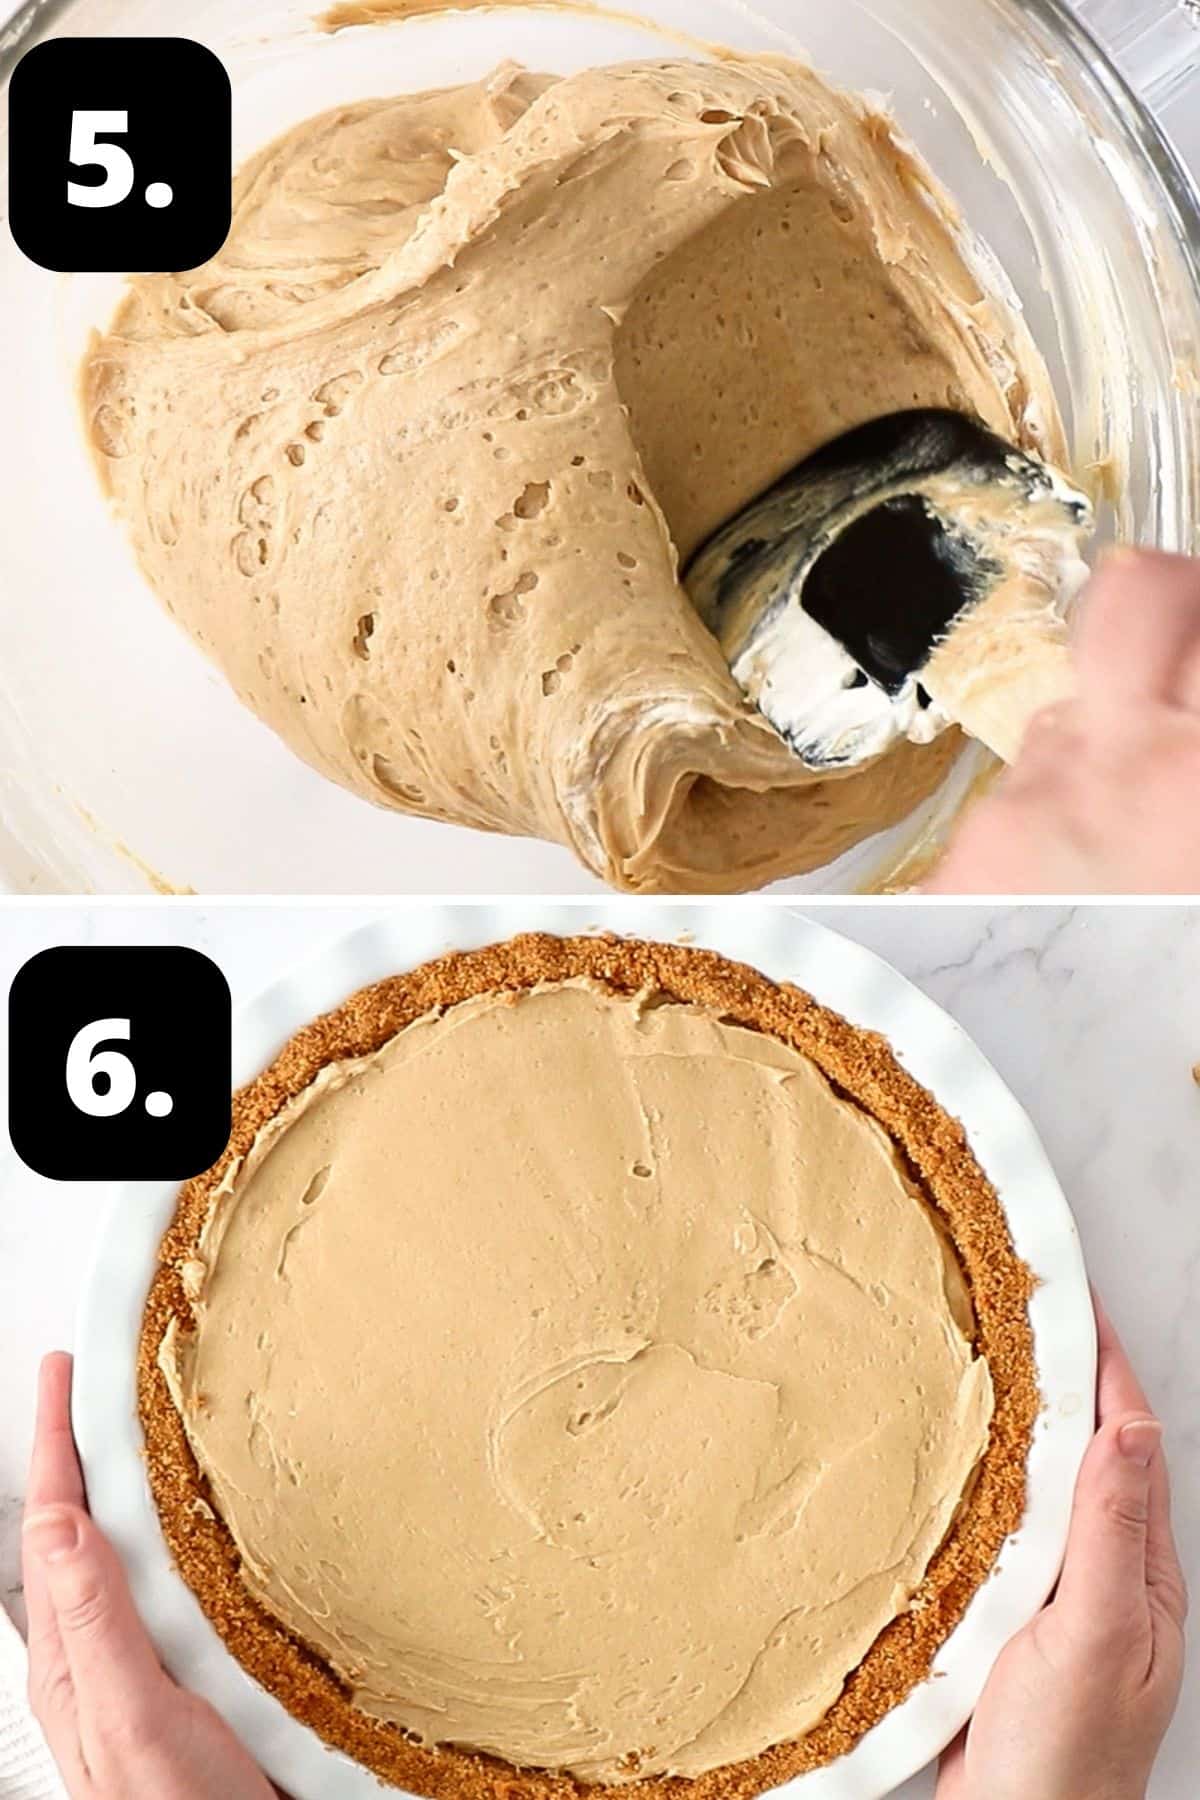
5 – The creamy peanut butter filling:
Fold the whipped cream into the peanut butter mixture.
6 – The filled pie ready for chilling:
Pour the peanut butter mixture onto the biscuit base, smooth the filling and place the pie in the freezer. Leave it in the freezer for about one hour to quickly chill, and then transfer it to the refrigerator.
Decorate, serve and enjoy!
Hint: the key to making a smooth, creamy pie is to have the cream cheese and peanut butter at room temperature. Otherwise, the filling will not be silky smooth.
Tips for Success, Storage and FAQs:
Digestive biscuits or Graham crackers are popular for crusts, but you can use almost any crunchy cookie. You may need to adjust the quantity of butter, as the absorption of all cookies will vary.
You certainly can do that. Just choose gluten-free cookies/biscuits that are plain and crispy.
Yes, you can. However, it is best to add the whipped cream shortly before serving.
Store the Creamy Peanut Butter Pie, covered with cling wrap, in the fridge for up to three days. Try to keep the cling wrap off the top of the pie in case it sticks.
Yes, it can be frozen for up to a month. It needs to be well covered to prevent freezer burn, so wrap first in cling wrap and then cover with aluminium foil.
Top Tip:
This is not a dessert to whip up at the last moment. A little forward thinking is necessary as the dessert needs to be thoroughly chilled before serving.
It is necessary to serve the Peanut Butter Pie whilst it is chilled. The filling will become soft again very quickly if left at room temperature. It still tastes delicious, but it becomes impossible to cut a neat slice.
Serving Suggestions:
You will find there are so many occasions to enjoy this Peanut Butter Pie. Some serving suggestions are:
- Serve at family gatherings or parties with friends; it is always a hit.
- It is a perfect way to finish a luncheon or dinner party.
- As a spectacular dessert on festive occasions such as Easter, Thanksgiving or Christmas.
- It’s a great addition to a dessert buffet, where you can balance flavours and texture with a variety of desserts such as Chocolate Orange Truffles or Almond Flour Cake.
Decadent and rich, you cannot go wrong with this Peanut Butter Pie. Enjoy this delicious crowd-pleasing dessert, and please let me know in the comments below if you try it.
Alex xx
More Delicious Recipes For You To Try:
Stay in touch!
Follow me on Facebook, Pinterest, Flipboard and Instagram and subscribe to my newsletter.
Easy Peanut Butter Pie
Please note:
For accuracy, when weights are provided, we recommend weighing your ingredients. This will produce the best results. All oven temperatures listed are for fan forced.
Ingredients
Pie Crust:
- 250 g (9 oz) plain sweet biscuits/cookies – I use Digestives See Note 1
- 100 g (3.5 oz) unsalted butter – melted
Pie Filling:
- 250 ml (1 cup) thickened/heavy whipping cream See Note 2
- 250 g (9 oz) cream cheese – at room temperature See Note 3
- 315 g (11 oz) peanut butter – I use smooth/creamy
- 155 g (¾ cup) light brown sugar
- 1 ½ teaspoon vanilla extract
- whipped cream/chocolate shavings to serve – optional
Instructions
Pie Crust:
- Preheat the oven to 180 Degrees C (355 F).Place the biscuits/cookies in the bowl of a food processor and pulse until they resemble fine breadcrumbs.Add the melted butter to the biscuit crumbs and process until well combined.
- You will need a 23 cm (9 inch) pie plate. Our pie dish has a depth of about 5 cm (2 inches).Tip the biscuit and butter mixture into the pie plate. Using the back of a dessert spoon, or the base of a flat-bottomed glass, press the mixture over the base and up the side of the pie plate.
- Place your prepared pie crust into the pre-heated oven and bake until golden, about 8-10 minutes.Remove the crust from the oven and set aside to cool while you prepare your filling.
Pie Filling:
- In a medium-sized bowl, using hand-held electric beaters, beat the cream until it holds soft peaks.
- Fit a stand mixer with the whisk attachment or continue with your hand-held electric beaters. Add the cream cheese, peanut butter, brown sugar and vanilla and beat at high speed until the mixture is smooth.
- Gently fold the whipped cream into the peanut butter mixture. Use a large rubber spatula or metal spoon.Start by adding ⅓ of the cream to slacken the peanut butter mixture. Run the spatula, or spoon, around the side of the bowl and then along the base. Fold the mixture over onto itself. Give the bowl a quarter turn and repeat the technique until the cream is folded in. Fold in the remaining ⅔ of the cream, repeating the method for folding, until the mixture is smooth and creamy.
- Fill the pie case with the mixture, and smooth over with a palette knife or spatula.
- Place the pie in the freezer for 1 hour to chill. Do not cover the pie with cling wrap before chilling, or the filling may stick.
- After 1 hour, remove the pie from the freezer, cover with cling wrap and place it in the refrigerator. Keep the pie in the refrigerator until you’re ready to serve. At room temperature, the filling will become very soft and it will be impossible to cut neat, clean slices.
- Prior to serving, top the pie with whipped cream and shaved chocolate if desired. Or, serve cream on the side.
Video
Notes
- Cookies/biscuits: most plain, sweet cookies are fine to use, but you may have to adjust the quantity of butter. Once the cookies and butter have been combined, you are looking for a consistency of wet sand.
- Cream: use thickened/heavy cream that has 35% milk fat.
- Room temperature: ensure your cream cheese and peanut butter are at room temperature, otherwise the filling will not be as smooth.
- Storage: cover with cling wrap and place in the fridge for up to three days. Try to keep the cling wrap off the top of the pie in case it sticks.
- Freezing: you can freeze the Peanut Butter Pie for up to a month. It needs to be well covered to prevent freezer burn, so wrap first in cling wrap and then cover with aluminium foil. Defrost in the fridge.
Nutrition Estimate:
Nutritional Disclaimer:
The nutritional information is an estimate only, and is derived from online calculators. For accurate results, we recommend calculating the nutritional information based on the ingredients and brands you use.
This post was originally published in December 2018. It has been updated with more information. The recipe remains the same.
Freya
This was an absolute dream of a pie, so easy to put together, and I made it in advance, putting the cream on the top on the day. It disappeared almost straight away!
Alexandra
Hi Freya, thank you for your fantastic feedback on the Peanut Butter Pie. I am delighted that you enjoyed it. 🙂
Anna de Nord
This is absolutely gorgeous, and so simple to make!
Alexandra
Thank you so much, Anna!
W Gunning
So delicious.
Alexandra
Thank you so much 🙂