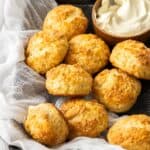
Buttermilk Scones
These Buttermilk Scones are my Mum's recipe, and will be a great addition to your baking repertoire. They are so quickly and easily made that you can have a batch on the table within 30 minutes. Made with butter and buttermilk, they are crisp on the outside, deliciously tender and flaky on the inside, and sheer perfection when eaten fresh from the oven. Although scones are traditionally served with jam and cream for morning or afternoon tea, they are so good I find they are also ideal for breakfast, brunch or a simple dessert.
Servings 8 scones
Calories 178kcal
Ingredients
For the Buttermilk Scones:
- 225 g plain/all-purpose flour + more for rolling out as needed See Note 1
- 2 teaspoon baking powder
- ¼ teaspoon baking/bi-carb soda
- ¼ teaspoon sea salt
- 3 teaspoon caster/superfine sugar
- 50 g unsalted butter – frozen
- 220 ml buttermilk – kept chilled
For the Topping:
- 1 tablespoon buttermilk See Note 2
- 3 teaspoon demerara/turbinado sugar
Instructions
- Line a baking tray with non-stick baking paper.Preheat your oven to 220 degrees C. (430 F)
- To a medium size bowl, add the flour, baking powder, baking soda, salt, and sugar. Whisk ingredients well to combine.
- Using a box grater, grate the frozen butter into the flour mixture.Use a fork to toss the flour to combine the butter - you still want to be able to see the butter (makes for flaky scones!), this is just to avoid it clumping.
- Make a well in the centre and add the buttermilk. Use a flat bladed knife and quickly stir to combine the ingredients. The dough should be slightly sticky and soft. Do not over mix.
- Turn out the dough onto a lightly floured surface. Gently bring the mix together.Use your fingertips to gently pat out the dough to a round, about 3 cm (1 ¼ inches) deep. Use a floured 5 cm round cutter to cut out 8 circles, re-shaping the dough as necessary. Press the cutter straight down - do not twist it.
- Place the scones onto the baking tray.Lightly brush the tops of the scones with buttermilk and sprinkle with demerara sugar.Place the tray into the oven and bake for 13-15 minutes, or until a deep golden.
- Enjoy while still warm or place the scones on a cooling rack. The Buttermilk Scones are best the day they are made.We recommend breaking the scones open with your hands instead of cutting in half with a knife as this can compress the scone and make them less fluffy.
Notes
- Flour: if you prefer, you can also use self-raising flour. Omit the baking powder, but still add the baking soda.
- Tablespoon: we use a standard Australian tablespoon which is 20 ml (4 teaspoons). For readers located elsewhere in the world, please use 1 tablespoon + 1 tsp for each listed tablespoon.
- Gluten-free: we have successfully made this recipe using a good quality gluten-free flour containing xanthan gum. The hydration level is different, and an extra 40 ml of buttermilk was necessary with the brand of flour we used. The scones do not rise as much/are flatter, but they still taste delicious, and are a fantastic gluten-free option.
- Storage: although scones are at their best when eaten shortly after baking, you can store them on a plate covered with cling wrap or in an airtight container for up to 3 days. They respond well to being reheated – see below. Store them at room temperature if possible - the fridge tends to make them hard.
- Freezing: when they are completely cool, place them in an airtight container, or wrapped thoroughly to prevent freezer burn, clearly labelled with their name and date, and freeze for up to 3 months. Reheat as below.
- Reheating: the best way is to place them on a baking tray or small ovenproof platter, cover loosely with foil and reheat in a 180 degrees C (355 F) oven for about 8 minutes. Uncover for the last 2 minutes to re-crisp the exterior a little.
Nutrition
Calories: 178kcal | Carbohydrates: 26g | Protein: 4g | Fat: 6g | Saturated Fat: 4g | Polyunsaturated Fat: 0.4g | Monounsaturated Fat: 2g | Trans Fat: 0.2g | Cholesterol: 17mg | Sodium: 140mg | Potassium: 173mg | Fiber: 1g | Sugar: 5g | Calcium: 84mg | Iron: 1mg
