Pickled Turnips
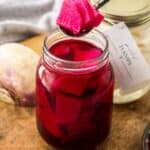
These Pickled Turnips are so delicious. The easy, quick pickling method transforms the humble turnip into a crunchy, tangy, slightly salty condiment that is delicious with so many things! They have the typical vinegary tang of pickles along with a gentle, naturally occurring heat from the turnip. If you taste a raw turnip, you will notice that it does have a spicy bite. By adding some sliced beetroot to the jar of sliced turnips, the beetroot gradually transfers its pink hue to the turnips.
Servings 2 500ml (17 fluid oz) Jars
Calories 115kcal
Equipment
- 2 500ml (17 fluid oz) Jars
Ingredients
- 400 g (14 oz) turnips - prepared weight, approx 2 large turnips See Note 1
- 1 small beetroot See Note 2
- 2 cloves garlic - peeled and smashed sightly See Note 3
- 1 cup (250 ml) water See Note 4
- 1 cup (250 ml) white vinegar See Note 5
- 5 teaspoon sea salt See Note 6
- 2 teaspoon sugar
Instructions
To Sterilise your Jars:
- Sterilise the jar or jars you'll be using to store the pickles. Choose glass jars with an airtight, metal lid and ensure they have been washed by hand in hot soapy water then rinsed well. Check that the metal lids do not have rubber inserts – if they do, allow them to air dry, instead of placing in the oven.Preheat the oven to 130 Degrees C (270 F) and place the jars in the oven for 15-20 minutes. Keep the jars warm.
For the Pickled Turnips:
- Peel your turnips and beetroot, and trim the top and base.
- Cut the turnips and beetroot in half and slice into half-moons, about 0.5 cm thick. Cut the half-moons in half again.
- Add the ingredients for the pickle brine to a small non-reactive saucepan. Stir over medium heat to dissolve sugar, then bring to the boil. Remove from the heat. (See Note 7)
- To your sterilised jars, add the turnips. Add the beetroot to both or just the one jar if you'd like a colour contrast for the pickles.
- Divide the pickling liquid between the two jars and then seal the jars. Allow the jars to cool on your kitchen bench before refrigerating.
- Although you can eat once cool, the pickles are best if you let them sit for 24-48 hours before consuming so the flavours and colour can develop.
Notes
- Turnips: my preference is for younger, smaller turnips as they have a sweeter flavour. The older, large turnips will be stronger and spicier with a texture that may be spongy or woody.
- Beetroot: depending on the size of the beetroot, you may only need to use half.
- Garlic: the garlic cloves add flavour to the pickling brine - you need to use fresh garlic cloves, and not garlic powder or jarred.
- Water: ensure you use filtered water, as water that contains chlorine can alter the taste of the pickles.
- Vinegar: I have used white vinegar that is 5% in acidity. You can also use apple cider or white wine vinegar – just ensure the acidity level is 5%.
- Coarse sea salt: ensure you use cooking salt or coarse sea salt. Regular table salt may contain anti-caking agents and is much stronger.
- Non-reactive saucepans: are those which are ceramic, stainless steel, glass or enamelled cookware. Copper, iron and aluminium pans are reactive. Acidic foods, such as vinegar or lemons, may take on a metallic taste and discolour if cooked in such pans.
- Storage: once the jars have cooled, store the pickles in the fridge for up to four weeks. This is a quick pickle recipe not designed for long term canning.
- Nutritional information: is based on one entire jar, and includes the pickling liquid.
Nutrition
Calories: 115kcal | Carbohydrates: 21g | Protein: 3g | Fat: 0.3g | Saturated Fat: 0.03g | Polyunsaturated Fat: 0.1g | Monounsaturated Fat: 0.02g | Sodium: 5986mg | Potassium: 520mg | Fiber: 5g | Sugar: 14g | Calcium: 86mg | Iron: 1mg