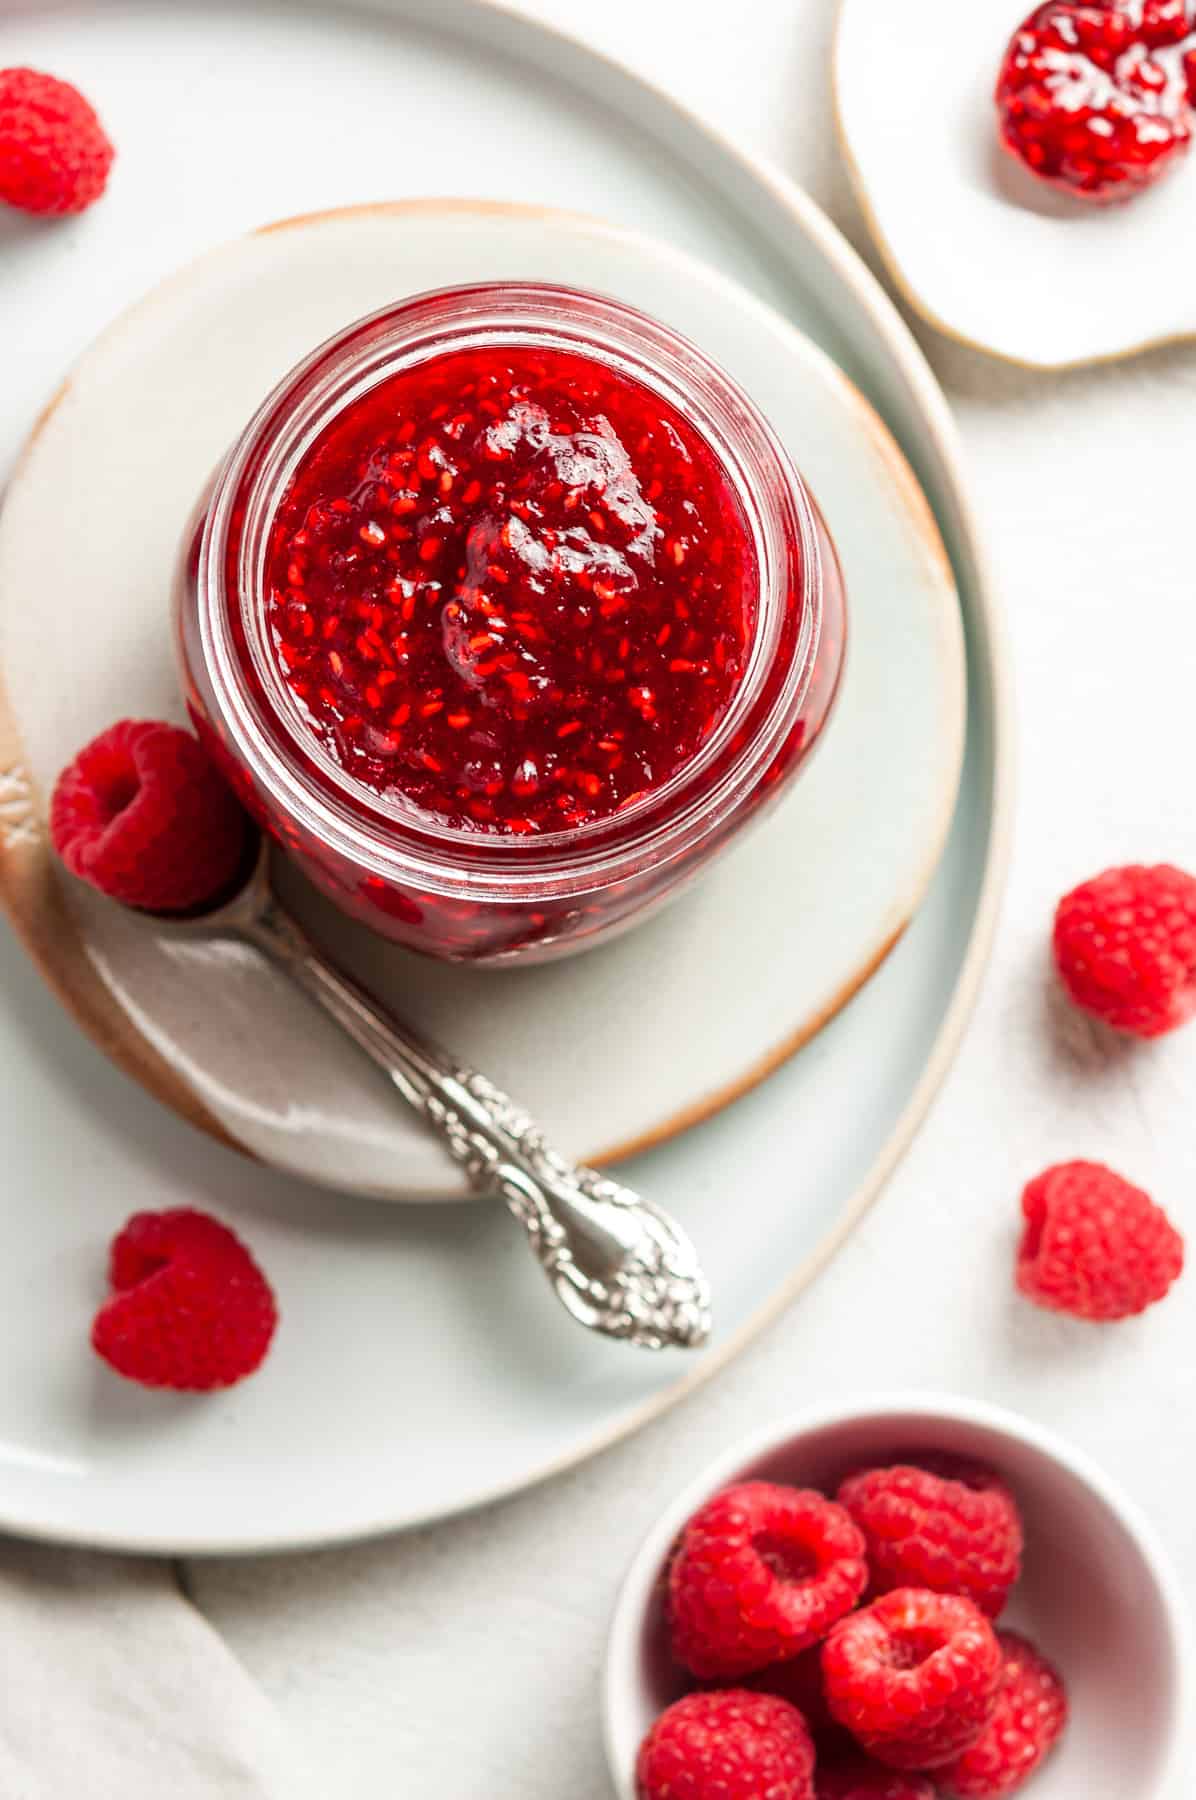
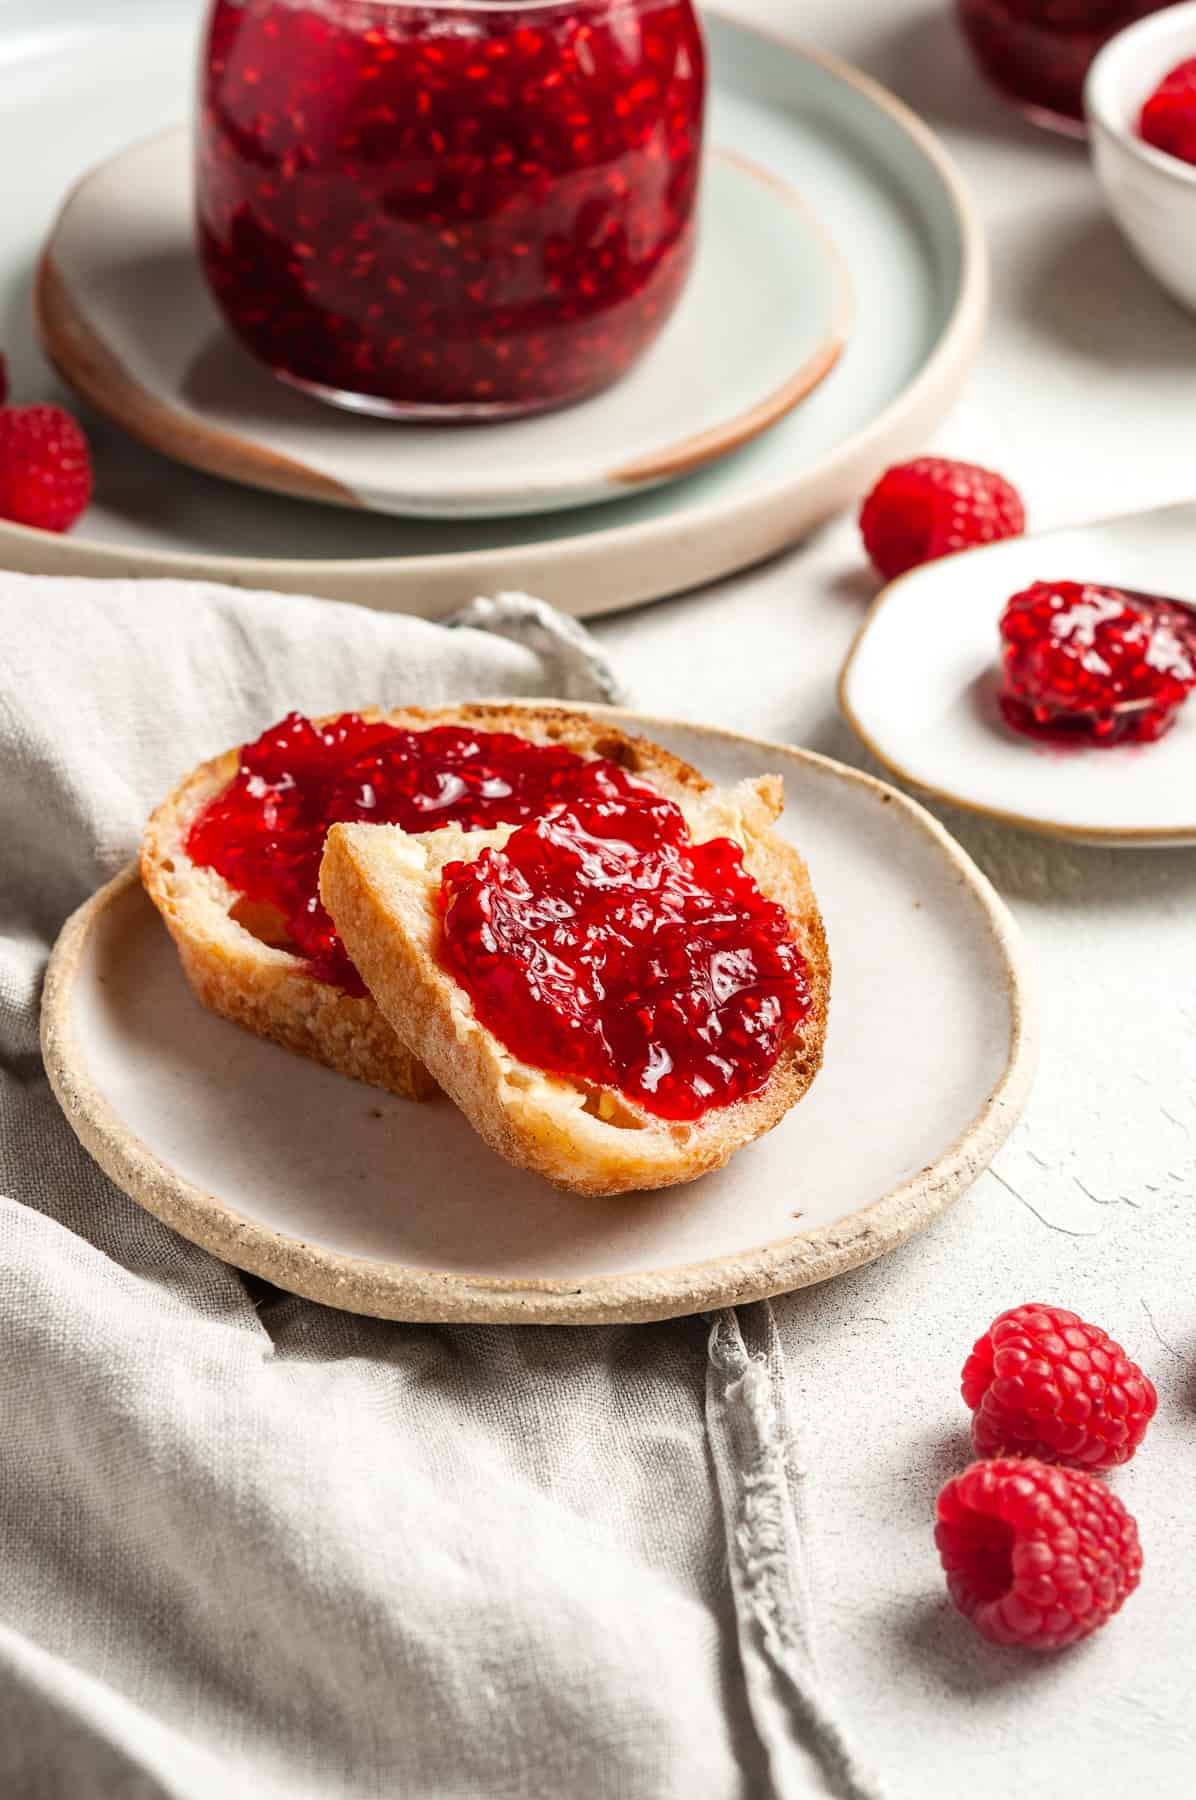
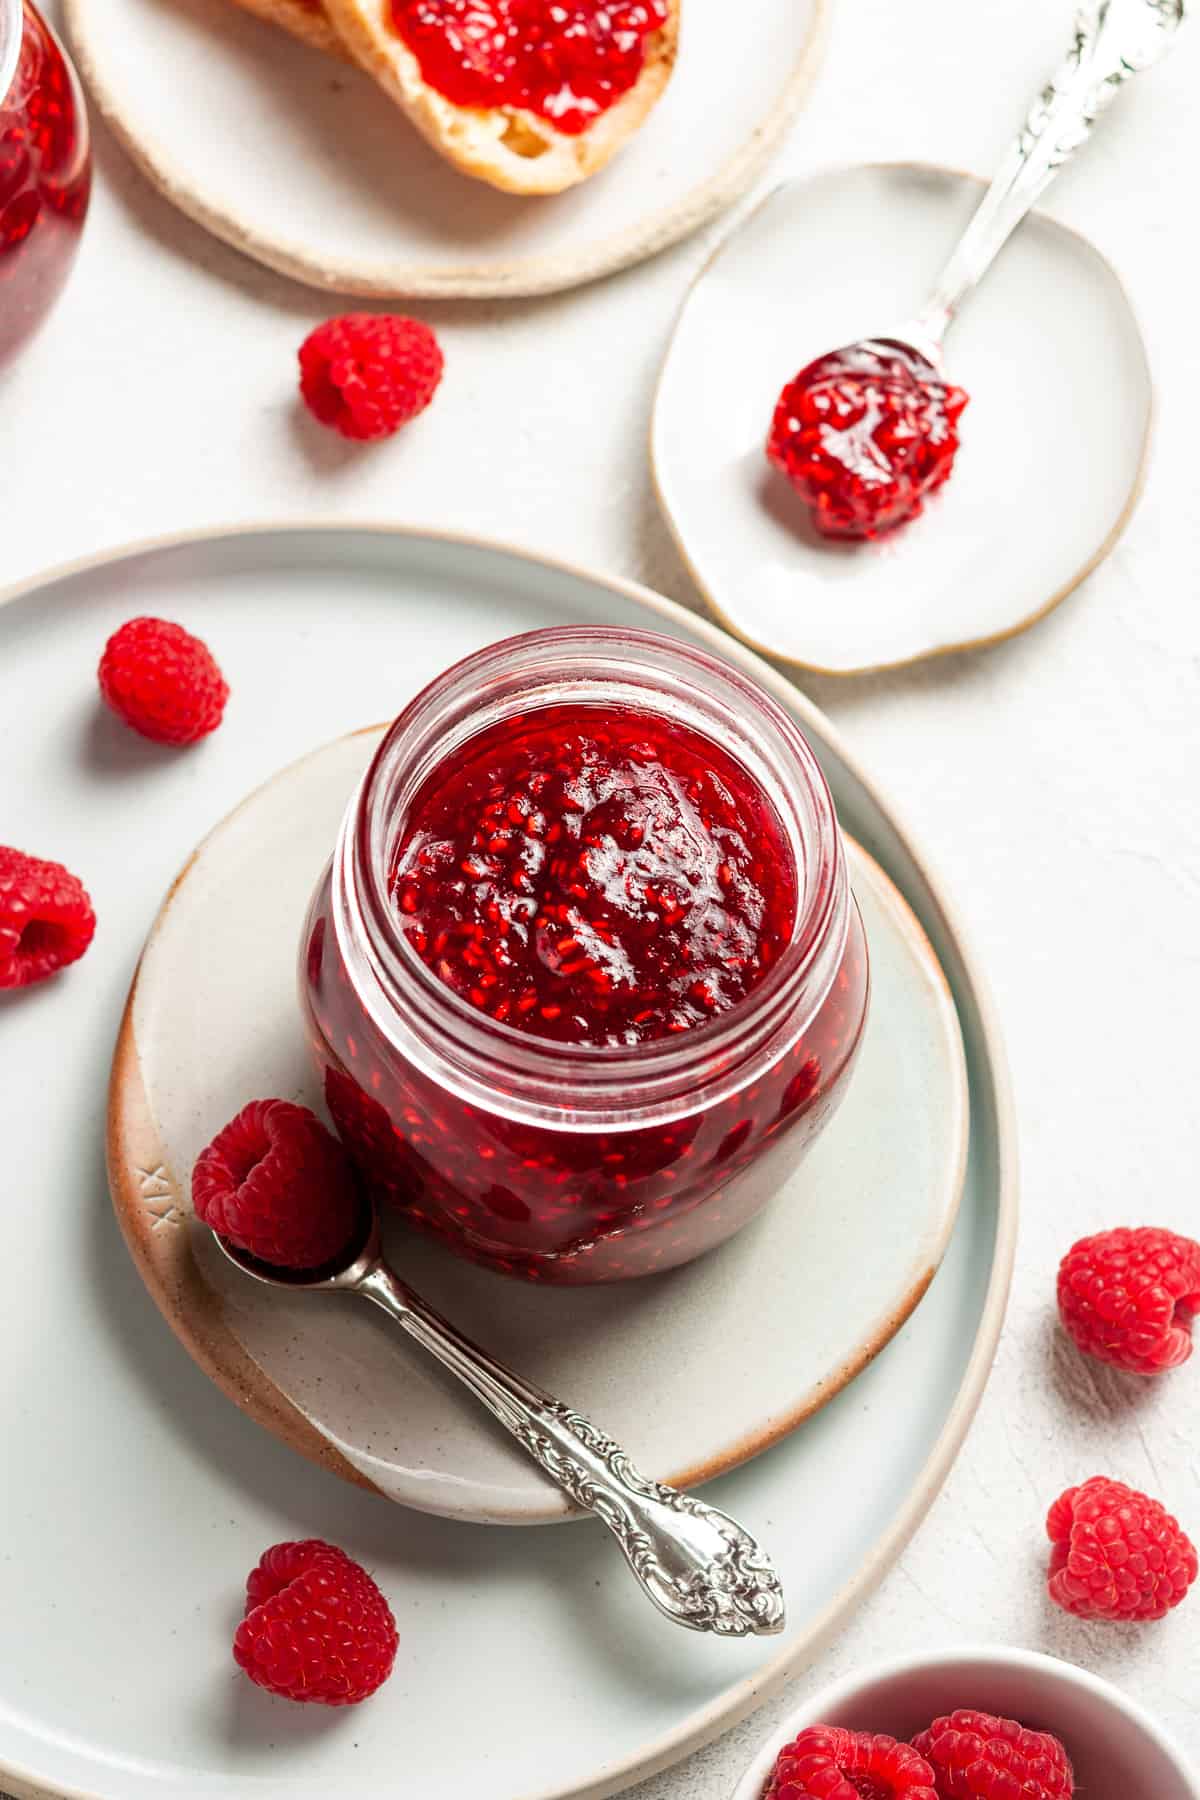
You will love this classic recipe for Raspberry Jam, made with ripe, aromatic berries at the height of their season. The vibrant raspberry flavour is captured in the jam which is a perennial favourite. This is the ultimate way to preserve these beautiful berries to enjoy throughout the coming months, and it truly is so easy.
Jump to:
Why we love this recipe:
My simple, traditional recipe contains just three ingredients; raspberries, sugar and lemon. It is not necessary to add pectin to get the jam to set. This is a recipe that has been made by generations in our family.
As well, by making a small batch, the boiling time is short and the fresh vibrant flavour is retained.
You may feel that jam is difficult to make. Let me assure you that it is not. If you have not previously made jam, this is a great one to start with. I will show you how to do it with step-by-step instructions. You will be surprised to discover how quick and easy it is to make your own Raspberry Jam. Plus, when you finish and see your own produce lined up, you will know that it was time well spent.
You’ll love this recipe because:
- Jam making is a great way to preserve some of nature’s seasonal bounty to enjoy throughout the cooler months ahead – if it lasts that long.
- Homemade jam is infinitely superior to shop-bought. There are no unwelcome additives, artificial preservatives or thickeners that you may find in a commercially prepared Raspberry Jam. For me, one of the most important parts of home cooking is the knowledge that I control the quality of the ingredients.
- You can use this Raspberry Jam in so many ways. Spread it on toast, serve with scones and cream (delicious!), make mini tarts, fill sponge cakes or drizzle over our No-Churn Vanilla Ice Cream. You are only limited by your imagination.
Ingredients in this recipe:
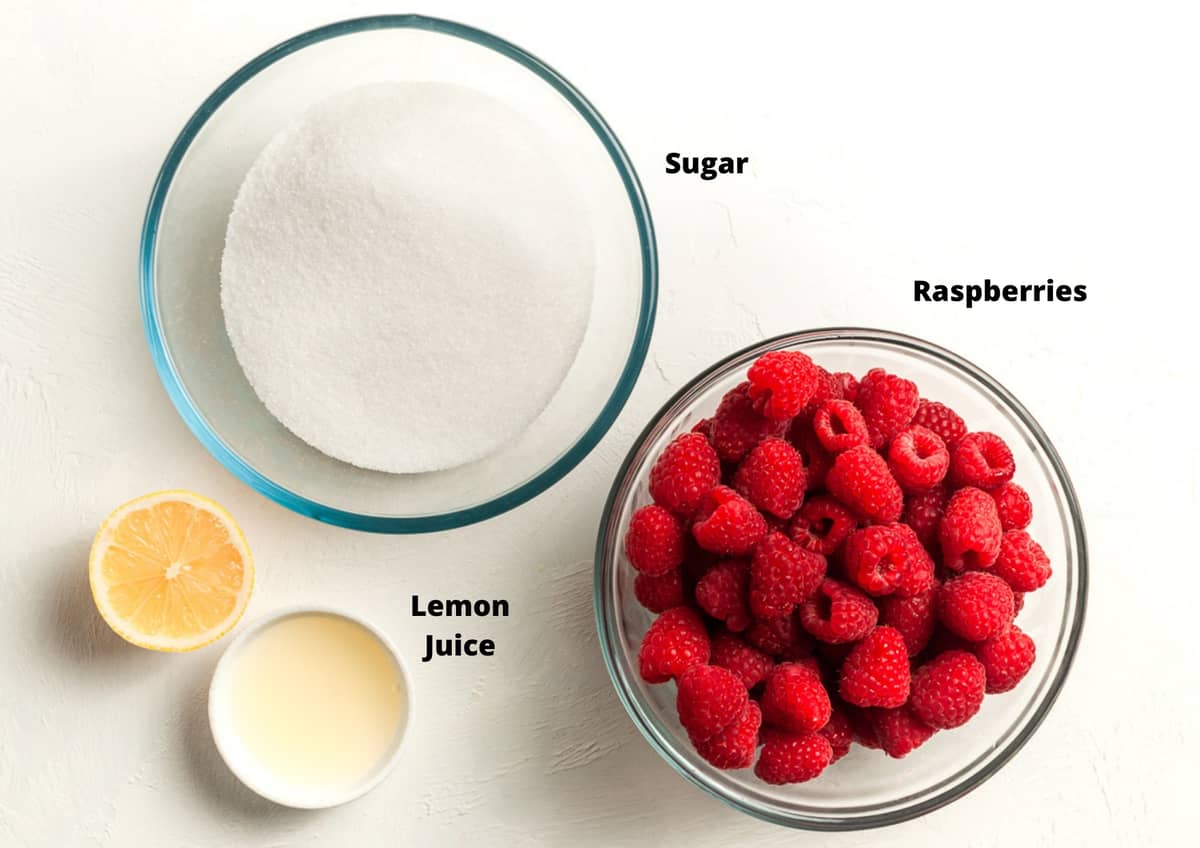
Please see the recipe card further along in the post for exact quantities of ingredients and the full method.
Raspberries – use fresh berries in good condition, ideally with some slightly unripe berries as they will contain more pectin.
Sugar – regular granulated sugar is best.
Lemon juice – use freshly squeezed lemon juice. The juice is vital, it aids in the setting of the jam.
Step by Step instructions:
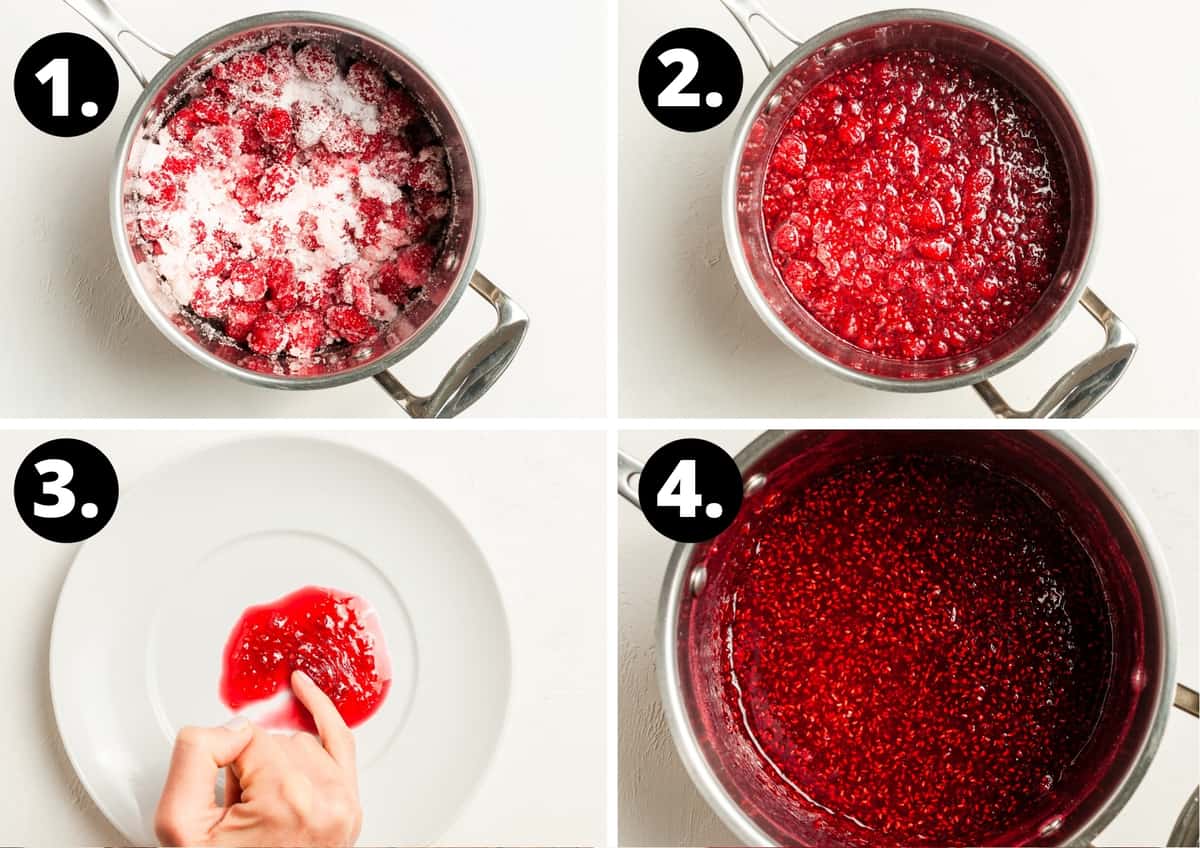
To begin, place two small saucers or plates in the freezer. You will use these to test when the jam is set.
Sterilise the jars by heating them in the oven. Full directions are in the recipe below.
- Wash and thoroughly dry the raspberries. Add the raspberries, sugar and lemon juice to a large saucepan and mix well with a wooden spoon.
- Turn the heat on low, stir until the sugar dissolves and then increase the heat to a rolling boil. Boil for 10 minutes stirring frequently. Turn off the heat and spoon a little of the jam onto a chilled saucer.
- Let it stand for 30 seconds to cool, then run your finger through it. If it wrinkles, it is ready. If it is still quite liquid, put it back on the heat and boil for a further 1-2 minutes, and retest.
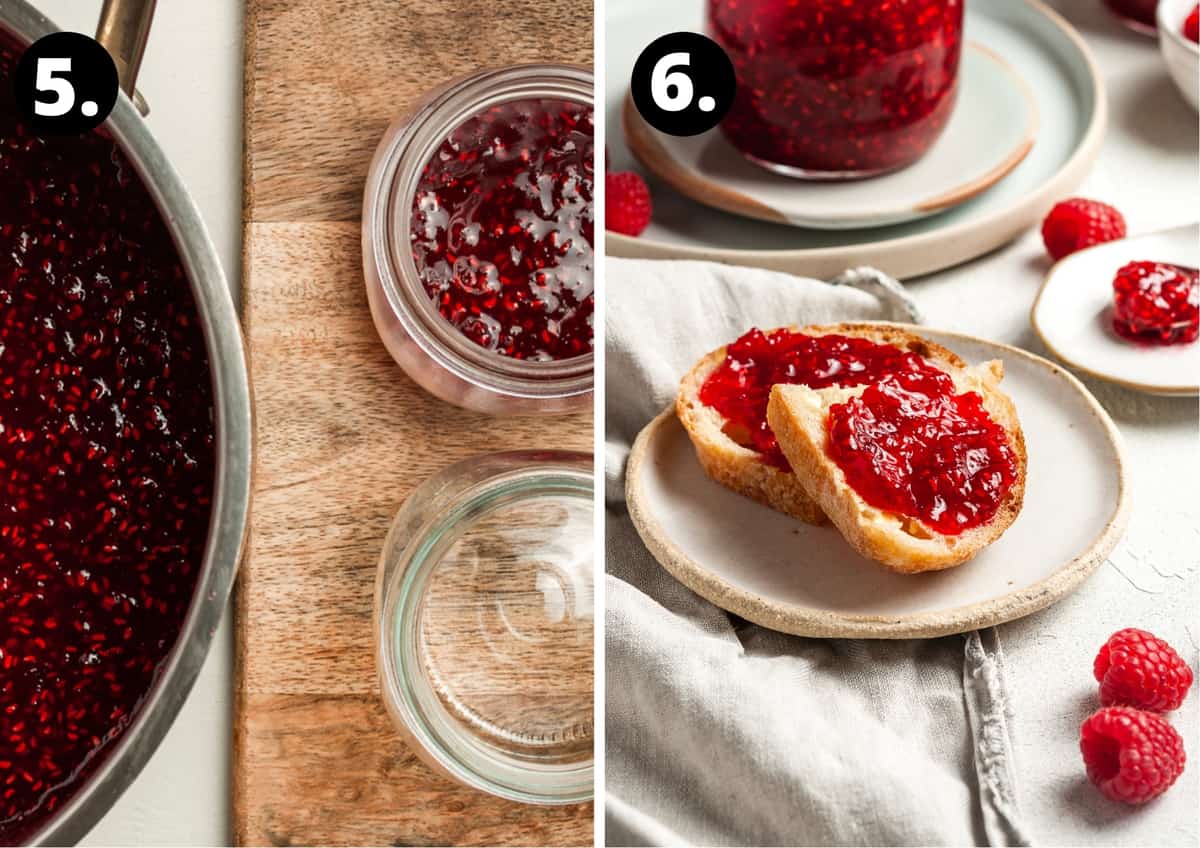
- Allow the Raspberry Jam to sit for 10 minutes before carefully ladling into jars. This helps the chunks of fruit to disperse evenly throughout the jam.
- Ladle the hot jam into jars and seal immediately.
- Enjoy your delicious jam!
Tips for success and FAQs:
When selecting fruit, ensure that the raspberries are at their peak of ripeness. Do not use berries that are over-ripe, soft or bruised. They may cause the jam to spoil. Good quality fruit is essential to obtain the best flavour. However, it is an advantage to have some which are slightly under-ripe as they will contain more pectin and acid, both of which assist with setting the jam.
When making your own preserves, always ensure you are sterilising the jars you will store them in. This is very simple to do:
- Choose glass jars with an airtight, metal lid and ensure they have been washed in the dishwasher or by hand in hot soapy water then rinsed well.
- Preheat the oven to 130 Degrees C (270 F) and leave the jars for 15-20 minutes.
You will not need any special equipment to make this recipe. You need a large, wide saucepan. The large surface area allows faster water evaporation, giving the jam a concentrated flavour. Without a large saucepan, there is the risk of it boiling over. Avoid aluminium, copper or iron pans; the acid in the fruit may react with the pan, giving the jam a metallic taste. As well, I use a long-handled wooden spoon to keep my hand away from the bubbling jam.
If you follow the recipe instructions precisely and your jars are thoroughly sterilised, the Raspberry Jam should be shelf-stable for a year, possibly longer. When you open a jar, store it in the fridge.
Conventional jam requires a lot of sugar. When you see it weighed out it is slightly alarming but please don’t reduce the amount of sugar. The sugar not only sweetens the fruit but it helps the jam to set and acts as a preservative. If you reduce the sugar, in short, your jam may not be shelf-stable.
Lemon plays an important role in jam-making. It is high in pectin. As raspberries are low in pectin the lemon juice provides the necessary boost to aid in setting the jam. Further, the acidity of the lemon helps balance the sweetness.
Pectin is a naturally occurring starch that is found in varying degrees in fruits and vegetables. It is what makes jams and jellies firm when they are cool. When combined with acid and sugar, and cooked to a high temperature, it forms a gel. In this recipe, I add a small amount of lemon juice to boost the pectin content.
You can use recycled glass jars with metal lids that are in good condition or purchase new ones. Jars which have contained pickles are generally not suitable as they often hold the aroma. Save these for your own chutneys or pickles.
Yes, you can! Follow the recipe as written.
More delicious recipes for you to try:
We love to make the most of seasonal produce. Making jams, preserves, pickles and condiments is a great way to enjoy them year-round. Here are some more of our favourite recipes:
- Apricot Jam
- Preserved Chillies in Oil
- Lemon Marmalade
- Sweet Chilli Sauce
- Blueberry Jam
- Grapefruit Marmalade
- Easy Plum Jam
- Strawberry Jam
Enjoy this delicious family recipe for Raspberry Jam. I would love to hear from you in the comments below when you have given it a try!
Alex xx
Raspberry Jam
Recipe Measurements:
For accuracy, when weights are provided, we recommend weighing your ingredients. This will produce the best results.
Ingredients
- 500 g (17.5 oz) raspberries See Note 1
- 450 g (2 cups) sugar See Note 2
- 2 tablespoon (40 ml) lemon juice – freshly squeezed See Notes 3 and 4
Instructions
To Sterilise the Jars:
- Choose glass jars with an airtight, metal lid and ensure they have been washed in the dishwasher or by hand in hot soapy water then rinsed well.Preheat the oven to 130 C (265 F). Place upright jars and lids on a baking tray. Heat in the oven for at least 20 minutes, then remove and immediately fill with jam. See Note 5.
To make the Raspberry Jam:
- Place two small saucers or plates in the freezer. See Note 6.
- Gently wash the raspberries in a colander. Turn them stem side down onto some paper towel to allow them to dry. Add the raspberries, sugar and lemon juice to a large saucepan and mix well with a long-handled wooden spoon.
- Turn the heat on low and stir until the sugar dissolves. (This can take 5-8 minutes)If sugar crystals get caught on the side of the saucepan, scrape down with a spatula.
- Once the sugar is dissolved, increase the heat to a rolling boil.Boil for 5 minutes, stirring frequently. After 5 minutes, begin to check for the setting point. Your jam will likely take between 5-8 minutes, but it will depend on the width of your saucepan and how rapidly the jam is boiling.
- Turn off heat and spoon a little of the jam onto one of your chilled saucers.Let it stand for 30 seconds to cool, and then run your finger through it. If it wrinkles, even slightly, it is ready. If it is still quite liquid, put it back on the heat and boil for a further 1-2 minutes, and retest until ready. Alternatively, you could use a candy thermometer. Setting point is reached when the thermometer reaches 105 Degrees C (220 F).
- Skim any scum off the top of the jam with a spoon.
- Allow the jam to sit for 5 minutes to allow the fruit to disperse evenly.
- Carefully ladle your jam into your hot jars and put the lids on immediately. Allow the jam to cool completely. Wipe the jars to remove any spills, and store the jam in a cool, dark place.
Notes
- Ensure your fruit is freshly picked and of good quality. Avoid fruit that is bruised or over-ripe. The raspberries contain pectin which aids in the jam setting. If your fruit is older, it will contain less pectin.
- Do not reduce the amount of sugar. Whilst the sugar sweetens the fruit it also acts as a preservative and helps the jam to set. If you reduce the sugar, your jam may not be shelf-stable and may become mouldy.
- The Australian tablespoon is 20ml or 4 teaspoons. In many other countries, the tablespoon is 15ml or 3 teaspoons. Please adjust the measurement if necessary.
- Lemon juice not only balances the sweetness of the sugar, but it also contains acid and pectin which help to set the jam.
- Properly sterilising your jars is an essential process to remove bacteria that could cause your preserves to spoil. Wash the jars and lids either in the dishwasher or by hand in hot soapy water, and rinse well. Do not dry them with a tea towel. Place jars and lids on a baking tray. If you are using Kilner jars with rubber seals, be sure to remove the seals before placing the jars in the oven. The dry heat of the oven would damage the seals. Boil the seals separately in a saucepan for about 10 minutes. Heat the jars in the oven for at least 20 minutes. When your preserves are ready to bottle, use thick oven mitts or jar tongs to remove the jars. Do not place them on a cold surface as they may shatter. I place mine on a wooden chopping board which I cover with a tea towel. Always sterilise a few more jars than you think you will need. It is better to have too many jars than not enough.
- The chilled plates are used to quickly cool the jam when testing the setting point.
- Always choose a large, wide saucepan that has enough height to enable the jam to boil vigorously. More surface area means the liquid will evaporate faster; having sufficient height means you can boil the jam at a higher heat and maintain the fresh flavour of the raspberries. Avoid aluminium, copper or iron pans; the acid in the fruit may react with the pan, giving the jam a metallic taste.
- Do not use a metal spoon, it will become very hot. A long-handled wooden spoon is important to avoid being burnt by a splash from boiling jam.
- My jam reached its setting point about 5 minutes after it began to boil rapidly. Boiling time will vary depending on the size of your saucepan and the heat that you apply.
- If you prefer smooth jam, use an immersion blender carefully once you have taken the raspberry jam off the heat.
- If your finished jam has not set as much as you would like, don’t worry, it will still be delicious stirred into some plain yoghurt or served over our No-churn Vanilla Ice Cream. Or, if it is slightly over-set and is very firm, it will be a lovely accompaniment on a cheese board.
- Please note, the nutritional information is based on one whole jar. The nutritional information is an estimate only.
Nutrition Estimate:
Nutritional Disclaimer:
The nutritional information is an estimate only, and is derived from online calculators. For accurate results, we recommend calculating the nutritional information based on the ingredients and brands you use.







Jamie
Why is ordinary sugar recommended not jam sugar with pectin? Thanks
Alexandra Cook
Hi Jamie,
I follow the recipes handed down from my family (some as far back as my great great grandmother), and they only ever used ordinary sugar.
Many fruits are naturally high in pectin, and with the addition of fresh lemon juice, I have found that it isn’t necessary to use jam sugar.
For me personally, I prefer to make jam not using any additional pectin.
Raspberries are somewhere in the middle when it comes to pectin levels, but if you try this recipe, you’ll find it sets beautifully as written.
Hope that helps, and please let me know if you give the recipe a try 🙂 Thanks, Alex
Barb R
Since the recipe only makes three jars, is it OK to double or triple it or is it better to make one batch of jam at a time?
Alexandra Cook
Hi Barb,
Thanks for your question! In some cases, I recommend making one batch at a time, but this is a smaller batch of jam, so it’s fine to double.
You may just find it takes a few minutes extra to cook.
Hope you’ll enjoy the recipe! Alex xo
Ann
Made my first ever raspberry jam using this recipe. Worked really well. Thank you.
Alexandra Cook
Hi Ann,
I am so pleased that your first ever Raspberry Jam has worked well for you. Thank you for taking the time to let me know. 🙂
Meredith
Thank you! We have raspberries in our backyard and after picking and freezing 4 gallons, I decided we needed some jam. I have been unconfident with this before, but followed your recipe to a “T” and it is perfect! My son is enjoying a PBJ with raspberry jam as we speak.
Alexandra Cook
Hi Meredith,
Thanks so much for trying this recipe 🙂 I am happy you enjoyed it!
I appreciate you taking the time to let me know. Alex xo
Lori Oney
Loved the recipe…used exact measurements and fresh from the garden red raspberries picked that day.
Alexandra Cook
Thanks, Lori! 🙂
Fresh from the garden sounds just perfect to me. Enjoy your jam! Alex xo
Peggy
Made for my 93 year old father. He loves it! Thank you for sweetening his day.
Alexandra Cook
That is so lovely to hear, Peggy! Thank you so much for your comment. 🙂
Sheryl Scott
Are you able to freeze this jam? how long does it stay good for?
Alexandra Cook
Hi Sheryl,
If you follow the recipe instructions precisely and your jars are thoroughly sterilised, the Raspberry Jam will be shelf-stable for a year. When you open a jar, store it in the fridge.
Jam can be frozen for about six months, and it is important to leave a gap at the top of the jar as it will expand when freezing.
Hope that helps! Thanks so much, Alex xo
LeOla
Follow this recipe everytime. Perfection.
Alexandra Cook
Thank you so much! I appreciate your comment, and am so thrilled you enjoy the recipe 🙂
Brian
I followed this as best I could, but my jam came out very sticky and tacky. It is a bit like a jolly rancher left in the sun all day.
Any ideas what I did wrong? Too hot? Too long ln boil? Not long enough?
Thanks!
Alexandra Cook
Hi Brian,
Thanks for your comment!
Did you alter any of the quantities at all?
If not, my best guess would be that the jam may have been overcooked. This can occur from taking the cooking too far, or also from not properly dissolving the sugar in the first place.
This article has a few ideas for salvaging sticky jam – assuming it doesn’t taste scorched or burnt at all.
I’ll add the link here: Jam Article
Did you use an immersion blender at all? If not, that might be worth a try to produce a smoother jam.
Hope this helps a bit, and please reach out with any questions! Thanks, Alex
Angela
Thank you!! Love this ❤️!
Alexandra Cook
Thank you, Angela! 🙂
Mare
Looks wonderful! Is it thick enough without added pectin (I realize pectin is in lemons) to use in a raspberry crumble bar recipe instead of *Hero (for example)
Thanks!
Alexandra Cook
Hi Mare!
This jam achieves a lovely set – not as firm as storebought, but certainly firm enough to use in a bar recipe. (I use this recipe in our Jam Oatmeal Bars!) I’ve never found the need to add additional pectin to jam 🙂
Hope you’ll give it a try! Thanks, Alex
sarah
I love this raspberry jam. Will only make my own from now on.
Alexandra Cook
Thank you, Sarah! I am so pleased to hear you enjoyed your jam 🙂
Josette
You say not to use aluminum pans. I have none stick or should I use a Dutch oven? Not sure what to do.
Alexandra Cook
Hi Josette,
Yes, it is important to use a non-reactive pan when making jam. If your Dutch oven has an enamel coating, that will be fine to use.
Happy jam making! Thanks, Alex
Nora
Love this raspberry jam recipe! Makes a great a gift for family and friends.
Alexandra
Hi Nora,
Thanks for the comment! Happy to hear you enjoyed the jam 🙂 Alex
Marcellina
This is the perfect ratio of fruit to jam! The raspberry flavor is bright and tangy just how I like it. All the tips for getting the jam to set are so helpful! Thanks!
Alexandra
Hi Marcellina!
Thank you for your lovely comment.
I am so pleased you are enjoying your jam 🙂
Best wishes, Alex
Andréa Janssen
I had some frozen raspberries in my freezer and I made this jam recipe. It turned out to be so delicious! Certainly going to prepare it more often.
Alexandra
Hi Andréa!
Thanks for your great feedback on the raspberry jam. So happy to hear you enjoyed it!
Julia
Gorgeous recipe – I made a double batch and gave to family members for Christmas gifts. They went down a treat!
Alexandra
Hi Julia,
What a lovely gift the jam would make! Thanks so much for sharing 🙂
Rb
2 cups of sugar is 400 grams? Not 450.
Alexandra
Hi Rb,
Our Australian cups are a slightly bigger size – we find that 1 cup of sugar = 225 g.
You’ll need 450 g of sugar for this recipe, and although we provide cup measurements, we always recommend weighing ingredients for accuracy.
Hope that helps! Thanks, Alex