


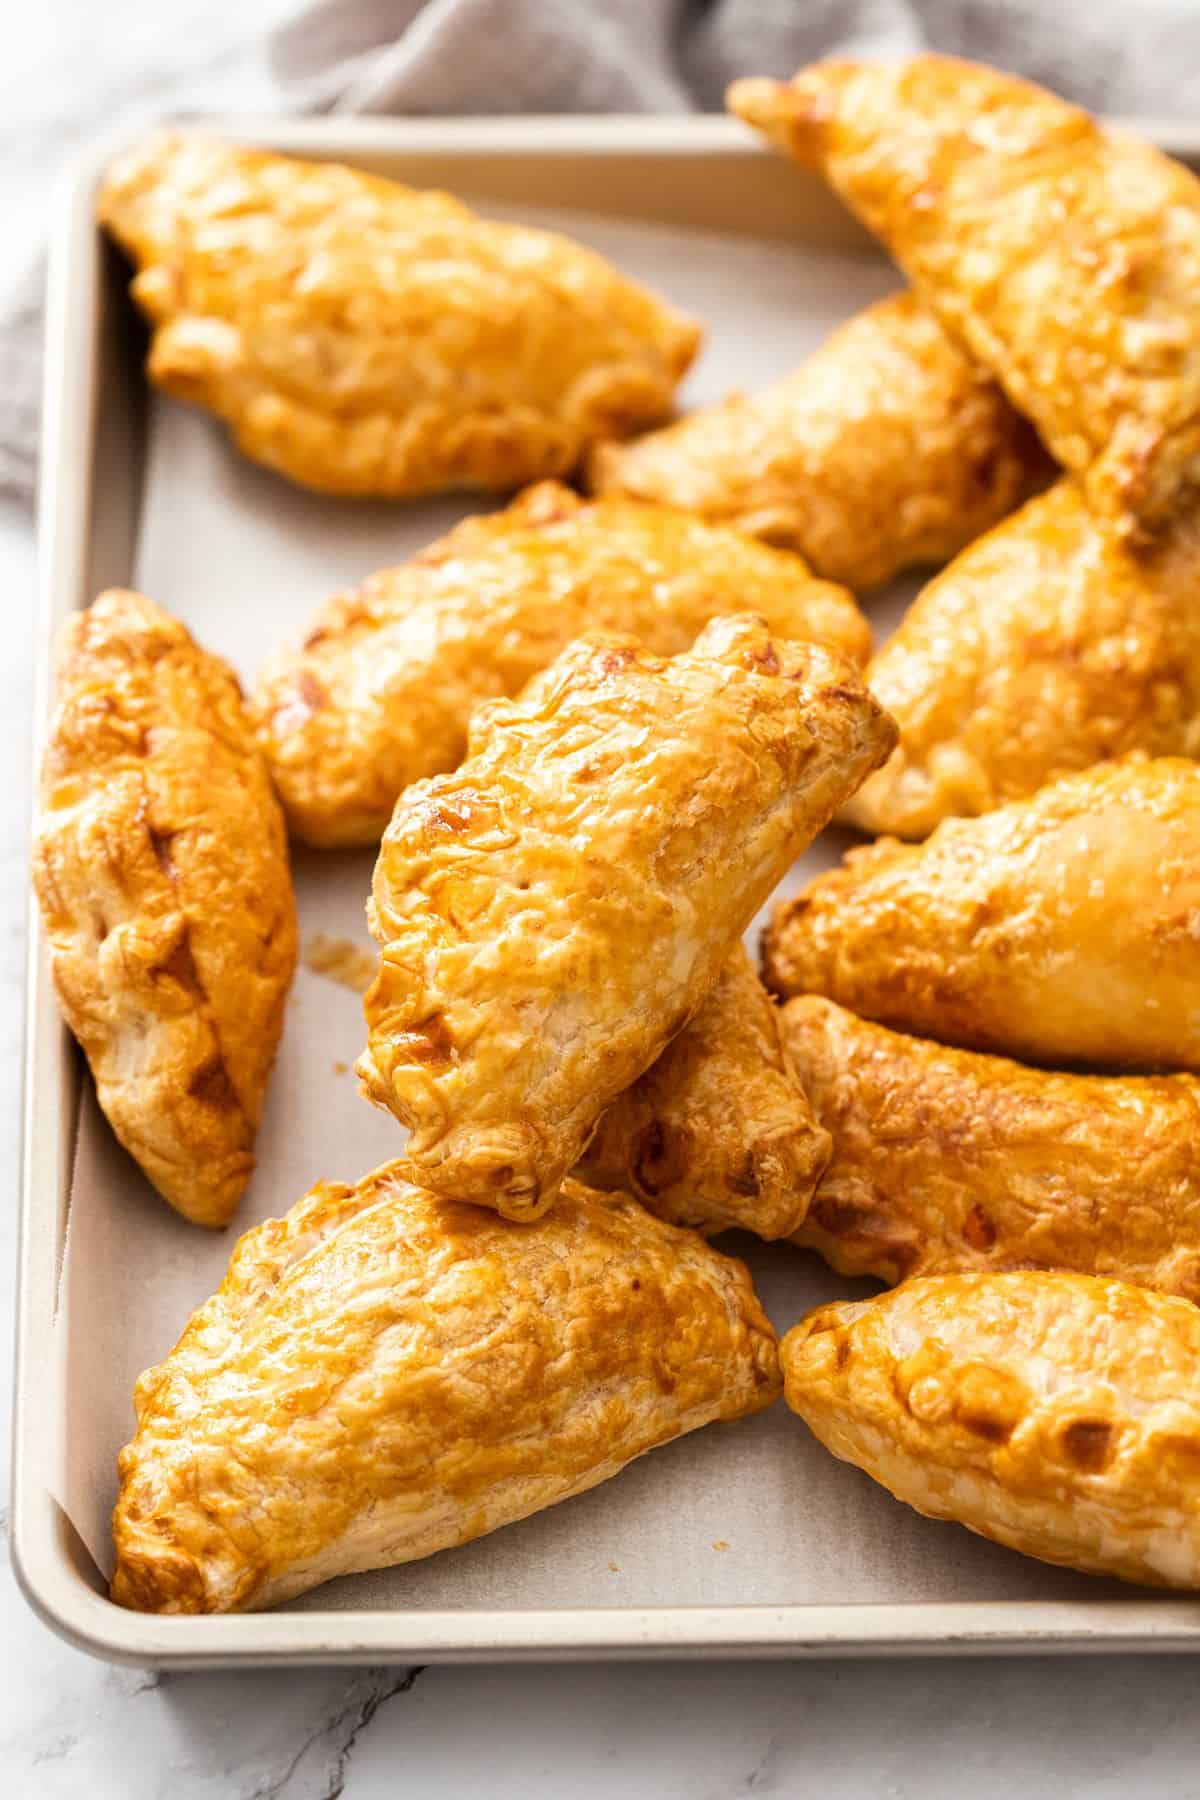
My Easy Vegetarian Pasties are certain to be a hit with your entire family. These delicious savoury baked goods are filled with tender root vegetables and encased in flaky puff pastry. They are ideal for meal prep; keep some in your freezer for times when you need a casual meal in a hurry.
Why you’ll love this recipe:
This is a traditional recipe that has been in my family for several generations. It was given to me by my Great Aunt.
Admittedly, she made her own pastry – she was a trained pastry cook. However, many of us are time-poor these days so I use a good quality commercial butter puff pastry that works very well.
These Easy Vegetarian Pasties are simple to prepare and absolutely delicious – I hope you will enjoy this special family recipe as much as we do.
Pasties are a popular bakery item, but with a small amount of effort and some time, you can easily make your own, confident in the quality of the ingredients that they contain.
You will love these Easy Vegetarian Pasties because:
- The meatless, hand-held pastries are filled with tender root vegetables and encased in flaky, buttery, puff pastry.
- You can customise the ingredients to suit your taste.
- They are versatile. Enjoy them as a light meal or snack. Pack some, freshly baked and loosely wrapped in a tea towel and take the family on a picnic. As well, they are ideal to pack in a lunchbox.
- You can keep some in your freezer for an easy meal.
- By choosing the appropriate pastry, you can make the pasties gluten-free or vegan.
Ingredients in this recipe:
Please see the recipe card further along in the post for exact quantities of ingredients and the full method.

Brown/yellow onion – essential to flavour the filling.
Carrot – for flavour and additional nutrients.
Turnip – the turnip is a member of the brassica family, along with cabbage, Brussels sprouts and broccoli. It is an important element as it adds great flavour and I strongly recommend you do not omit it.
Potato – a traditional ingredient in pasties. Any type of potato will work in this recipe.
Sea salt – use coarse kitchen salt, not fine table salt.
Ground white pepper – to season the filling. You can use black pepper if you prefer.
Puff pastry – I prefer to use all-butter puff pastry. You can, however, use vegan or gluten-free pastry, depending on your dietary requirements. Puff pastry is an ideal ingredient to use in both sweet and savoury preparations.
Egg – the beaten egg seals the edges and glazes the top of the pasty. It will add great shine and colour to the Vegetarian Pastries.
How to Make Vegetarian Pasties:
Please see the recipe card further along in the post for exact quantities of ingredients and the full method.
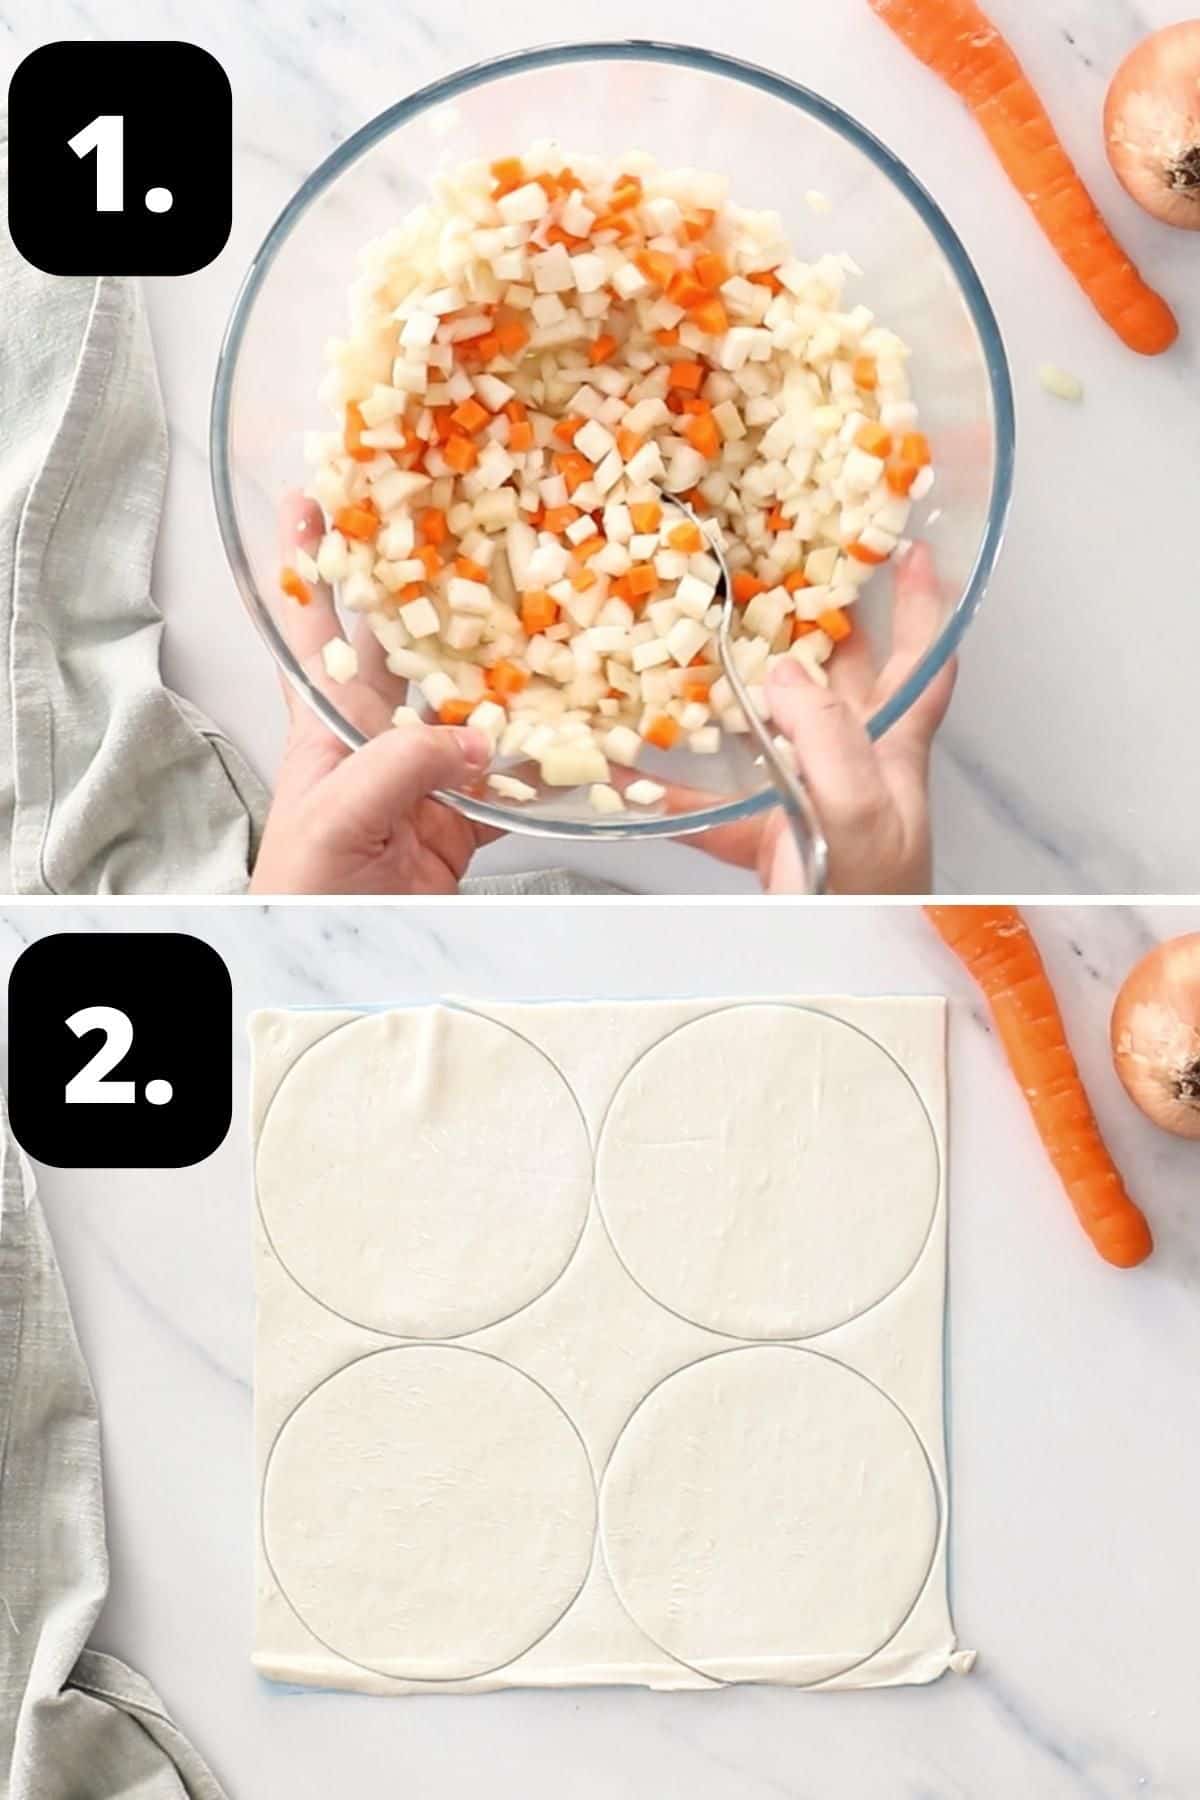
1 – Prepare the vegetable filling:
Cut the onion, carrot, turnip and potato into small dice and add to a medium-size bowl. Mix well to combine all the ingredients.
If using immediately, season with salt and pepper, but if preparing in advance, don’t add the salt until you’re ready as it will draw moisture out of the veg and make the mixture watery.
2 – Prepare the pastry rounds:
Remove the puff pastry from the freezer to partially defrost. Work with one sheet of pastry at a time and keep the others in the fridge to stay cold. Prepare 2 baking trays by lining them with non-stick baking paper.
Using a cutter or a template, cut out 4 circles from a sheet of pastry, about 12 cm (4 ½ inches) each. I use a lid from a plastic container from a supermarket deli to mark my circle and cut around it with a sharp paring knife.
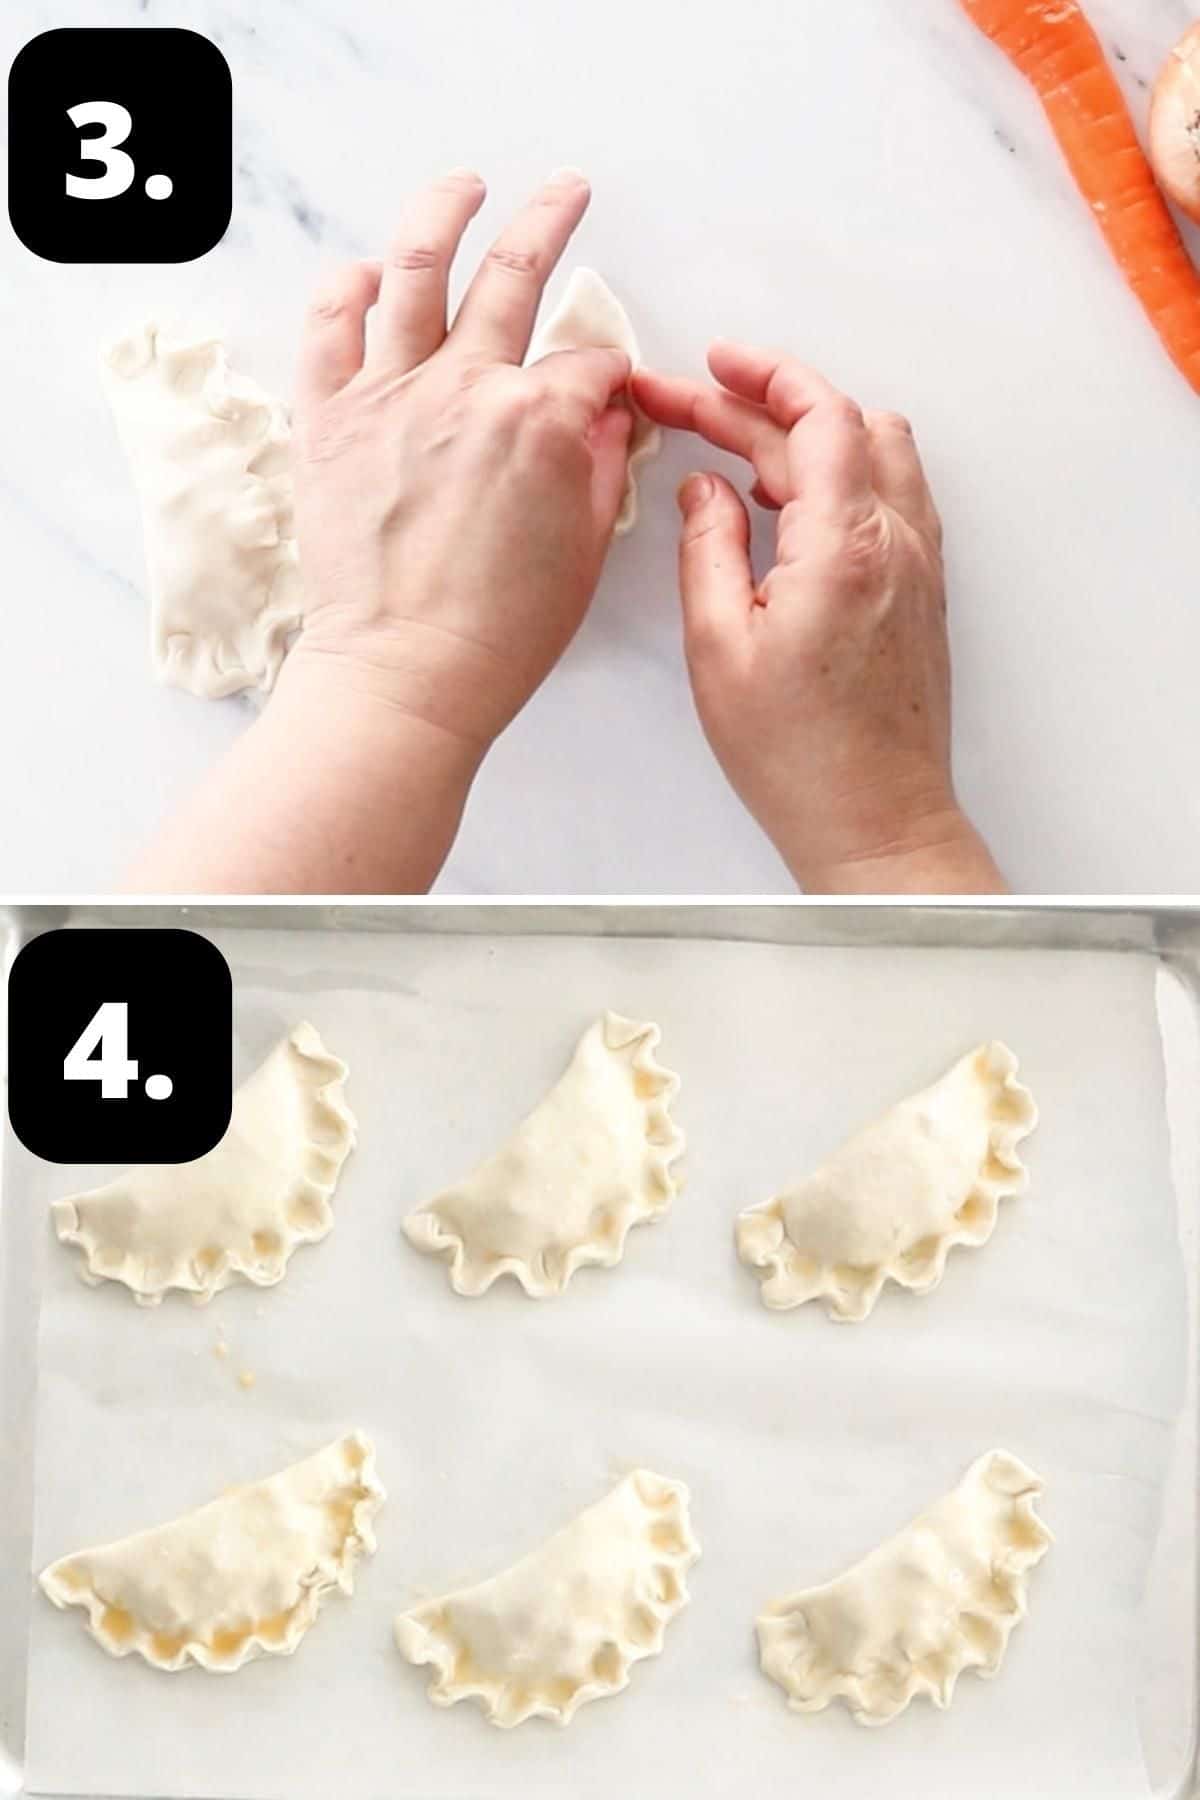
3 – Assembling the Vegetarian Pasties:
Brush just inside the edge of one half of the pastry with beaten egg. Add about 1 tablespoon mixture to one half of the pastry, being careful to keep the mixture away from the edge.
Fold the other side of the pastry over the filling, into a half-moon shape, making sure the edges meet and press to seal.
Crimp the edges together. Place the pasty on the baking tray and repeat.
Continue with the remaining mixture and pastry. When one tray is assembled, brush the top of the pasties with the beaten egg and place into the fridge for 15 minutes. If using a second tray, continue assembling your Vegetarian Pasties.
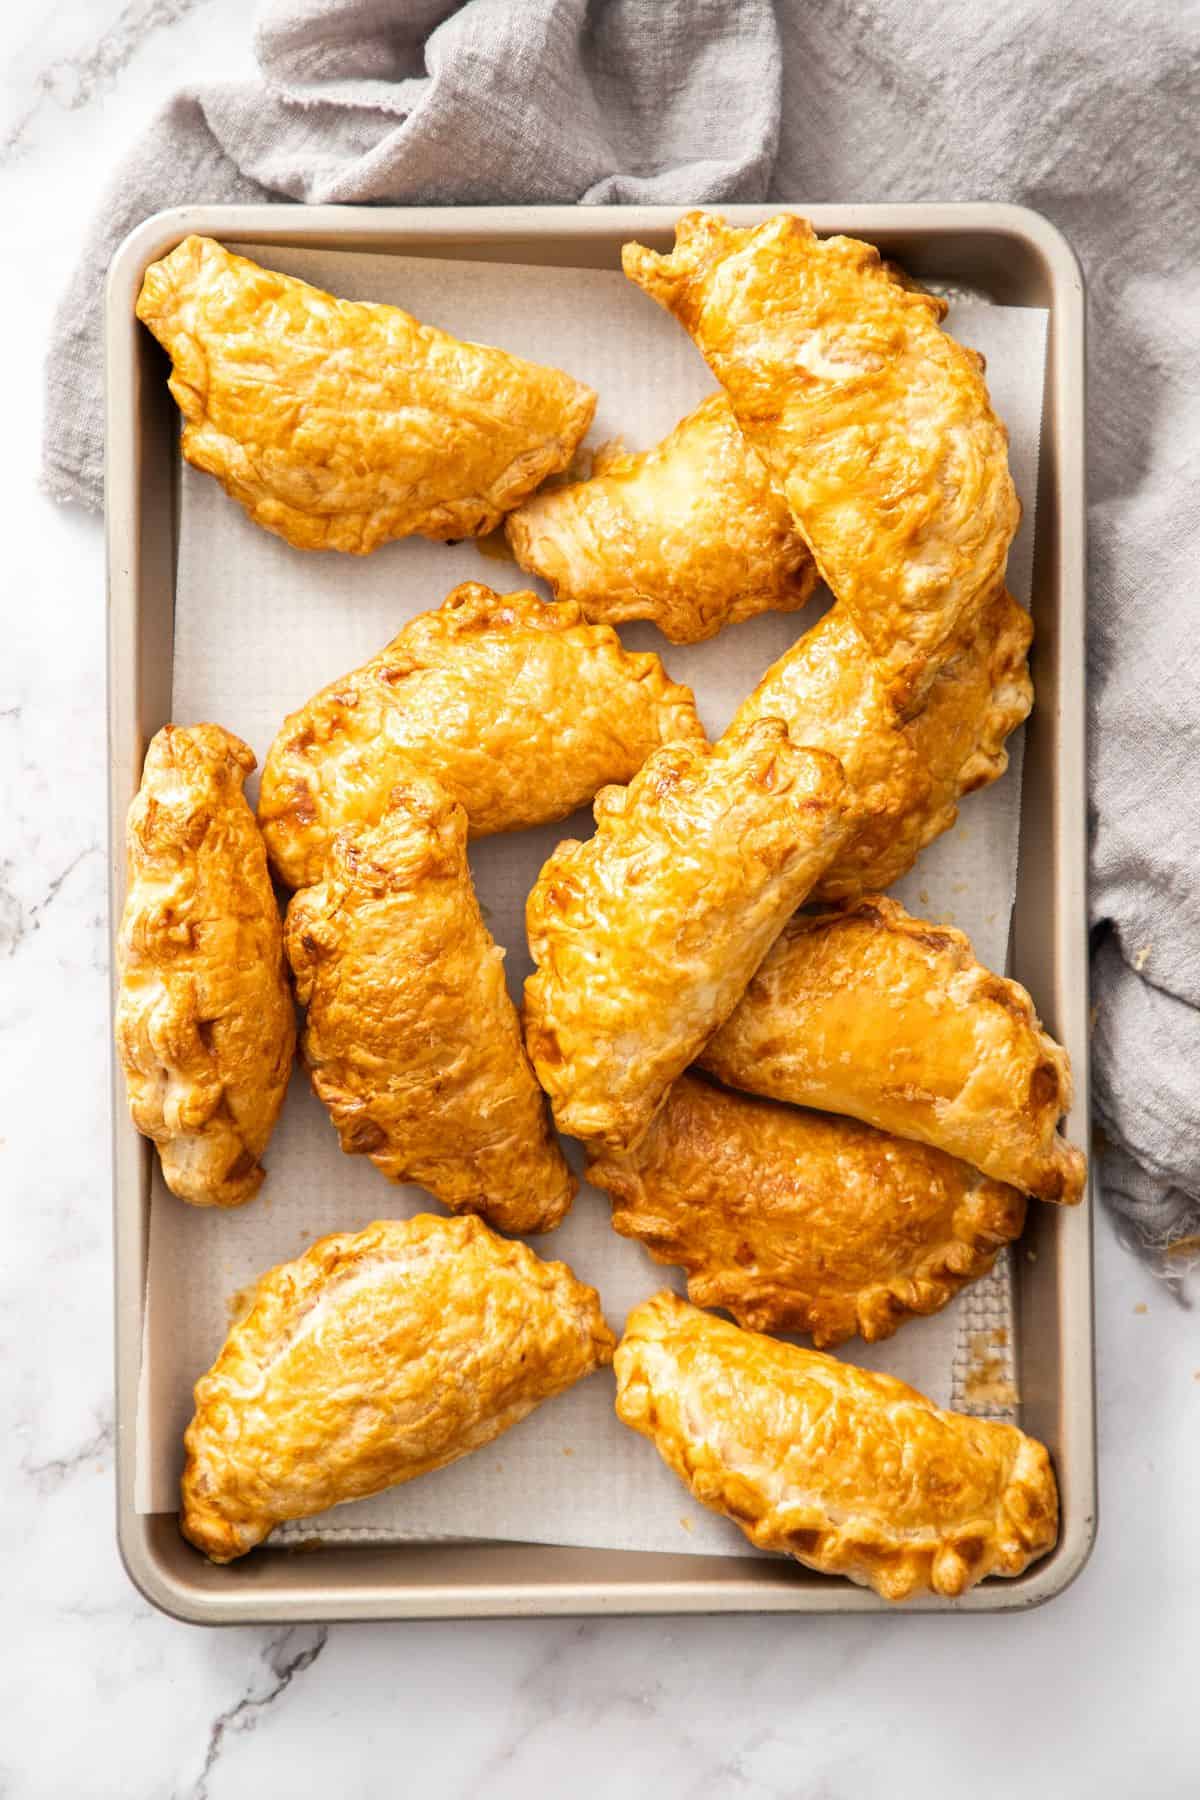
4 – Baking the Pasties:
When you are ready to bake the Vegetarian Pasties, pre-heat your oven to 200 degrees C (400 F).
Add your trays to the oven and bake for 10 minutes and then lower the heat to 180 degrees C (355 F) and cook for 20 minutes.
Turn the trays around mid-way so they cook evenly.
Remove the trays from the oven and cool the pasties on a rack.
Repeat with the remaining pastry and mixture.

Tips for success and FAQs:
As with all savoury food, one of the most important tips is to ensure that it is well seasoned. If not, your pasties will be bland.
No, there is no need to pre-cook the vegetables. As they are cut into small dice, they will cook while baking.
When cool, store them, covered, in the fridge for up to 3 days.
Yes, they freeze very well. When the cooked pasties are completely cool, wrap thoroughly in cling wrap and then wrap in foil, or place in an airtight, freezer-safe container. Freeze for up to 3 months. Defrost the pasties and heat in a pre-heated 180 degrees C oven (355F) for 10-15 minutes. If heating while still frozen, it will take about 8-10 minutes longer.
We love to make mini pasties, like our Mini Bacon and Onion Pasties. You could also make larger pasties, depending on the size of your sheet of pastry. Just adjust the quantity of filling that you use and the cooking time accordingly.
Variations and substitutions:
Herbs and spices – our family recipe does not use herbs or spices, and relies on salt and white pepper to season the dish. However, you can certainly add herbs and spices of your liking.
Optional additions – you may like to add peas or sweetcorn to the pasties. Some people like to add a little grated cheese.
Vegan and gluten-free – make this recipe vegan and/or gluten-free by using the appropriate pastry. For a vegan option, replace the egg wash with a brush of plant-based milk.
Serving suggestions:
The Vegetarian Pasties are delicious served alongside some tomato sauce or ketchup. Make them a complete meal and enjoy them with some:
- Mashed Potato
- Peas
- Pickled Red Cabbage
- Roasted Broccolini
The plant-based filling in these Vegetarian Pasties is made from ingredients that are readily available. You will find many ways in which to enjoy them. They are ideal snacks, light meals, perfect for picnics, potlucks or lunch boxes and certain to be popular.
Alex xx
More delicious recipes for you to try:


Stay in touch!
Follow me on Facebook, Pinterest and Instagram and subscribe to my newsletter.

Easy Vegetarian Pasties
Recipe Measurements:
For accuracy, when weights are provided, we recommend weighing your ingredients. This will produce the best results.
Ingredients
- 1 medium brown/yellow onion – 200 gm/7 ounces prepared weight
- 1 small carrot – 90 gm/3 ounces prepared weight
- 1 medium turnip – 200 gm/7 ounces prepared weight
- 1 small potato – 135 gm/4 ¾ ounces prepared weight
- 1 teaspoon coarse kitchen salt See Notes 1 and 3
- ½ teaspoon ground white pepper See Notes 2 and 3
- 5 sheets puff pastry See Note 4
- 1 egg for egg wash – lightly beaten
Instructions
For the Filling:
- Peel and cut the onion, carrot, turnip and potato into small dice, about 6 mm (¼ inch) and add to a medium-size bowl. Mix well to combine.
- If using immediately, season with salt and pepper, but if preparing in advance, don’t add the salt until ready as it will draw moisture out of the veg and make the mixture watery.
For the Pastry:
- Remove the puff pastry from the freezer, separate the sheets and set them aside to partially defrost. Work with one sheet of pastry at a time and keep the others in the fridge to stay cold. Prepare 2 baking trays by lining them with non-stick baking paper.
- Using a cutter or a template, cut out 4 circles from a sheet of pastry, about 12 cm (4 ½ inches) each.I use a lid from a plastic container from a supermarket deli to mark my circle and cut around it with a sharp paring knife. – See Note 4
- Brush just inside the edge of one half of the pastry with beaten egg.Add about 1 tablespoon of mixture to one half of the pastry, being careful to keep the mixture away from the edge. See Notes 5 and 6.
- Fold the other side of the pastry over the filling, into a half-moon shape, making sure the edges meet.Press firmly to seal the edges and crimp them together. To crimp the edges, press down on the edge of the pasty, starting at one end, holding it down between your thumb and forefinger. Use the forefinger of your other hand to push the edge of the pastry between your fingers, push toward you, making an indent. Repeat until it is sealed and place the pasty on the baking tray.
- Continue with the remaining mixture and pastry. The pastry must remain chilled. If necessary, return it to the fridge to re-chill. If it becomes warm, it will stretch out of shape and become difficult to work with.
- When one tray is assembled, brush the top of the pasties with the beaten egg and place them into the fridge for 15 minutes. Chilling the pastry again will give you the best result.
Baking the Pasties:
- Meanwhile, pre-heat your oven to 200 degrees C (400 F).
- Add your trays to the oven and bake for 10 minutes and then lower the heat to 180 degrees C (355 F) and cook for 20 minutes, or until golden brown. Turn the trays around mid-way so they cook evenly.
- Remove the trays from the oven and cool the pasties on a rack.Repeat with the remaining pastry and mixture.
- Store covered in the fridge for up to 3 days. Or wrap them well in cling wrap and then in foil, and place them in a freezer-safe airtight container in the freezer for up to 3 months.If packing in layers, it is advisable to separate them with a sheet of baking paper so they don’t stick together.
Video
Notes
- Salt: use coarse kitchen salt. Table salt is not suitable. It is too fine and may make the filling too salty.
- Pepper: you can use freshly ground black pepper if you prefer.
- Seasoning: adjust the seasoning to your liking – ensure that the mixture is not bland to your taste.
- Puff pastry: my puff pastry sheet measured 24 cm X 24 cm (9 ½″) square. I used 5 sheets of pastry and made 4 pasties from each sheet. Depending on the size of your pastry, you may wish to make larger pasties.
- Tablespoon: we use a standard Australian tablespoon which is 20 ml (4 teaspoons).
- Quantity of mixture: with your first pasty, you will determine how much mixture you can add. It may be a little more than a tablespoon, but it is better to not add too much, or you may tear a hole in the pastry while trying to seal it.
Nutrition Estimate:
Nutritional Disclaimer:
The nutritional information is an estimate only, and is derived from online calculators. For accurate results, we recommend calculating the nutritional information based on the ingredients and brands you use.
Mara
Do you cook and then freeze these? If so, what would you suggest for reheating instructions? And if not, do you have a suggested cooking time and temp for baking from frozen? Thanks so much!
Alexandra Cook
Hi Mara!
The cooked pasties freeze very well. I’ll copy and paste the details for you:
When cool, wrap thoroughly in cling wrap and then wrap in foil, or place in an airtight, freezer-safe container. Freeze for up to 3 months. Defrost the pasties and heat in a pre-heated 180 degrees C oven (355F) for 10-15 minutes. If heating while still frozen, it will take about 8-10 minutes longer.
Hope you’ll enjoy the recipe! Alex xo
Linda Shields
These were a hit as an appetizer at Thanksgiving with the adults and the kids. I made a simple, spicy dipping sauce for people that wanted more flavors. Since then, I purchased an inexpensive dumpling maker kit to make my pasties look more uniform. I am making more for Christmas due to popular demand. Worth the effort. Give yourself time for chopping and dealing with the phyllo dough (it is fussy about being at the right temperature). Thanks for sharing your recipe. It is a tradition in my family now, too!
Alexandra Cook
Hi Linda,
It is so lovely to hear that this recipe has now become a tradition in your family now also.
Thank you so much for your thoughtful comment!
Alex xo
Linda
Hi Alex! We’ve been loving your puff pastry recipes ever since we discovered them and had to try this one out. I think we found a new favorite appetizer! The filling is so flavorful and the crust comes out so flakey and crispy. I’ll be making this for Christmas this year. It’s everyone’s favorite! 🙂
Alexandra
Hi Linda, thank you for your fantastic feedback on our Vegetarian Pasties. I am delighted to hear that you enjoy them and plan to make them over the festive season. 🙂
Marie
I knew I’d like these because puff pastry and tender veggies but they were even more amazing than I imagined. Great recipe, thank you.
Alexandra
Hi Marie, thank you for your lovely comments on our Easy Vegetarian Pasties. I am delighted to hear that you enjoyed them. 🙂
Dawn
Wow, these are delicious. I normally don’t like turnip, but followed your advice and did not omit. I’m so glad I didn’t. They are perfect in every way. I have a stash in the freezer and I’ve been pulling them out for my lunch each day.
Alexandra
Hi Dawn, thank you for your lovely comments on the Vegetarian Pasties, I’m so pleased that you enjoy them. I also like to keep some in the freezer! 🙂
Karen
Taste just like the ones my grandma used to make. Really great recipe – simple, yet flavorful and this is truly a fool-proof recipe that always turns out. Thanks for sharing.
Alexandra
Hi Karen, thank you for your feedback on our Vegetarian Pasties. I am so pleased that you enjoyed them. 🙂
Jamie
So delicious and gone in no time! I didn’t have turnips so just replaced them with more carrots and potatoes. I made sure to be careful with the amount of filling like the recipe states and had no trouble with tearing. I highly recommend these veggie pasties!
Alexandra
Hi Jamie, I am so pleased that you enjoyed our Vegetarian Pasties. Thank you for letting me know. 🙂