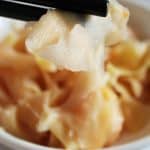


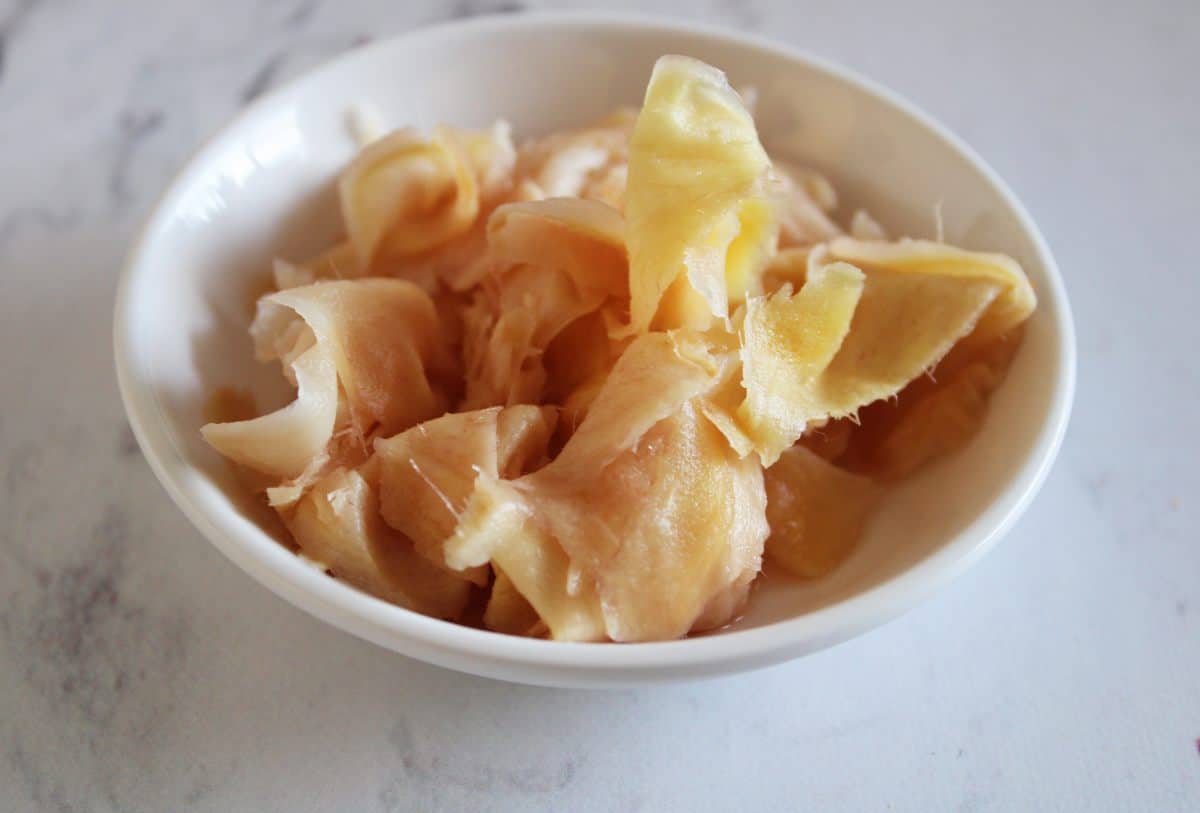
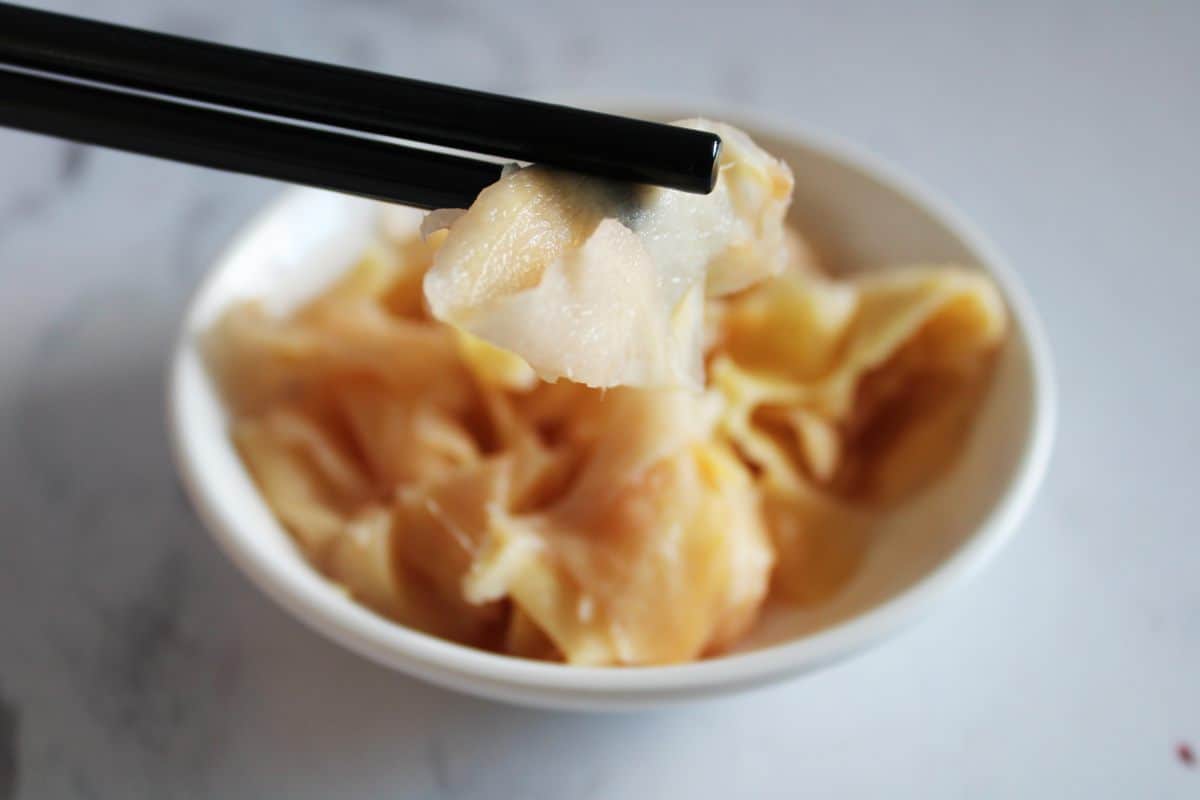
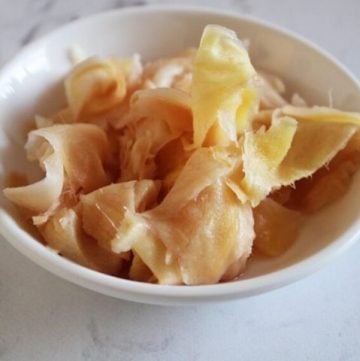
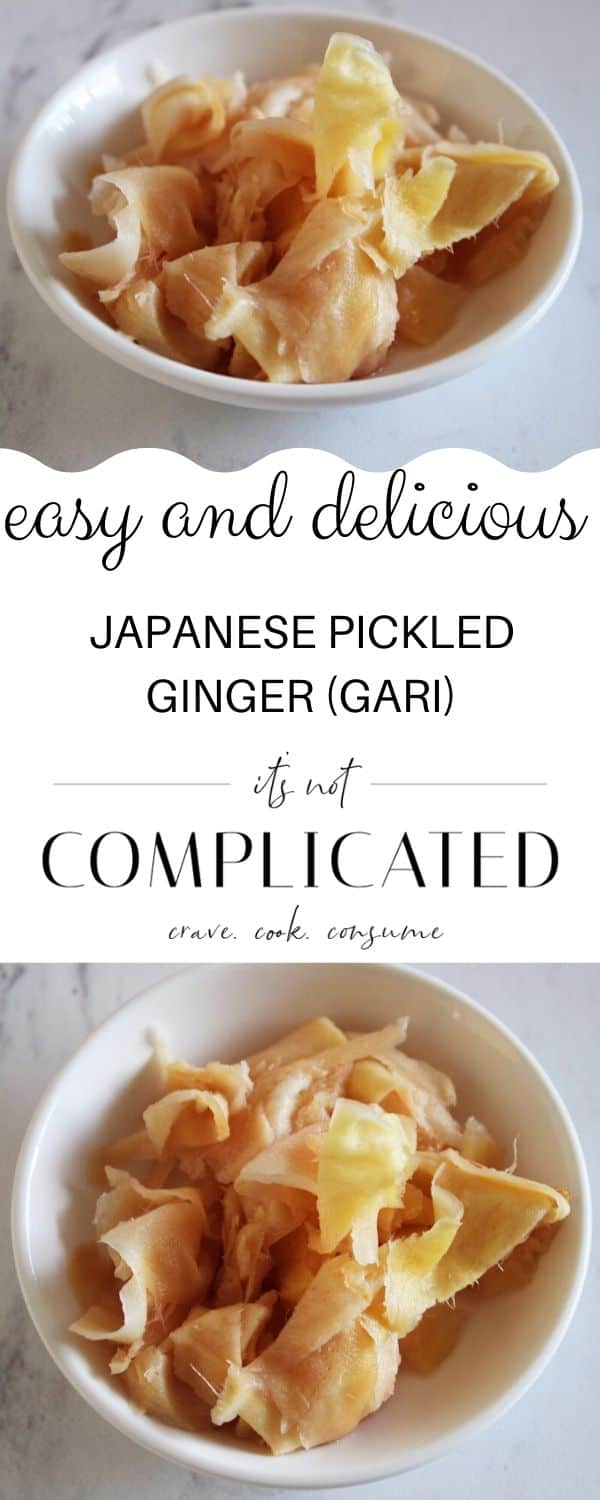
Thin slices of sweet pickled ginger; perfect to cleanse your palate and enjoy alongside sushi, sashimi and so much more. “Gari”, as it is known in Japan, is for ginger lovers, who enjoy the flavour and warmth this delicious plant has to offer.
Why we love this recipe:
In 2019, I was lucky enough to visit Japan for the first time. During my stay, my delightful host taught me how to make this Easy Pickled Ginger. I am so pleased to share this recipe with you all now.
I have always enjoyed eating ginger with my sushi and sashimi. What I learnt while I was in Japan, was that the ginger is meant to be enjoyed in between sushi, to cleanse the palate.
This is an easily prepared recipe, and I love to keep a jar of it in the fridge.
Best of all, this recipe contains only natural ingredients. A lot of store bought Pickled Ginger contain preservatives, artificial sweeteners and colours. And truly, they do not taste anywhere near as good as our homemade Gari!
What is ginger?
Ginger is one of my favourite flavour boosters. I use it fresh or dried – both have their place in the kitchen. Many people also believe in the health benefits of ginger, and take it in supplement form as well as enjoying it in food.
It is known to improve digestion, and is a good source of antioxidants.
Ginger is a flowering plant, and from the same family as galangal and turmeric.
Ingredients in this recipe:
Please see the recipe card further along in the post for exact quantities of ingredients and the full method.
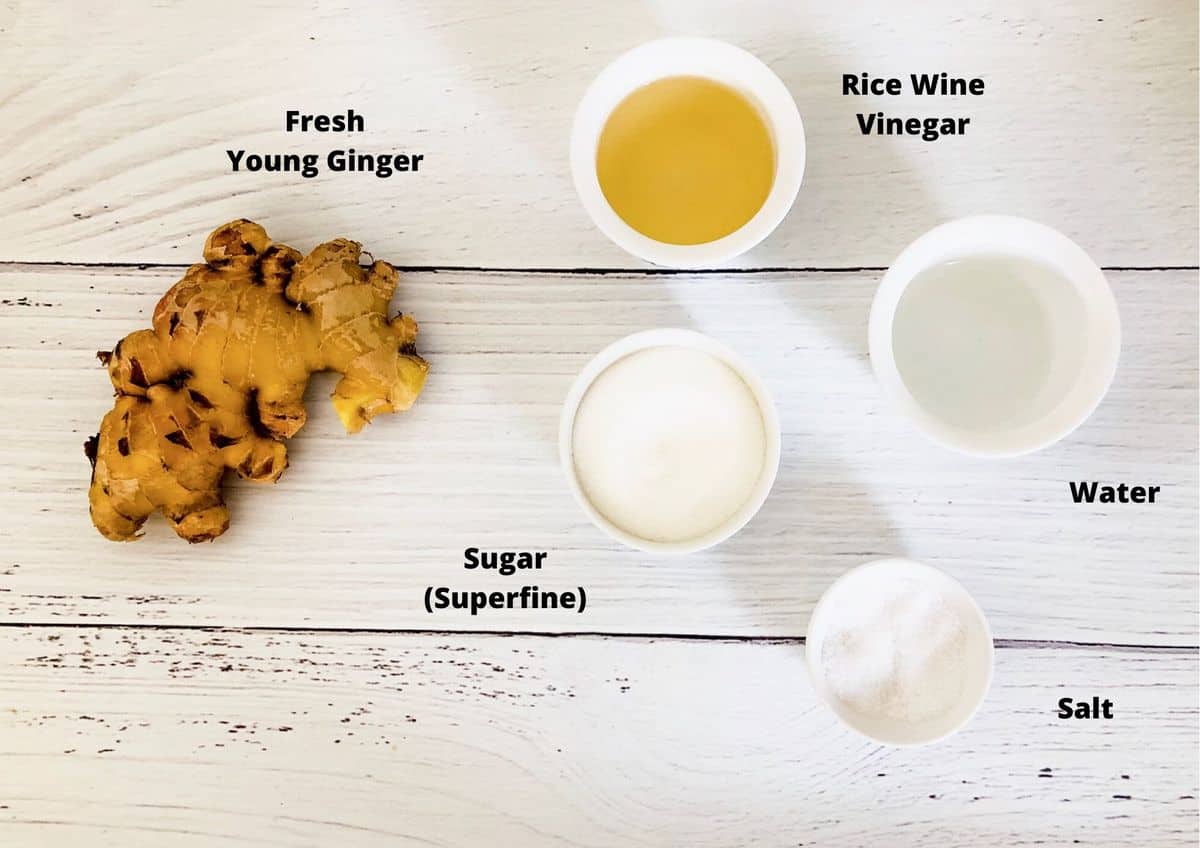
Fresh, young ginger: Use the freshest, youngest ginger you can find. The older the ginger, the more fibrous it will be.
New ginger rhizomes are the best to use – however, not always easy to find. My local fruit shop has young ginger at the moment though, and it works very well in this recipe!
Rice wine vinegar: My preference of vinegar for Gari, this has a delicate flavour which works so well.
Sugar: I used regular white sugar, however you could also use caster/superfine sugar.
Salt: We use kosher salt or coarse kitchen salt (not table salt) to help soften the ginger.
Water: Although only a small amount of water is used briefly in this recipe, I still recommend using filtered/un-chlorinated water for the best taste.
Step by Step instructions:
Start by sterilising your jar or jars (see how to do this below).
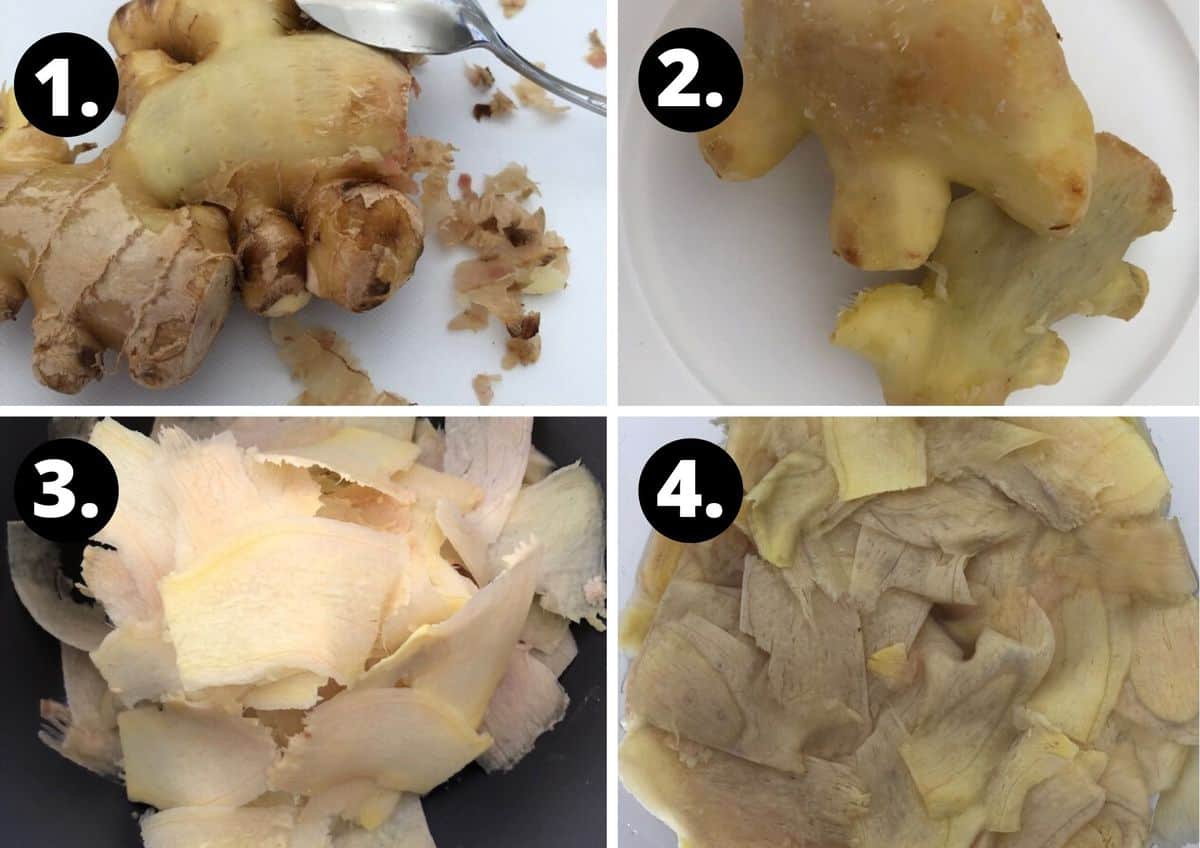
- Using a spoon, peel the ginger.
- Remove any brown spots left on ginger.
- Using a vegetable peeler or mandolin on a super-thin setting, slice pieces of ginger.
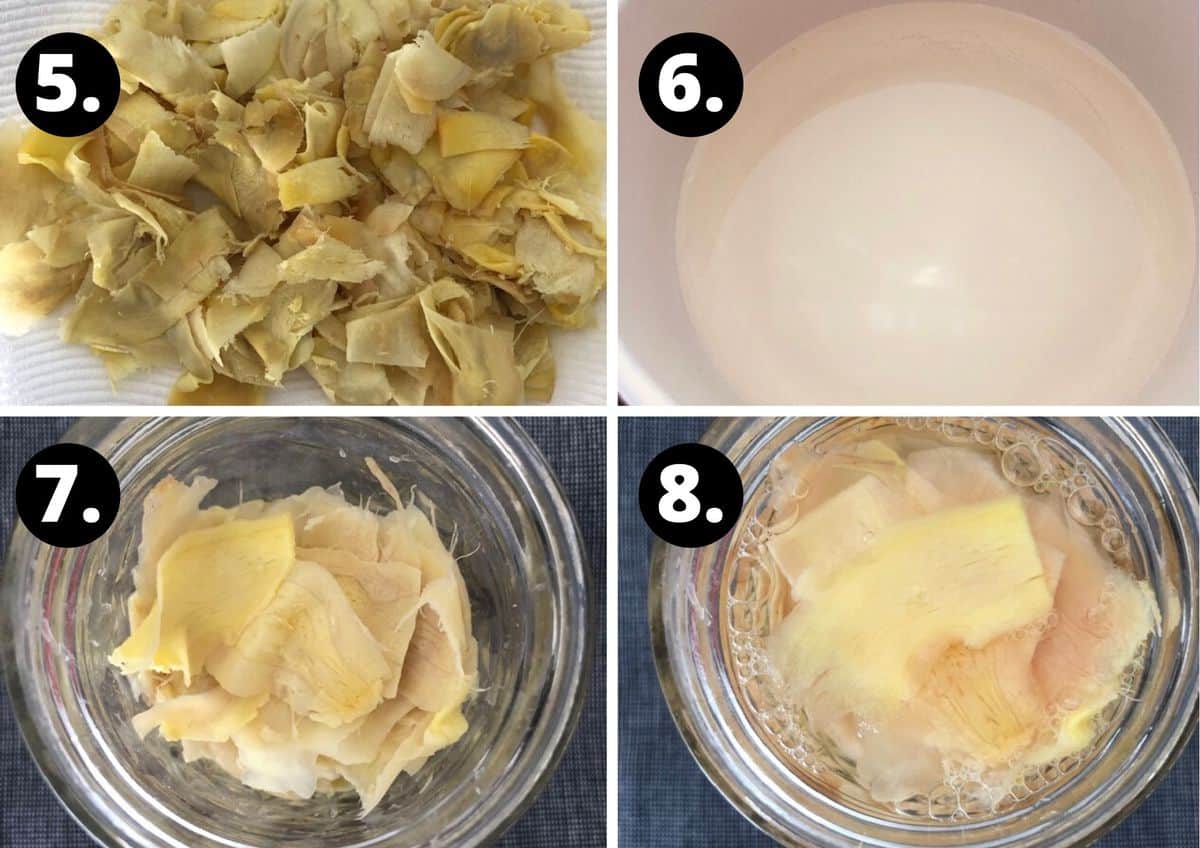
- Put salt on ginger, and allow to sit for 5 minutes. Pour boiling water on the ginger and sit for a further 2 minutes.
- Drain water, and squeeze excess liquid from the ginger. Set aside to drain further on some paper towel.
- Prepare your pickling liquid.
- Place your ginger in your sterilised jars.
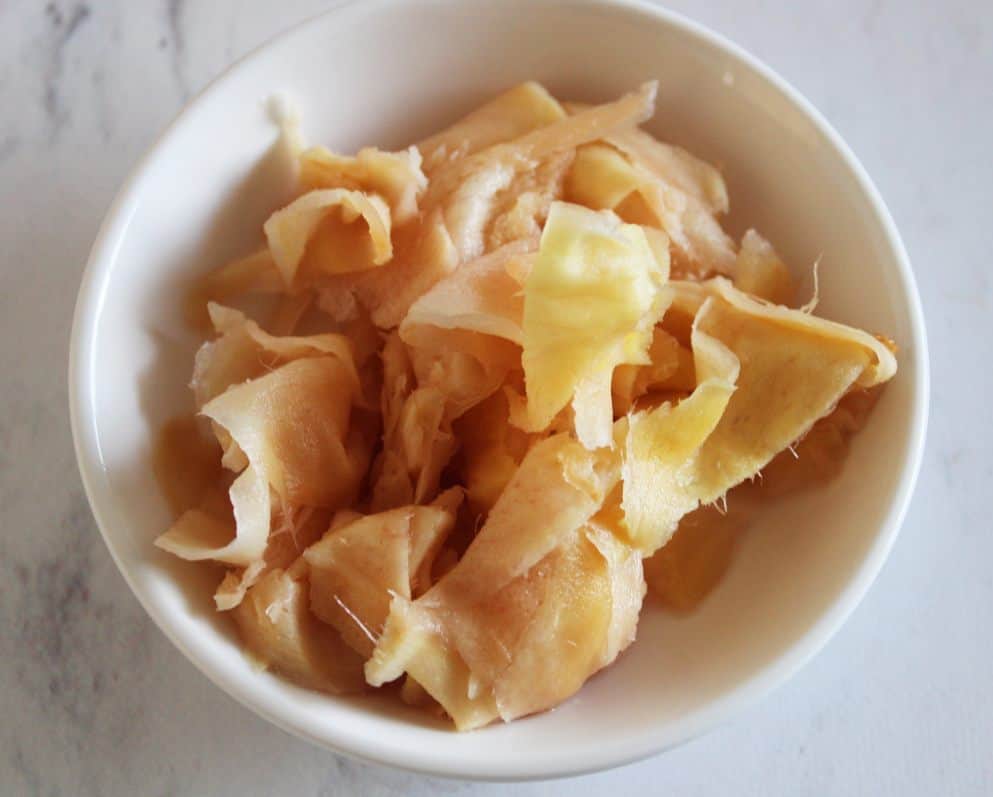
- Pour the pickling liquid on top. Seal the jar, and allow to cool on your kitchen bench for 30 minutes, before placing in the refrigerator.
Tips for success and FAQs:
As I mentioned under the ingredients list, use the youngest ginger you can find. It is seasonal, but definitely worth sourcing for this recipe.
When making your own pickles and preserves, always ensure you are sterilising the jars you will store them in. This is very simple to do:
- Choose glass jars with an airtight, metal lid and ensure they have been washed by hand in hot soapy water then rinsed well.
- Check that the metal lids do not have rubber inserts.
- Preheat the oven to 130 Degrees C (270 F) and leave the jars for 15-20 minutes.
Absolutely – this recipe can be adapted to make a smaller or larger batch, depending on the quantity you require.
When prepared and stored correctly, the ginger will last in the fridge for 6 months.
The tender flesh of young ginger is preferable in this recipe. It is also much milder in flavour than mature ginger. I would recommend using only young ginger for this recipe.
More delicious recipes for you to try:
This Easy Japanese Pickled Ginger makes a fantastic edible gift. Take a jar with you next time you’re visiting family or friends. For some more great edible gift ideas, be sure to check out these:
- Homemade Pickled Jalapenos
- Preserved Chillies in Oil
- Dill Pickled Cucumbers
- Apricot Jam
- Plum Jam
- Fresh Peach Chutney
- Sweet Chilli Sauce
- Balsamic Glaze
- Pickled Daikon
- Beetroot Pickled Turnips
Enjoy the delicious, refreshing flavour of this Japanese Pickled Ginger. I hope you’ll love the fresh taste, perfect as a palate cleanser. Be sure to let me know in the comments below when you try it.
Alex xx
Easy Pickled Ginger (Gari)
Equipment
- 1 x 8 ounce/250 ml Jar
Recipe Measurements:
For accuracy, when weights are provided, we recommend weighing your ingredients. This will produce the best results.
Ingredients
For the Ginger:
- 200 g (7 oz) fresh young ginger See Note 1
- 2 teaspoon coarse sea salt See Note 2
- boiling water, to cover the ginger
Pickling Liquid:
- ¼ cup (60 g) caster/superfine sugar
- ½ cup (120 ml) rice wine vinegar See Note 3
- ¼ cup water See Note 4
Instructions
To Sterilise your Jars:
- Sterilise the jar or jars you'll be using to store the ginger.Choose glass jars with an airtight, metal lid and ensure they have been washed by hand in hot soapy water then rinsed well. Check that the metal lids do not have rubber inserts. Preheat the oven to 130 Degrees C (270 F) and place the jars in the oven for 15-20 minutes.
For the Pickled Ginger:
- Using a spoon, peel the ginger. Remove any brown spots left on ginger.
- Using a vegetable peeler or mandolin on a super-thin setting, slice pieces of ginger.
- Put salt on ginger, stir and allow to sit for 5 minutes.
- Pour boiling water on the ginger (just enough to cover) and sit for a further 2 minutes.
- Drain water, and squeeze excess liquid from the ginger. Set the ginger aside to drain further on some paper towel.
- Prepare your pickling liquid by placing the water, rice wine vinegar and sugar in a non-reactive saucepan.On a medium heat, stir to dissolve the sugar. Increase heat, and boil for 30 seconds.
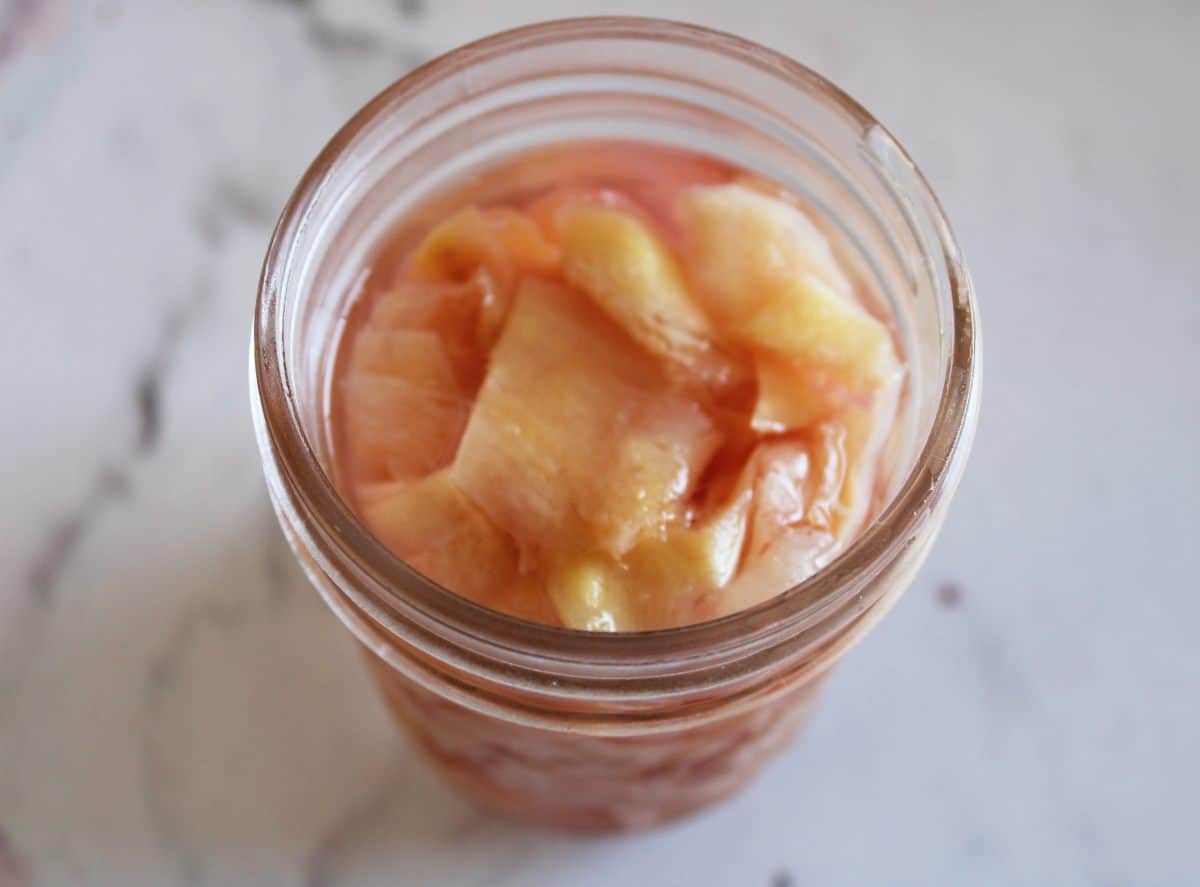
- Place your ginger pieces into the sterilised jars.Pour the pickling liquid on top.
- Seal the jar, and allow to cool on your kitchen bench for 30 minutes, before placing in the refrigerator.Can be eaten once cooled, but I prefer to enjoy about 24 hours after preparing to let the flavours develop.
Notes
- Use the freshest, youngest ginger you can find. The older the ginger, the more fibrous it will be. If you can find new ginger rhizomes, these are the very best to use! For this recipe, I have used young ginger.
- Ensure you use cooking salt or kosher, as regular table salt may contain anti-caking agents and is much stronger.
- I have used rice wine vinegar in this recipe, and this is my preference, but some people have also tried using apple cider vinegar.
- It is essential to use filtered/un-chlorinated water when pickling or preserving. (You don’t want the bad taste of the water to affect the final product!)
- Please note, the nutritional information is based on the entire jar, and you will not be consuming the brine.
Nutrition Estimate:
Nutritional Disclaimer:
The nutritional information is an estimate only, and is derived from online calculators. For accurate results, we recommend calculating the nutritional information based on the ingredients and brands you use.
Geoff
I followed the recipe but the ginger didn’t turn pink
Alexandra Cook
Hi Geoff,
The level of pink will depend on your ginger – was it a lovely young, new ginger? Or older? The younger ginger is what helps achieve a soft pink colour.
Also, just as a note, this recipe won’t produce the shade of pink you see in commercial varieties – many are artificially coloured or enhanced using beetroot juice etc.
Hope you’ll enjoy the taste of it anyway 🙂 Thanks, Alex
Stan Kwiecian
frequent user, I add a few slices of fresh turmeric
Alexandra Cook
Hi Stan!
Thanks so much for taking time to leave a comment.
I’ve never tried with fresh turmeric before, but will add it to my next batch 🙂
Thanks, Alex
Tammy
Super delicious and sooo much better than store bought. Will make again and intend to always have this on hand! Thanks!
Alexandra Cook
So happy you enjoyed this, Tammy!
Thanks for taking the time to comment.
Alex xo
Sheila
How long will the ginger last in the refrigerator?
Alexandra Cook
Hi Sheila,
When prepared and stored correctly, the ginger will last in the fridge for 6 months.
Let me know if you give the recipe a try 🙂
Ginny
Sounds great especially not having colours or preservatives
Thank you
Alexandra Cook
Thank you, Ginny!
Enjoy your ginger! Alex xo
Faye
I really enjoyed this recipe. I found some nice ginger at my local market – it wasn’t young ginger and I can see that would make all the difference. The older ginger still worked fine though when cut thinly (I used a mandolin.)
I will make it again when I can source young ginger – thank you.
Alexandra Cook
Hi Faye,
Thanks for trying this recipe, and I am glad you enjoyed it.
I hope you’ll get to try it soon with the young ginger too 🙂 Alex xo
Howard Colyer
I guess I did something wrong. Super salty, nasty. Went in the trash.
Alexandra Cook
Hi Howard,
I am sorry you didn’t enjoy this recipe. I’d love to try and help with what may have happened.
A couple of thoughts – what type of salt did you use? Regular table salt is too strong for this recipe.
Also, did you drain the salt water and pat the ginger dry?
Did you make any changes to the quantities at all?
Thanks in advance! Alex
Nora
So cool to be able to finally do this at home! Thanks for the recipe! Delicious.
Alexandra Cook
Hi Nora,
Thank you for your lovely comments on the Pickled Ginger. I am delighted that you enjoy the pickles. 🙂
Phil Saulnier
excellent results . The sugar can be replaced with Miriam
Alexandra Cook
Hi Phil,
I’m delighted that you enjoy the Pickled Ginger. Thank you for letting me know. 🙂
Samantha Dyer
This is the BEST Pickled Ginger. So easy to make, but honestly – easier even to eat! I am adding it to just about everything at the moment, and can’t wait to make more this weekend. Thanks so much! Xx
Alexandra Cook
Hi Samantha,
Thank you so much for your lovely comments on the Pickled Ginger. I am delighted that you enjoy it and have plans to make more. I appreciate that you took the time to let me know. 🙂
Glenda LongGlenda
Just wondered why the commercial pickled ginger is pink?
Alexandra Cook
Hi Glenda,
When done naturally, the ginger will be different shades of pink depending on how young the ginger is – the tips of young ginger can be pink. (Young ginger is preferable for this recipe.)
However, from a commercial point of view, the colour is often enhanced, sometimes with various artificial colourings or beetroot juice etc.
Although the homemade Gari may not have the same shade of pink, it is very delicious, and I much prefer knowing it hasn’t had anything artificial added to it. (Some commercial varieties also contain artificial sweeteners and preservatives.)
Hope that helps! Let me know if you give the recipe a try 🙂
Stan Kwiecian
have you read the ingredients, red dye ?? True young Japanese ginger does turn pink.
Andrea
Thank you for sharing this recipe. I just love pickled ginger with my sushi, and was in need for a great recipe with great flavor. This for sure was that recipe!
Alexandra Cook
Hi Andrea,
Thank you for your lovely comments on the Pickled Ginger. I am so pleased that you enjoyed it and appreciate that you took the time to let me know 🙂
nanc
I love pickled ginger at Japanese restaurants. I’m so happy I can make this at home now. thanks for the easy recipe.
Alexandra Cook
Enjoy it, Nanc! 🙂 Thanks for the comment!
Deborah
Goodness gracious, making this reminded me of when my bestie and I used to go out for sushi, we would always order a ton of ginger. I love it and yours was the best.
Alexandra Cook
Hi Deborah,
Thank you so much for your lovely comments on the Pickled Ginger. I am delighted that you enjoyed it and appreciate that you took the time to contact me. 🙂
Stephanie
I had a bunch of leftover ginger so I had to try this recipe – we love pickled ginger in my house. The end result was wonderful and glad to know this will last such a long time in the fridge. I will make a double next time!
Alexandra Cook
Hi Stephanie,
Thank you for your feedback on the Pickled Ginger. I am so pleased that you enjoy it, and plan to make a double batch next time! 🙂
Glynis
Hi Alex, what other vinegar can be used in place of rice wine?
Alexandra Cook
Hi Glynis!
I have only ever made it using the rice wine vinegar as it has an ideal delicate flavour. That being said, some readers have made and enjoyed it with apple cider vinegar. Hope that helps, and let me know if you give it a try 🙂 Thanks! Alex