


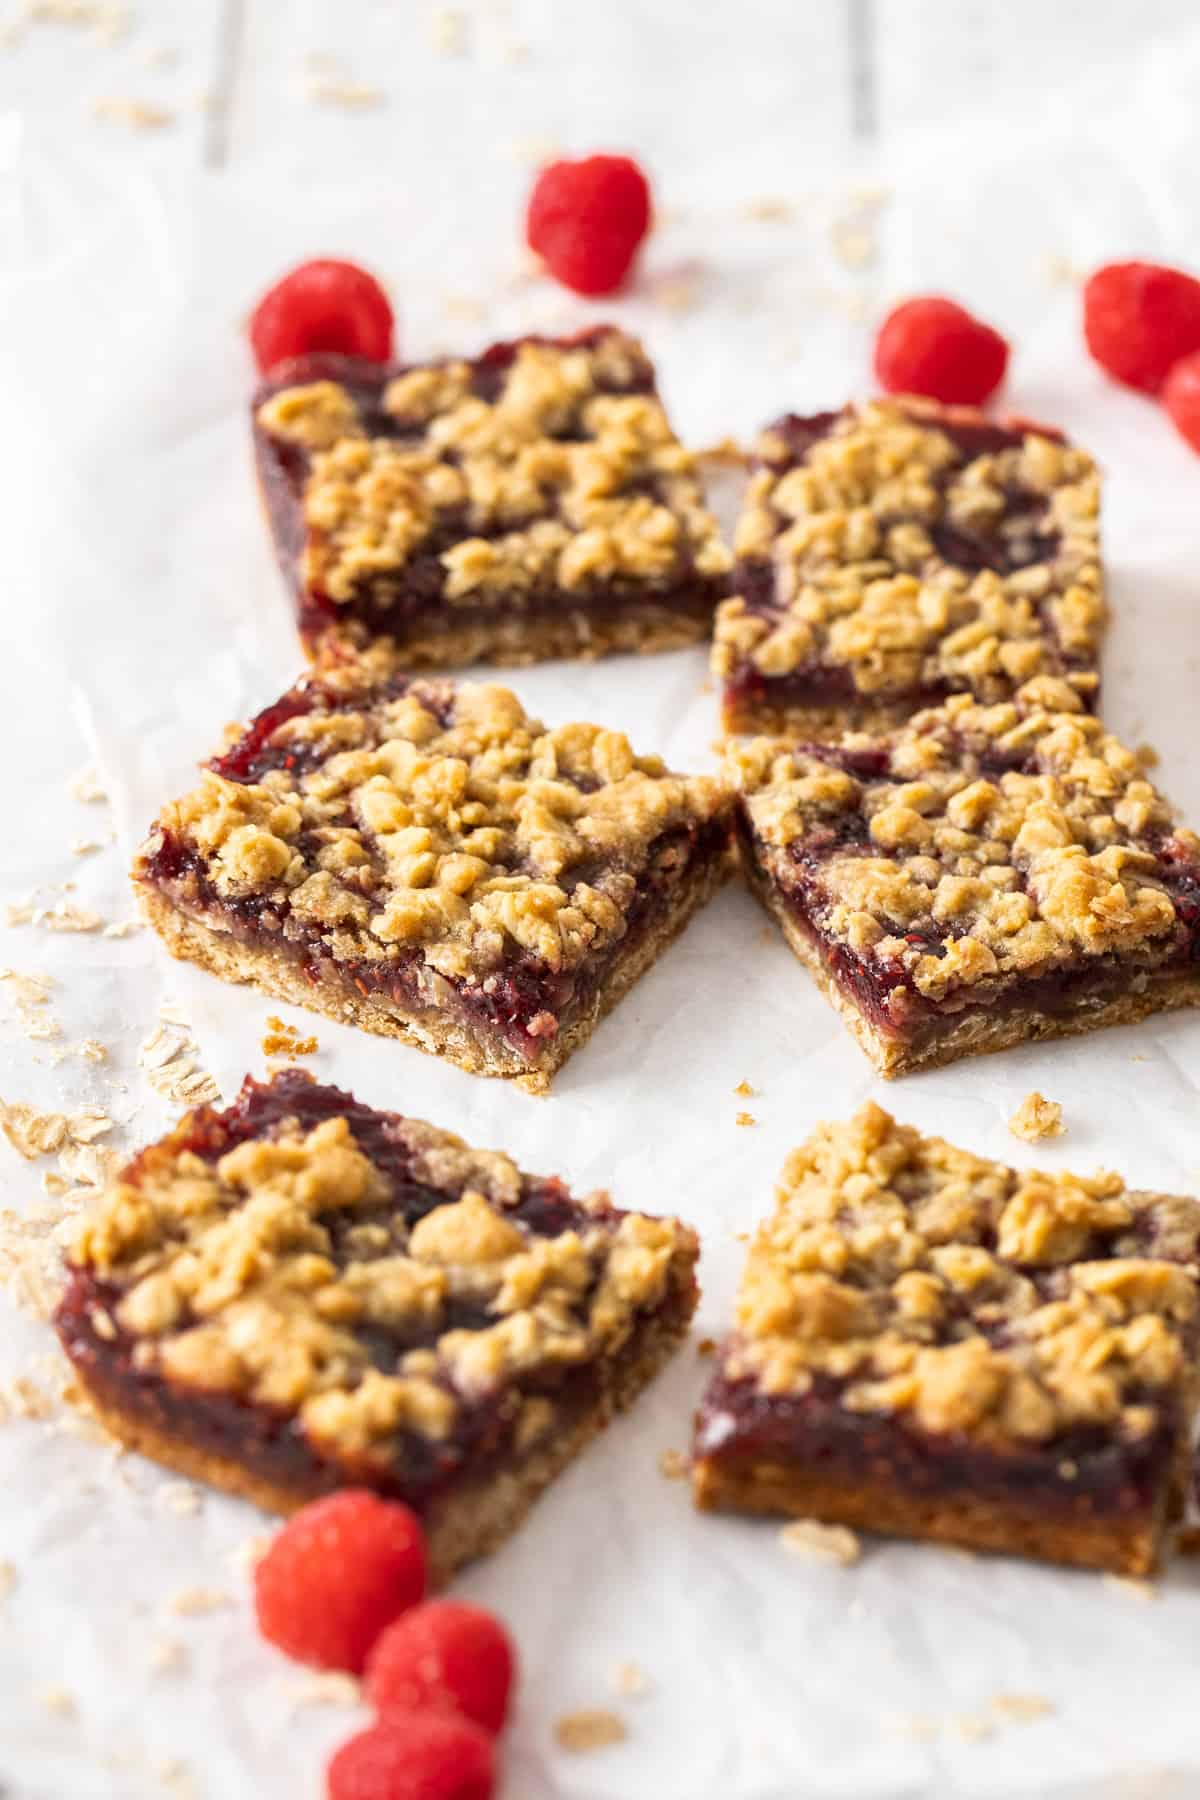
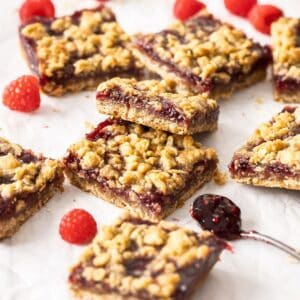
These delicious Easy Jam Oatmeal Bars are going to be your favourite new recipe. With a crisp, slightly chewy base, a sweet jam centre and a crispy crumble topping, they are a crowd-pleaser. They’re so simple! If you love a good, sweet treat that you can make in about a half hour, this recipe is for you. The hardest part is waiting for them to cool down once they’re baked!

Why you’ll love this recipe:
You can bake a batch of these Jam Oatmeal Bars with minimal effort using basic household staples.
To make it especially easy, the base and topping are made from the same mixture. The rolled oats give the bars a very pleasing, slightly chewy texture, beautifully complemented by the sweet jam in the centre.
You will love these Raspberry Jam Oatmeal Bars because:
- They are so easy to make; it only takes about a half hour to make and bake the bars, but you do have to be patient while waiting for them to cool!
- Like my Lemon Curd Cake and Caramel Bars, the base and the crumble topping are made from the same mixture. After pressing the base into the tin and covering it with jam, you simply crumble the remaining mixture over the top. It doesn’t get much easier than this.
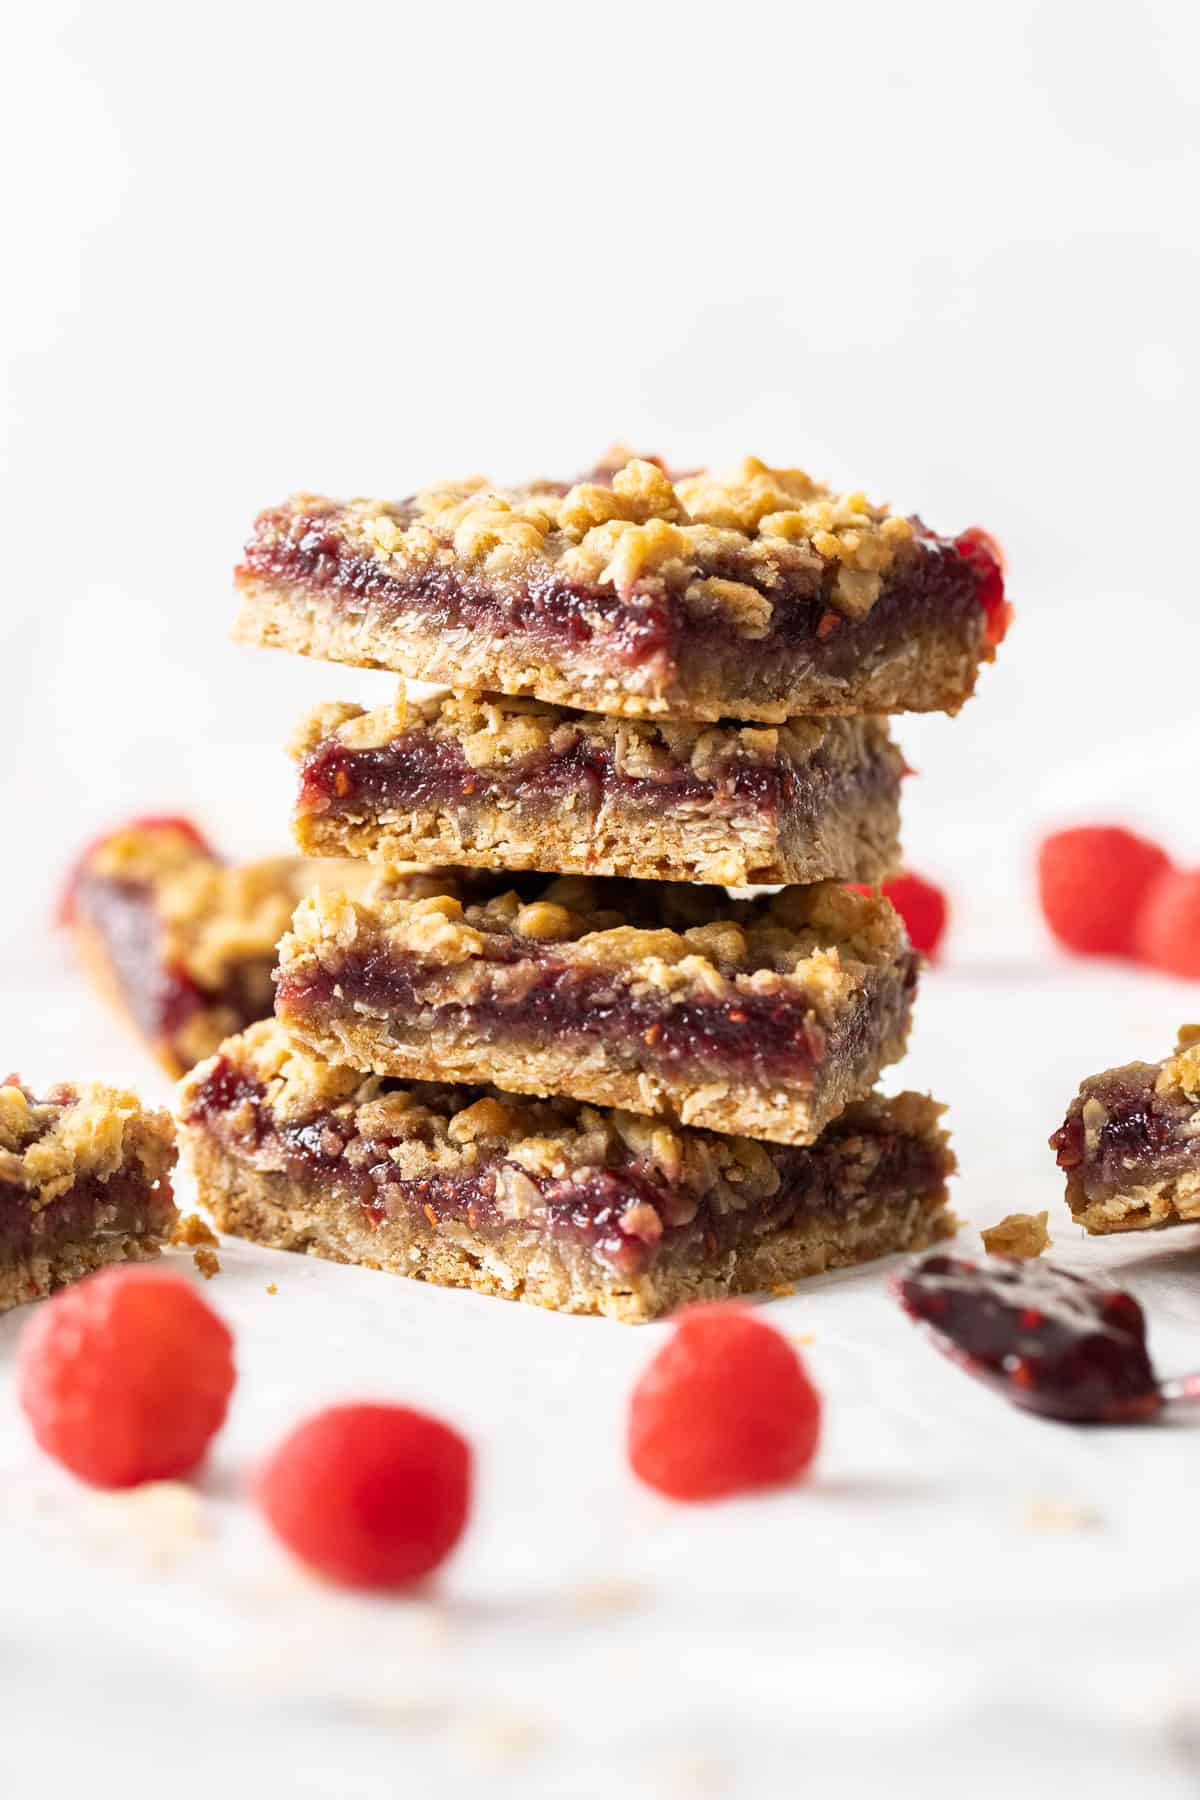
- They are deliciously sweet with a texture that is slightly crispy as well as chewy.
- I have used Raspberry Jam, but you can fill them with a jam of your choice. Be sure to also try my Nutella or Peanut Butter Oatmeal Bars.
- They are perfect as a snack, but also delicious served warm for dessert with our Vanilla Ice Cream.
Ingredients in this recipe:
Please see the recipe card further along in the post for exact quantities of ingredients and the full method.
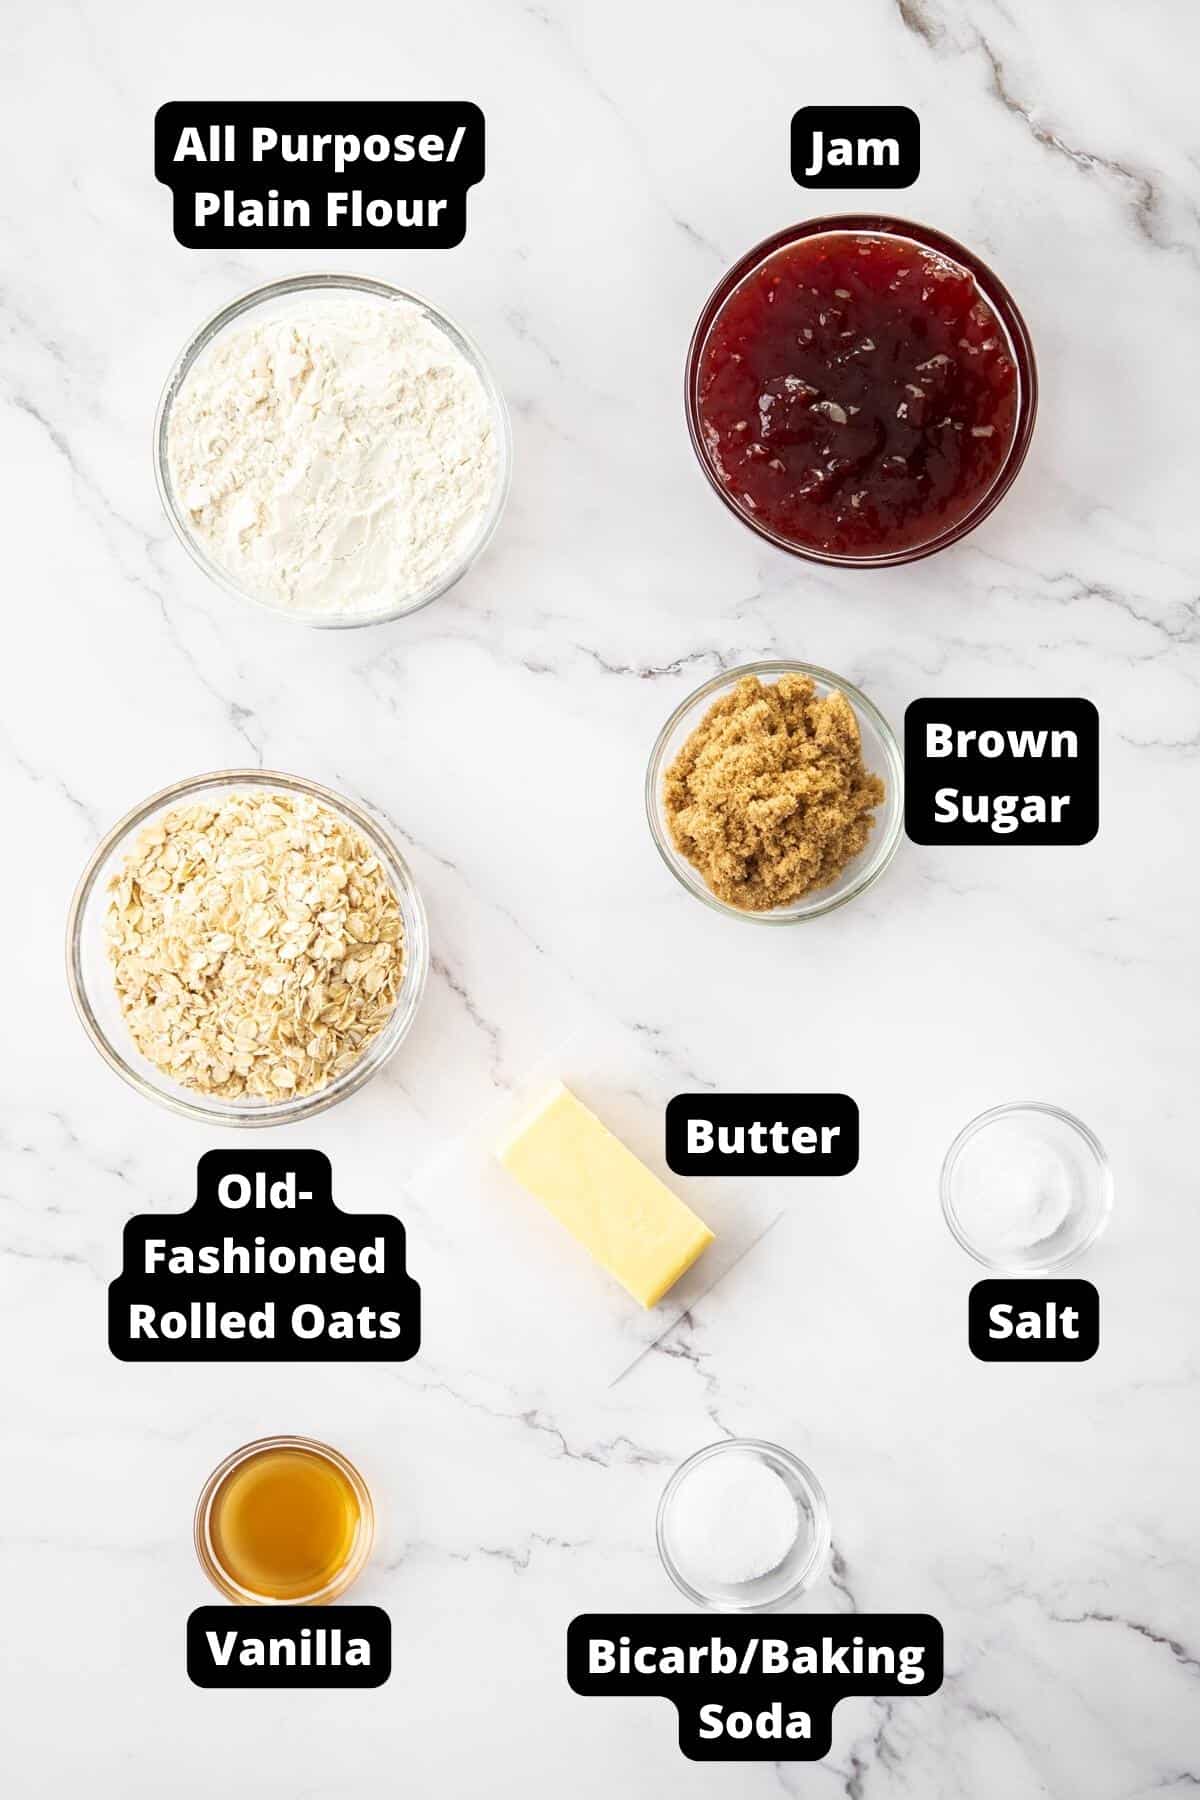
All-purpose/plain flour – this recipe has been tested with regular wheat flour and also, gluten-free all-purpose flour. Both work well!
Rolled oats – old-fashioned rolled oats are best for this recipe. Use certified gluten-free if you require.
Jam/preserves – I have used our Homemade Raspberry Jam, but you can use the jam of your choice.
Butter – adds richness and flavour. We use unsalted butter.
Brown sugar – we use light brown sugar; it adds a slight caramel flavour.
Vanilla extract – for the best result, use vanilla, which is naturally extracted, not artificially flavoured.
Salt – use coarse kitchen sea salt to boost the other flavours.
Baking/bicarbonate of soda – acts as a raising agent. It is not the same as baking powder.
How to Make Jam Bars:
Please see the recipe card further along in the post for exact quantities of ingredients and the full method.

1 – Combine dry ingredients:
To begin, preheat your oven and line a baking tin with non-stick baking paper.
In a medium-sized bowl, combine all the dry ingredients except the sugar and mix well.
2 – Combine wet ingredients:
In another bowl, combine the sugar, vanilla and melted butter. Mix well.
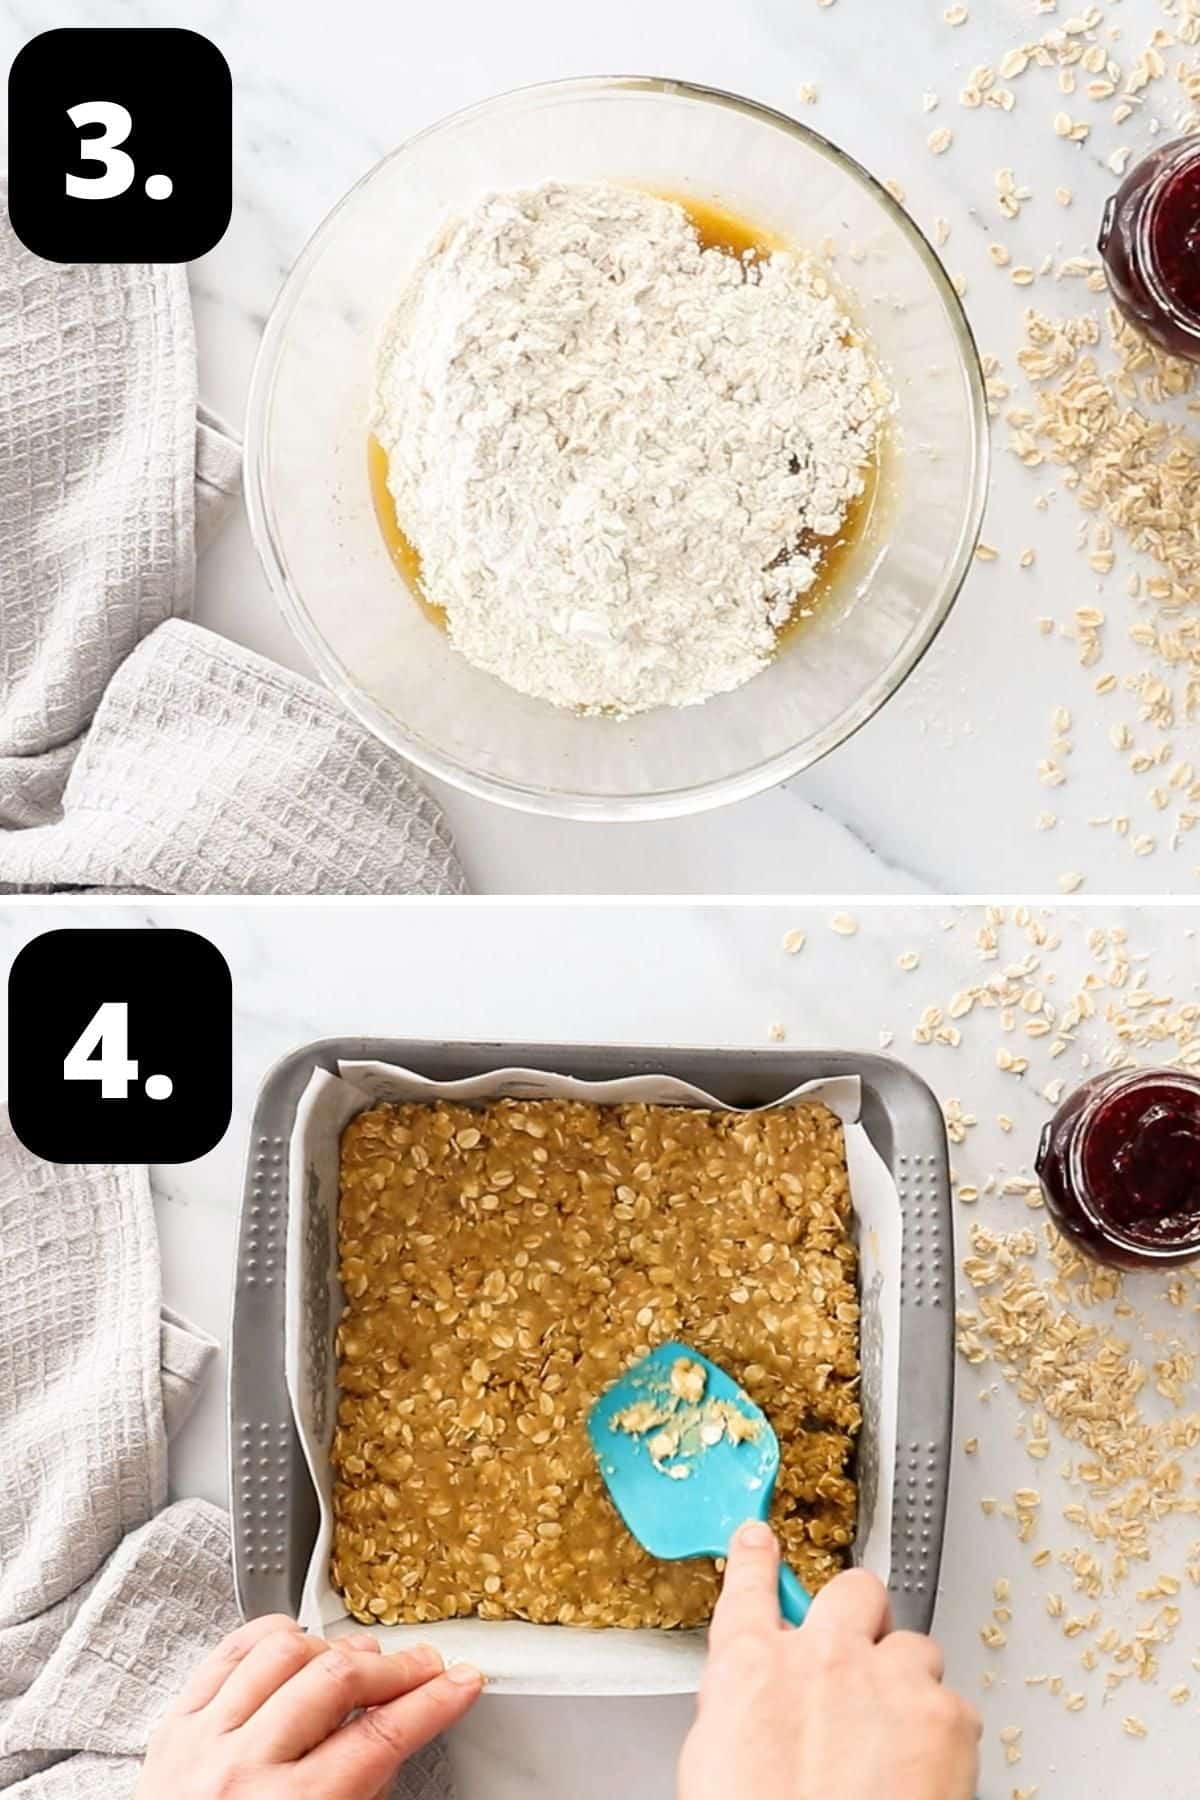
3 – Combine the wet and dry ingredients:
Add the wet ingredients to the dry and combine.
4 – Add the base to the tin:
Press about ¾ of the mixture into the bottom of the prepared pan and bake for 10-12 minutes.
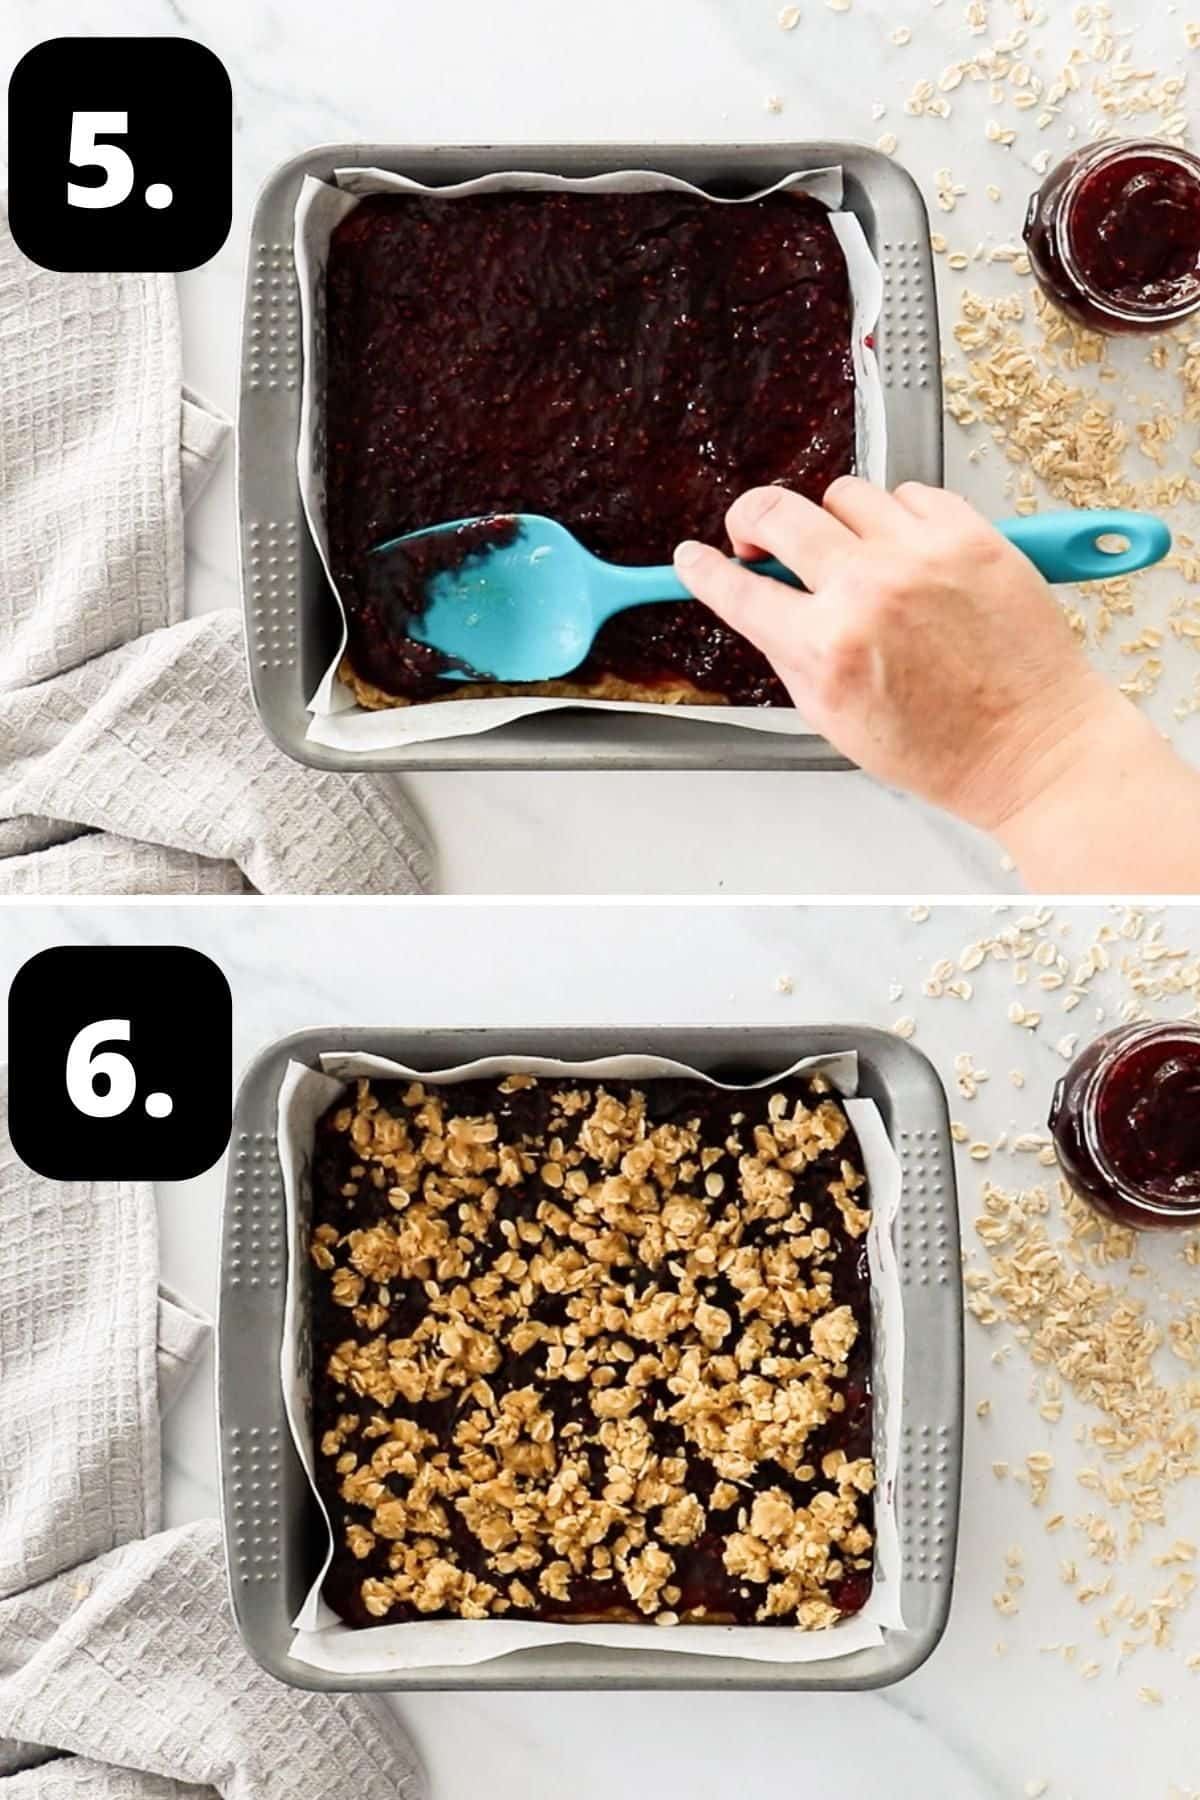
5 – Add the jam:
Remove from the oven and immediately spread the jam/preserves over the top.
6 – Crumble over the topping:
Sprinkle the remaining dough over the top.
Cook for another 10-15 minutes or until the crumble on the top is light golden brown.
Remove the slice and allow to cool for 30 minutes on the bench then chill in the fridge for a further 30 minutes.
Tips for success and FAQs:
When you line the pan with baking paper, be sure to leave some overhang. This makes it easier to lift the Raspberry Oatmeal Bars out of the pan.
And now patience is required. The Jam Bars must chill before being cut, otherwise, they will fall apart. I like to cool them on the bench for 30 minutes and then transfer to the fridge for a further 30 minutes. Then, I cut the bars into squares and enjoy!
You certainly can. I have made this recipe using many different kinds, and they have all been delicious.
Store in an airtight container in a cool location. The bars will be at their best for the first two days but will last for 4 (they will just soften a little). If the weather is warm, keep them in the fridge in an airtight container for up to a week. Remove them about 10 minutes prior to serving.
Yes, they freeze well. Allow the bars to cool completely, and then put them in an airtight container. If storing them in layers, place a sheet of baking paper between the layers so that they don’t stick. Thaw them at room temperature.
I have made the Jam Oatmeal Bars using gluten-free flour and oats on many occasions. However, there are differing views regarding oats. For Australian residents, Coeliac Australia provides a great resource on this topic. Always be sure to read the labels and consult with a health professional if you are unsure.
Variations and substitutions:
Jam – use a jam or marmalade of your choice. Homemade or storebought are both fine.
Nuts – to add extra crunch, you could sprinkle some flaked almonds over the top before baking.
Serving suggestions:
The Jam Oatmeal Bars are very versatile. Some suggestions to enjoy them are:
- For morning or afternoon tea – delicious with a cup of coffee!
- As an easy breakfast when time is short.
- Add them to lunchboxes.
- Take on picnics or potlucks.
- Serve warm with a scoop of Vanilla Ice Cream.
Minimal effort is required to make these Easy Jam Bars with their delicious crumble topping. They are certain to become a family favourite. I would love to hear from you in the comments when you have given them a try!
Alex xx
More delicious recipes for you to try:
Stay in touch!
Follow me on Facebook, Pinterest and Instagram and subscribe to my newsletter.
Jam Oatmeal Bars
Recipe Measurements:
For accuracy, when weights are provided, we recommend weighing your ingredients. This will produce the best results.
Ingredients
- 1 cup (150 g) all-purpose/plain flour See Note 1
- 1 cup (80 g) old-fashioned rolled oats See Note 2
- ½ teaspoon sea salt
- ½ teaspoon baking/bicarb soda
- ½ cup (125 g) butter – melted
- ⅓ cup (70 g) brown sugar
- 3 teaspoon vanilla extract
- 1 cup raspberry jam – or jam of your choice See Note 3
Instructions
- Preheat your oven to 175 Degrees C (350F).
- Line a 20 x 20cm (8 x 8 inch) baking dish with non-stick baking paper. (Allow an overhang with the baking paper – it makes it easier when removing the slice!)
- In a medium-sized bowl, add the flour, rolled oats, salt and baking soda. Mix well.
- Melt your butter. Add this to another bowl, and combine with the vanilla and brown sugar.
- Combine the contents of both bowls, and mix well.
- Firmly press about ¾ of the mixture into the tin. (You'll need to reserve about 100 g/a firmly packed ½ cup of the mixture).Bake for 10-12 minutes, or until a light golden brown.
- Remove from the oven, and immediately spread over your jam. Crumble the remaining mixture, using your fingers, over the top of the jam.
- Return to the oven, and bake for a further 10-15 minutes or until the topping is cooked through and a light golden brown.
- Remove the bars from the oven, and allow them to cool for 30 minutes on your bench.
- Put the slice in the fridge, and chill for a further 30 minutes or until completely cool. Cutting the bars while too warm will cause them to fall apart. Remove the slice from the tin, and cut the slice into squares.
Video
Notes
- Flour: use a gluten-free all-purpose/plain flour if you require it- this has been tested and works perfectly.
- Rolled oats: use gluten-free oats if required.
- Jam: any jam/preserve can be used in this recipe. If your jam is quite thick, give it a quick stir in a bowl before spreading it over the base. The heat from the base of the bars will also help the jam to spread more easily.
- Measurements: for the most accurate measurements when baking, we suggest you weigh your ingredients.
- Chill the bars: the Jam Bars really need to chill before cutting, otherwise, they will fall apart.
- Storage: store in an airtight container in a cool location. The bars will be at their best for the first two days but will last for four (they will just soften a little). If the weather is warm, keep them in the fridge in an airtight container for up to a week. Remove them about 10 minutes prior to serving.
- Freezing: allow the bars to cool completely, and then put them in an airtight container before placing them in the freezer. If storing them in layers, place a sheet of baking paper between the layers so they don’t stick. Thaw them at room temperature. Freeze for up to two months.
Nutrition Estimate:
Nutritional Disclaimer:
The nutritional information is an estimate only, and is derived from online calculators. For accurate results, we recommend calculating the nutritional information based on the ingredients and brands you use.
This post was originally published in June 2020. It has been updated with new photos and more information. The recipe has been altered slightly.
Lizzie
Delicious and super easy to make. I used apricot jam and it worked really well. Kids gave them two big thumbs up.
Alexandra Cook
Thank you, Lizzie 🙂
So happy you all enjoyed this recipe! Alex xo
Lauralea Dawson
These oatmeal bars were a complete hit with my entire family! We needed to use up some sugar free strawberry jam and these were just the most delicious way to do that!
Alexandra Cook
Thank you so much for making this recipe, Lauralea!
I am so happy you enjoyed it. Alex xo
Candia
I doubled this recipe using a 9×13 glass pan. I baked at 350 degrees the bottom crust for 15 mins. and finished the baking for 15 mins. till light golden and edges were bubbling. (some ovens made require 35 mins. total finish time ). This is a favorite treat I love to share.
Alexandra Cook
Thank you, Candia! 🙂
Lovely to know a double recipe works too. Thank you so much for taking the time to comment!
Alex xo
Melinda
These Jam Bars are chewy and delicious and best of all, easy to make with ingredients from my pantry. I used a jar of homemade huckleberry jam that I had on hand. These oatmeal bars are a real treat!
Alexandra Cook
Hi Melinda,
That sounds lovely! I am so pleased you enjoyed this recipe.
Alex xo
Nora
These oatmeal bars turned out perfectly! Will make them again and again! Thank you!
Alexandra Cook
I am so pleased you enjoyed this recipe, Nora! 🙂
Thanks, Alex xo
Helen
These bars are so sweet and delicious = They are so easy to make and I think all of us have everything we need right now = I did!! My husband ate most of these. I guess I’ll be making more tomorrow!
Alexandra Cook
Hi Helen,
Thanks so much for trying this recipe! I am so pleased you’ll be making more 🙂
Alex xo
Nicole NK
So easy to make, and came out perfectly for breakfast.
Alexandra Cook
Hi Nicole,
Thank you for making this recipe 🙂 We love them for breakfast with a coffee!
Alex xo
Jodi Sherman
Fantastic recipe! Only proviso is that the cooking times were off – needed at least 20 mins before adding jam and at least 20 mins after. At first I thought my oven heat was off but after testing the calibration, oven was fine. The 10 minute cooking time for each portion as indicated in the recipe was insufficient to get any color in the crust. I made this recipe 5x during the holidays this year and it will become a staple in my rotation.
Alexandra Cook
Hi Jodi,
Thanks for making this recipe 🙂 I’m glad it will become a staple!
Alex xo
Lisa Turner
These were great. I have made them a couple of times now. So perfect with a cup of tea or for an after school snack for the kids. I made with homemade raspberry jam and also tried store bought strawberry. Both versions turned out great. Thanks!
Alexandra Cook
Hi Lisa, thank you for your fantastic feedback on the Jam Oatmeal Bars. I am delighted that you enjoyed them and varied them by using different jams. 🙂
Marie
These are so good and so easy to make. I’m just having another for lunch dessert now 🙂
Alexandra
Hi Marie, I am so pleased that you enjoyed the Jam Bars. Thank you for taking the time to let me know. 🙂
Tina K
Just made these for the first time w homemade strawberry jam and they were incredible!! Looking forward to making other variations!
Alexandra
Hi Tina, I am delighted to hear that you enjoyed our Easy Jam Bars. They would have been especially delicious with homemade strawberry jam! Thank you for taking the time to let me know. 🙂
Audrey
My kids loved these!
Alexandra
Happy to hear that, Audrey!
Kim
This turned out so good,will make it again
Alexandra
Thank you, Kim!
Jenni
Can these be put in freezer for later use? Great recipe. Thank you
Alexandra
Hi Jenni!
The bars freeze really well. Allow the bars to cool completely, and then put them in a sealed container – ensure that you have some baking paper in between so they don’t stick together. Allow to defrost in the fridge overnight and bring back to room temperature before consuming. They will keep in the freezer for 2 months.
Kind regards, Alex
Heidi | The Frugal Girls
I loved your tip for using homemade jam. That would really elevate the flavors of these beautiful bars!
Alexandra
Thank you so much, Heidi! I definitely love using homemade jam where possible 🙂
Martha
Hi Alex!
I have an abundance of homemade jam from this summer so decided to make a few flavors this weekend! I used strawberry, apricot, and plum jam (using your recipe)! Well, my kids loved it so much they were all gone! I’m going to make extra next time since they keep disappearing so quickly! I think they would make an excellent after school snack too. Thanks for the idea! My family has been enjoying quite a few of your recipes!
Alexandra
Martha, I’m so pleased that you have been using your homemade jams in our Easy Jam Bars; it’s great to vary the flavours. Thank you for letting me know that you are enjoying our recipes; I do appreciate it. 🙂
Robyn
These bars are so delicious! A tasty addition to any lunchbox or cookie jar!
Alexandra
Thank you so much, Robyn!