


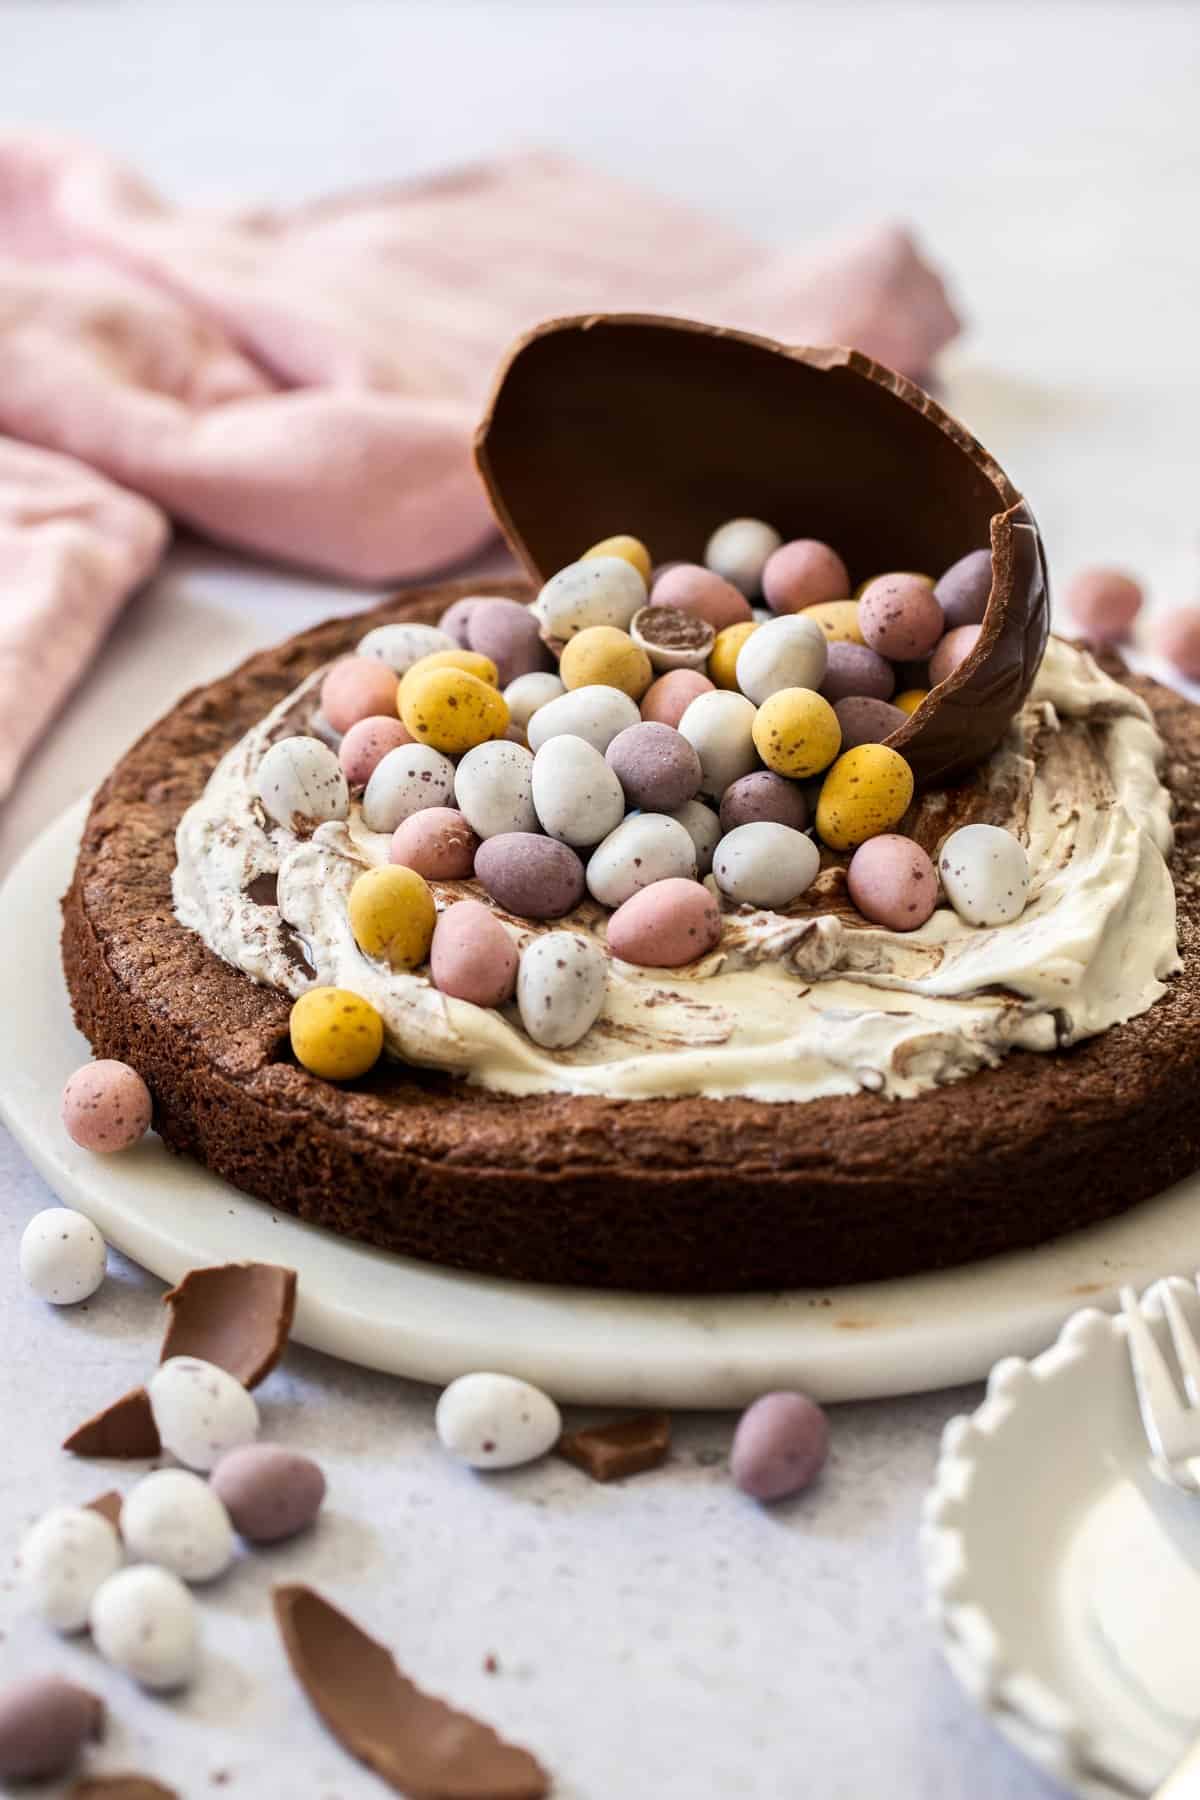
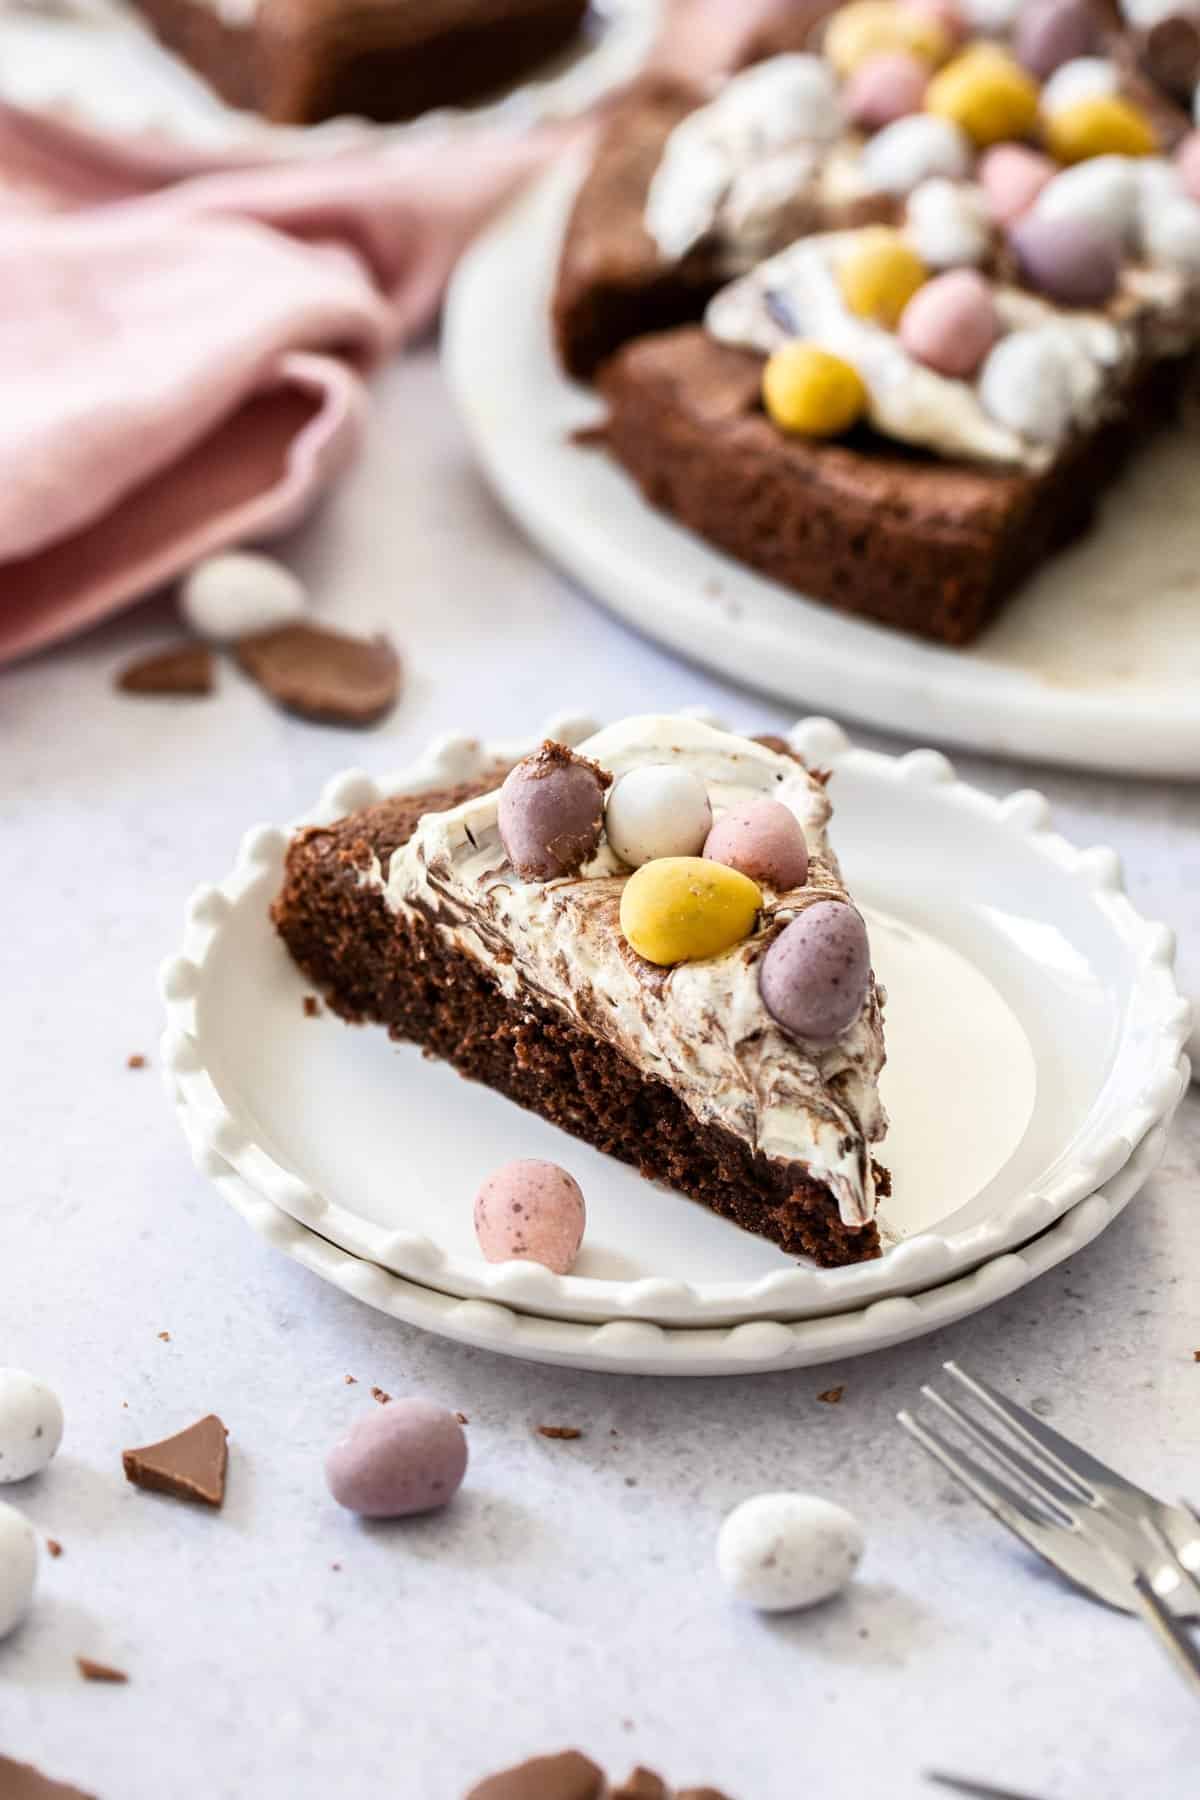
My super-easy Easter Mini Egg Chocolate Cake will be a great addition to your festivities. This richly flavoured, moist chocolate cake is made even more special by topping it with whipped cream marbled with melted dark chocolate. The cake is then decorated with the Easter favourite, Mini Eggs. The ideal cake to serve as part of your Easter celebrations.

Jump to:
Why we love this recipe:
For many people, chocolate is an essential part of their Easter celebrations, and this easily made Chocolate Cake will be the ideal centrepiece for your Easter table. In fact, if you have never made a cake, this one is ideal as it is so easy.
You will love this cake because:
- The recipe is gluten-free as written, but you can use regular flour if you prefer.
- It is so easily made; simply add all the cake ingredients to one bowl and mix together.
- This Mini Egg Easter Cake is not just for special occasions. It is so easy that you can make it for busy weeknights, and decorate it as you wish.
- It is a crowd-pleaser – the ideal dessert for an Easter celebration with family and friends.
- We have used one of our most popular cakes, our Sour Cream Chocolate Cake, as the base, and decorated it with Marbled Chocolate Cream and an assortment of mini chocolate eggs.
- You can make the cake a day ahead and decorate it just before serving.
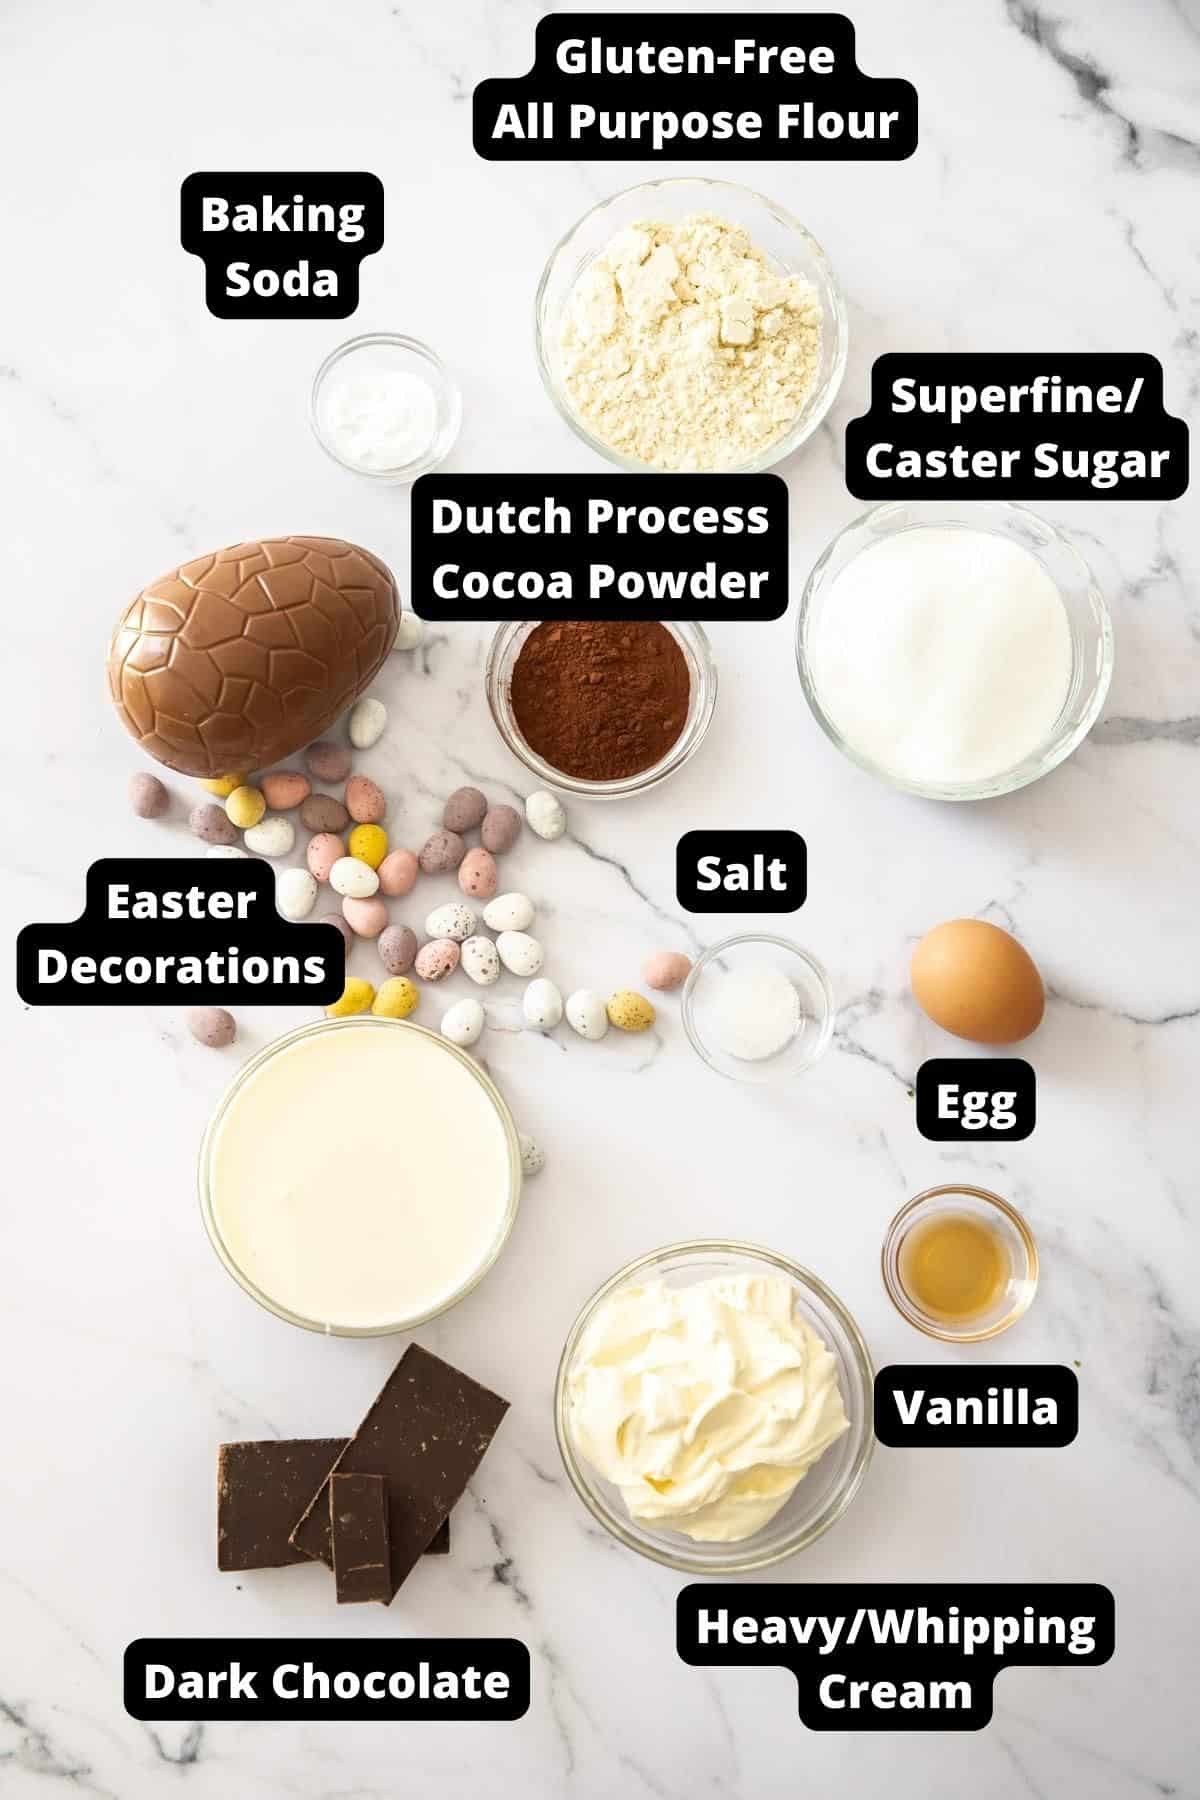
Ingredients in this recipe:
Please see the recipe card further along in the post for exact quantities of ingredients and the full method.
Chocolate Cake:
Caster/superfine sugar – finer than regular sugar, the granules dissolve more readily. Use regular granulated sugar if you wish.
Gluten-free plain/all-purpose flour – I have used a commercial gluten-free plain/all-purpose flour which is made from a blend of naturally occurring gluten-free flours. Our gluten-free flour blends contain either xanthan or guar gum to stabilise and provide structure to our recipes. If you wish, you can substitute regular all-purpose flour if you don’t need the cake to be gluten-free.
Salt – we use coarse, kitchen salt; a small amount enhances the flavour of the other ingredients.
Dutch Process cocoa powder – for a rich colour and deep chocolate flavour, I use unsweetened cocoa powder.
Baking soda/bicarbonate of soda – baking soda is used in this cake to neutralise the acidity of the sour cream and to act as a raising agent. It is not the same as baking powder.
Vanilla extract – use naturally extracted vanilla, not one synthetically flavoured.
Egg – I use a large, free-range egg. Eggs add richness to cake batters, as well as providing structure and strength.
Sour cream – full-fat sour cream adds richness and moisture to the cake as well as acting with baking soda as a raising agent.
Marbled Chocolate Cream:
Dark chocolate – I have chosen rich, dark chocolate with 70 % cocoa solids to balance the richness of the cream.
Whipping/thickened cream – also known as heavy cream, this is cream that consists of 35% milk fat.
Step by step instructions:
Please see the recipe card further along in the post for the exact quantities of ingredients and the full method.
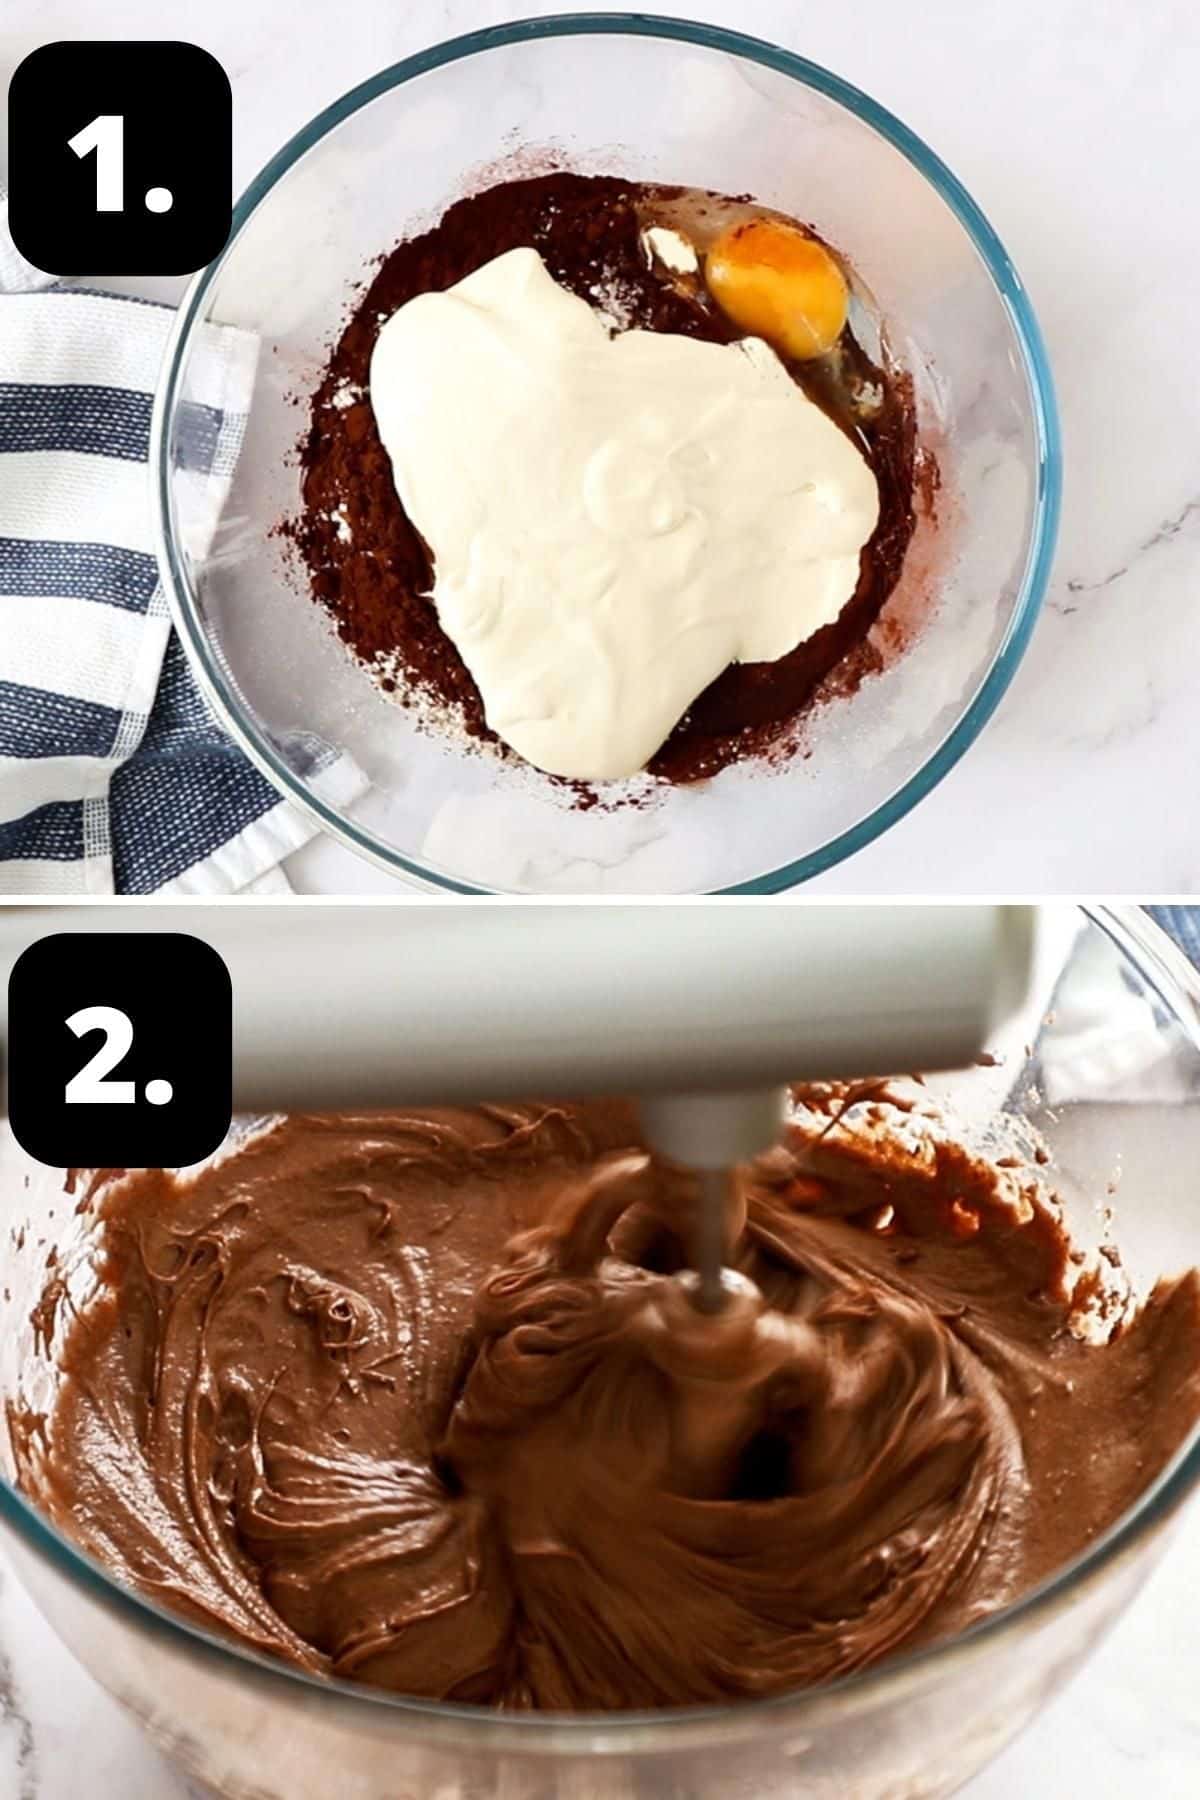
1 – Prepare the cake batter:
Start by preheating your oven and preparing your cake tin.
Add all the cake ingredients to the bowl of a stand mixer or place them in a bowl and use a handheld electric mixer.
2 – Mix the cake batter:
Mix the ingredients until the cake batter is smooth, but be careful to not overbeat the mixture.

3 – Bake the cake:
Turn the mixture into your prepared cake tin. Bake for 25-30 minutes, or until a skewer inserted into the cake comes out clean.
4 – Allow the cake to cool:
Place the tin on a wire rack to cool, then carefully transfer the cooled cake to a serving platter and decorate. A dusting of icing sugar is lovely if you would like to keep it simple or decorate for Easter with chocolate whipped cream and Mini Eggs.
Tips for success and FAQs:
As baking is a science, you will obtain the best results by weighing the ingredients. This is more accurate than volume measurements.
Always use good quality ingredients; you can taste the difference. For a deep, rich flavour, use a good quality, unsweetened cocoa powder.
Yes, you can. Put the cake on a serving plate, cover with cling wrap and set aside at room temperature until ready to decorate it. If you are going to top it with cream, do that just before serving.
Yes, you can. Wrap it well in cling wrap, excluding as much air as possible. Place the wrapped cake in an airtight container or cover with aluminium foil. Keep it in the freezer for up to 3 months.
Store leftover cake in an airtight container in the fridge for up to 2 days. If the decorated cake has been at room temperature for 2 hours, you should discard it. Ideally, serve your cake and return the remainder to the fridge.
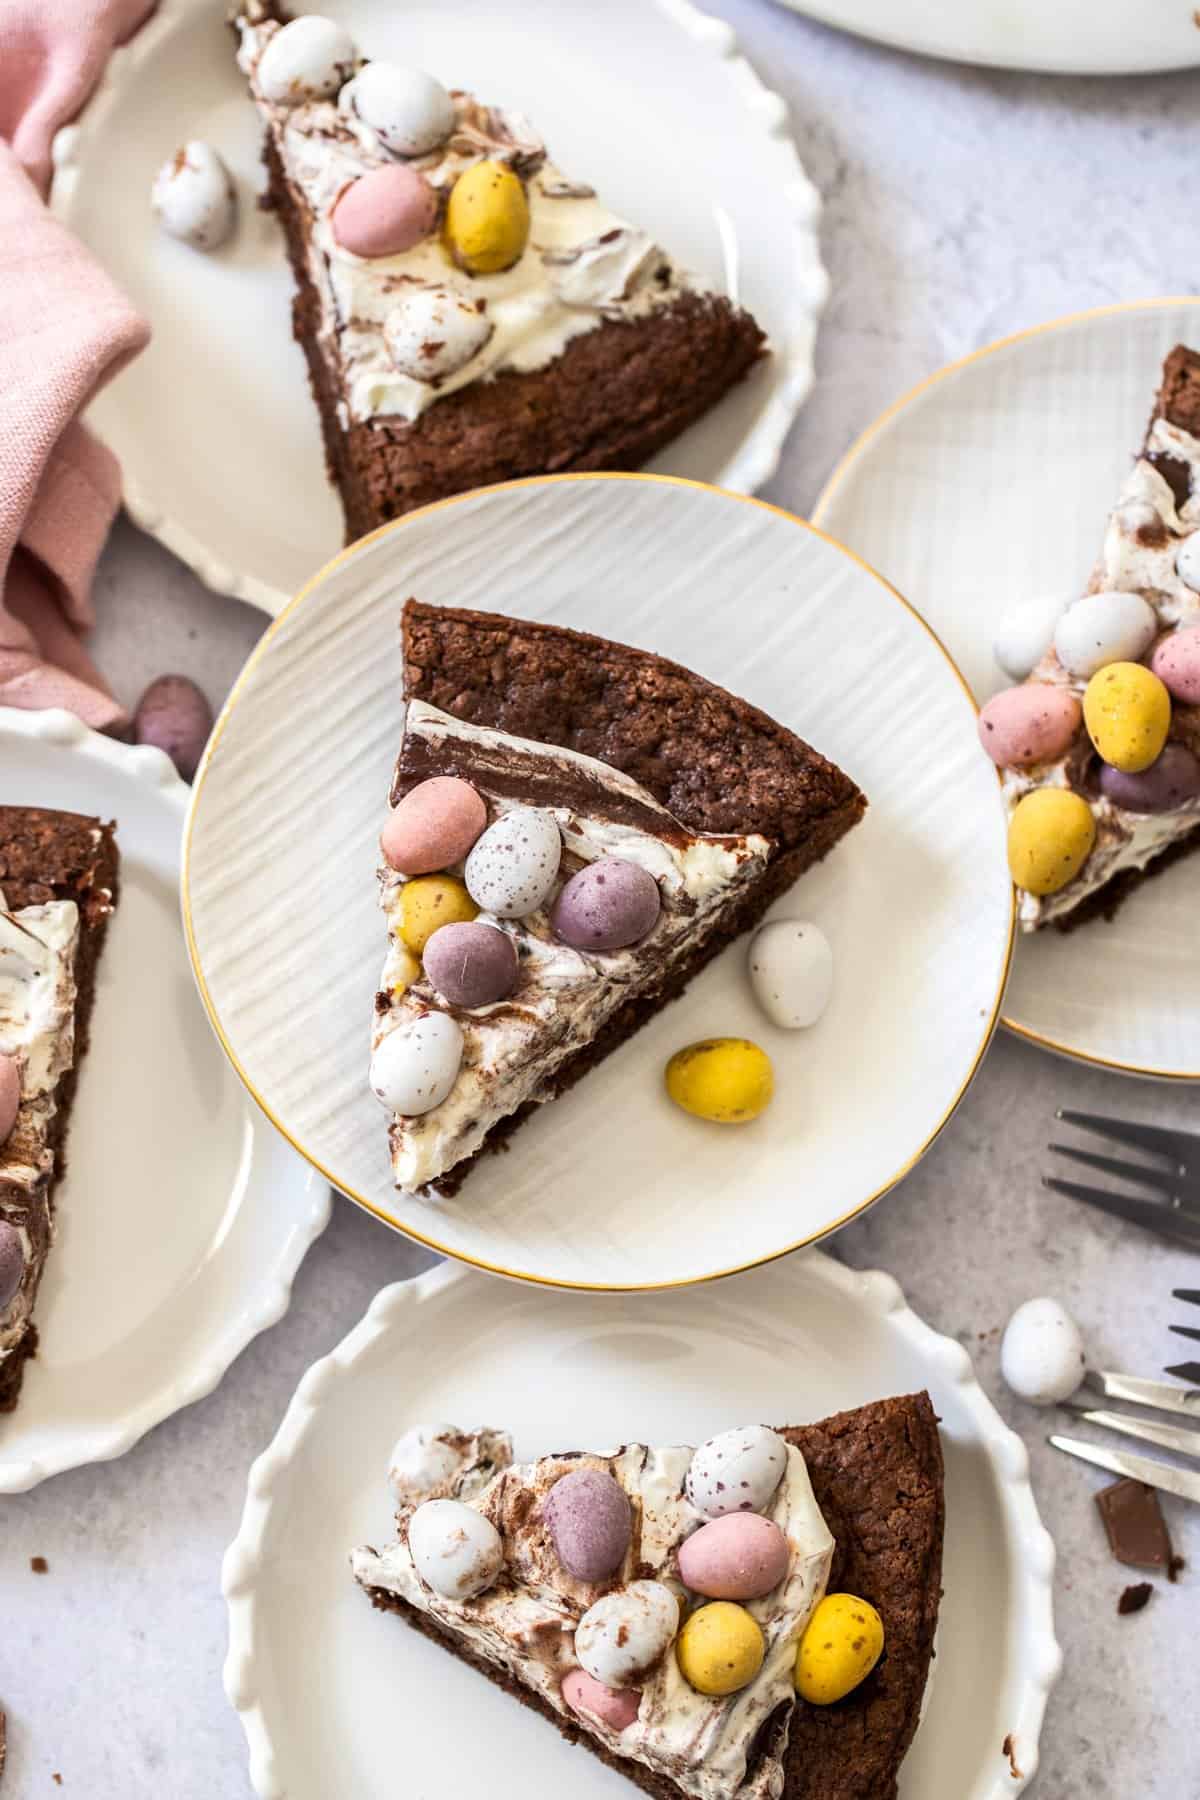
I have used mini eggs as their outer candy shells, in various pastel shades, are very pretty. However, you could also use plain chocolate eggs, all one colour or a mixture of dark, milk or white chocolate. As well, you could use Crème Eggs, cutting some in half to reveal their soft cream centre which mimics an egg yolk. If you want your dessert to be gluten-free, be sure to check that the eggs are also gluten-free.
More delicious recipes for you to try:
If you’re like us, and cannot resist a delicious chocolate treat or are looking for some great edible gift ideas, you’ll love some of these other favourite recipes:
- Easter Rocky Road
- Chocolate Pretzel Easter Nests
- Decadent Chocolate Brownies
- Chocolate Tiffin
- Hedgehog Slice
- Or check out our complete collection of chocolate recipes here.
My Easter Mini Egg Chocolate Cake is for lovers of chocolate and is the ideal cake for your Easter celebration. It can be made with minimum effort, making it ideal when time is short. It’s a simple, beautiful cake that is sure to be a crowd-pleaser. Enjoy!
Alex xx

Mini Egg Easter Chocolate Cake (Gluten-Free)
Recipe Measurements:
For accuracy, when weights are provided, we recommend weighing your ingredients. This will produce the best results.
Ingredients
For the Cake:
- 1 cup (220 g) caster/superfine sugar
- 1 cup (150 g) gluten-free plain/all-purpose flour See Note 1
- ¼ teaspoon salt
- 3 tablespoon Dutch Process cocoa powder See Notes 2 and 3
- 1 teaspoon baking soda/bicarbonate of soda See Note 4
- 1 teaspoon vanilla extract See Note 5
- 1 large egg
- 1 cup (240 g) full fat sour cream
For the Chocolate Whipped Cream:
- 100 g (3.5 oz) dark chocolate –70 % cocoa solids – broken/cut into even pieces
- 1 cup 250 ml whipping/thickened cream – 35% milk fat
- 125 g (4.5 oz) Cadbury Mini Eggs – to decorate, or decorations of your choice
Instructions
For the Cake:
- Preheat your oven to 180 Degrees C (355 F).
- Line the base of a 9” (23cm) round spring-form tin with baking paper, and grease the sides.
- Add all the ingredients to the bowl of a stand mixer or place them in a bowl and use a handheld electric mixer. On medium speed, mix them all together until the batter is smooth, but do not overbeat.
- Turn the mixture into the prepared baking tin and smooth the top.
- Bake for 25-30 minutes or until a skewer inserted into the cake comes out clean. A few crumbs are okay but there should not be any batter.
- Place the tin on a wire rack and cool for 10 minutes. Remove the side of the cake tin. Cool a further 10 minutes before carefully removing the cake to the rack to further cool. The cake is very fragile at this point so leave it to cool further if necessary.
- Add the Marbled Cream and Easter eggs shortly before serving.
For the Chocolate Whipped Cream:
- To melt the chocolate, place the chopped chocolate pieces in a bain-marie/double boiler or heatproof bowl set over a pan of barely simmering water, making sure the bowl doesn’t touch the water. Stir with a metal spoon or spatula until the chocolate has almost melted. Remove from the heat – the residual heat will melt the remaining chocolate. See Note 6.Once the chocolate has melted, leave it for five minutes to cool slightly.
- Meanwhile, in a medium-size bowl, using hand-held electric beaters on a medium speed, whip the cream until it holds a soft peak. That is, it holds a peak, but the tip is soft. Be careful to not overwhip, or you may end up with butter.
- Add the melted chocolate to the whipped cream and gently give it a few turns with a spatula to roughly combine the two.Don’t completely combine them, they will mix more when you add them to the cake. You want a marbled effect on the cake.
- Add the marbled mixture to the cold cake and roughly but evenly distribute it over the top. Do not attempt to smooth the cake or you will lose some of the marbled appearance. To the centre of the cake, add the Easter eggs of your choice.
Video
Notes
- Our gluten-free flour blends contain either xanthan or guar gum to stabilise and provide structure to our recipes. If your flour blend already contains either of these gums, there is no need to add more. If you don’t need to make these gluten-free, you can use regular plain/all-purpose flour.
- Use a good quality, unsweetened cocoa. I use Plaistowe Dutch Processed Cocoa, available in supermarkets. It gives the cake a lovely, rich, chocolatey colour.
- Tablespoon: We use a standard Australian Tablespoon that is 20ml or 4 teaspoons. You may have to adjust your measurements accordingly.
- This is not the same as baking powder. Be sure to use baking soda, which works with the sour cream as a raising agent.
- For the best flavour, use vanilla extract/essence which has been naturally extracted from the vanilla bean and not one which is synthetically flavoured.
- If you prefer to use a microwave, add chopped chocolate to a microwave-safe bowl. Melt in 20-second increments, stirring frequently. When most of the chocolate is melted, remove the bowl from the microwave and stir until it is completely melted. If possible, melt your chocolate on a low power setting. As each microwave functions differently, you will need to keep an eye on the chocolate so it does not overcook.
Nutrition Estimate:
Nutritional Disclaimer:
The nutritional information is an estimate only, and is derived from online calculators. For accurate results, we recommend calculating the nutritional information based on the ingredients and brands you use.
This post was originally published in April 2019. It has been updated with new photos and more information. The recipe remains the same, however, the decorations have been improved.
Leave a Comment