


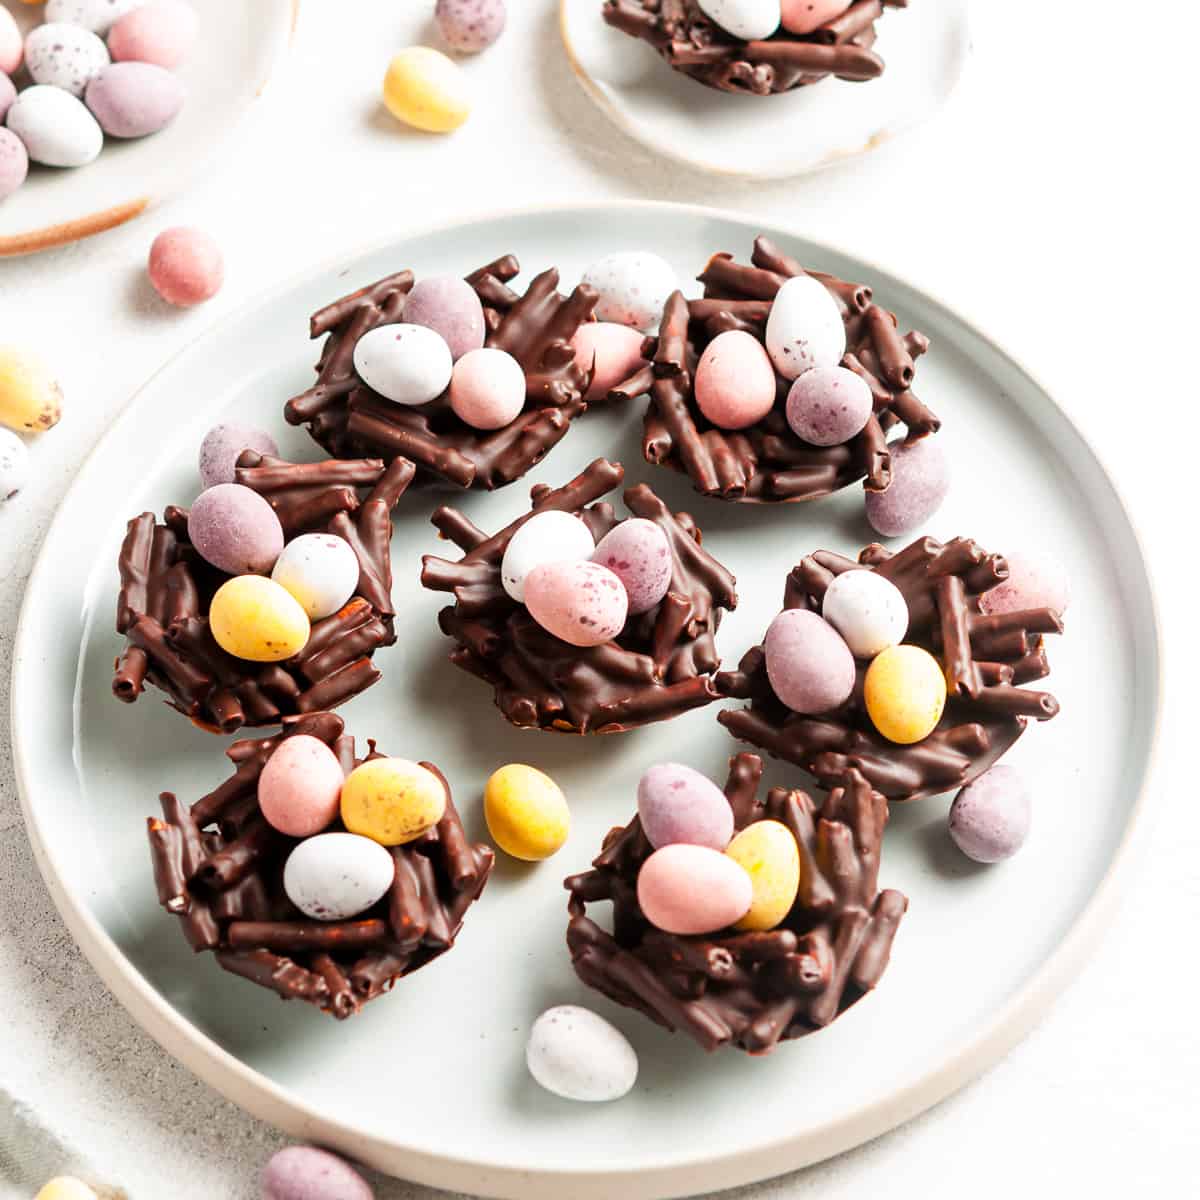
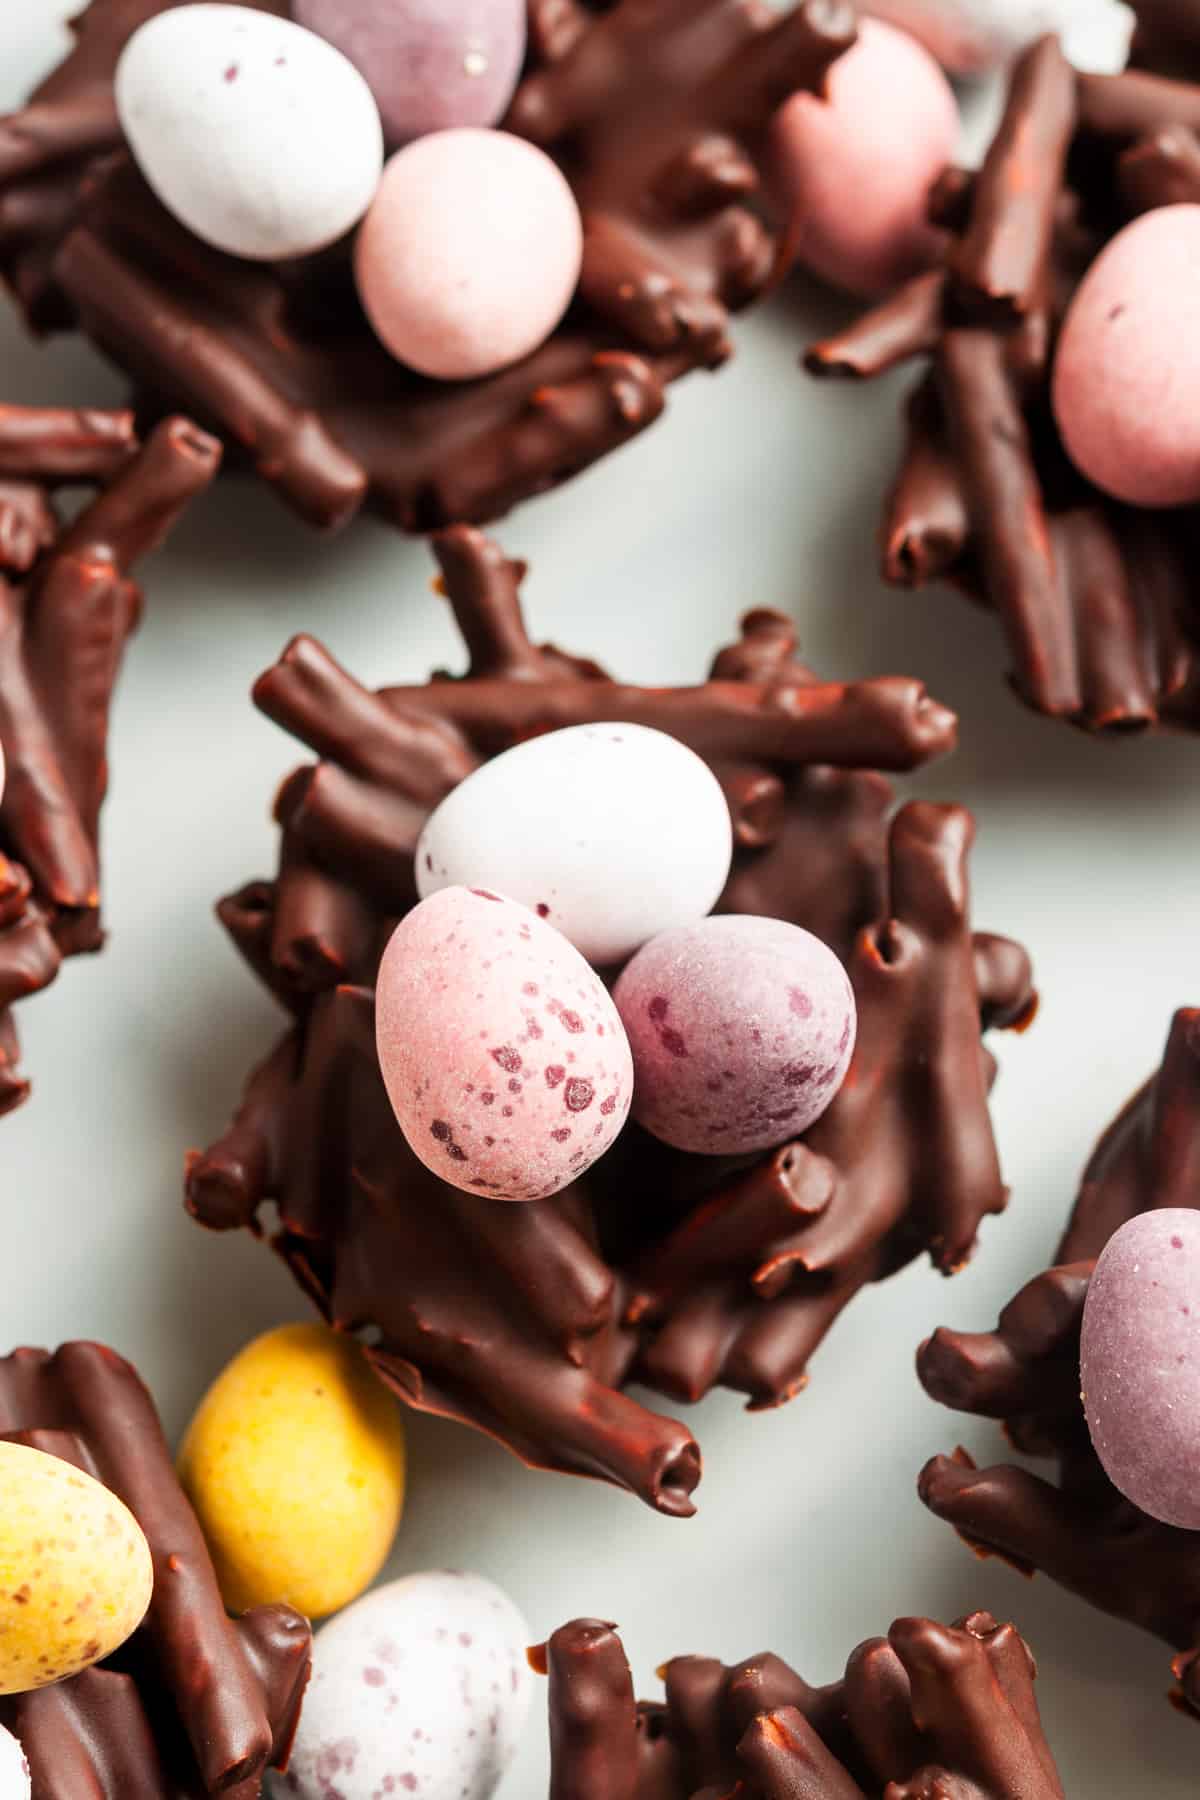
If you’re seeking some Easter inspiration, these Chocolate Pretzel Easter Nests may just be the answer. Salty-sweet chocolate dipped pieces of pretzels are roughly shaped into nest shapes and then filled with colourful eggs.
Jump to:
Why we love this recipe:
There are few recipes that are simpler than this, and there are not many that will be more fun to make. In fact, this could be a great activity to make with your children. It can get a little messy – but I think that’s part of the fun.
They are so easy to make. There are just 3 ingredients; chocolate, pretzels and your choice of Easter eggs.
If you’re a novice in the kitchen, this is the recipe for you. You do not require any technical skills. If you can melt chocolate, you can make these Chocolate Pretzel Easter Nests. And if you’ve never before melted chocolate, we will give you detailed advice.
The nests have a delicious combination of flavours; the sweet chocolate is offset by the slight savoury, saltiness of the pretzels. The pretzels add crunch to contrast with the smooth chocolate.
You can use the chocolate of your choice; dark, milk or white. Or, for great presentation, make a selection to suit different palates.
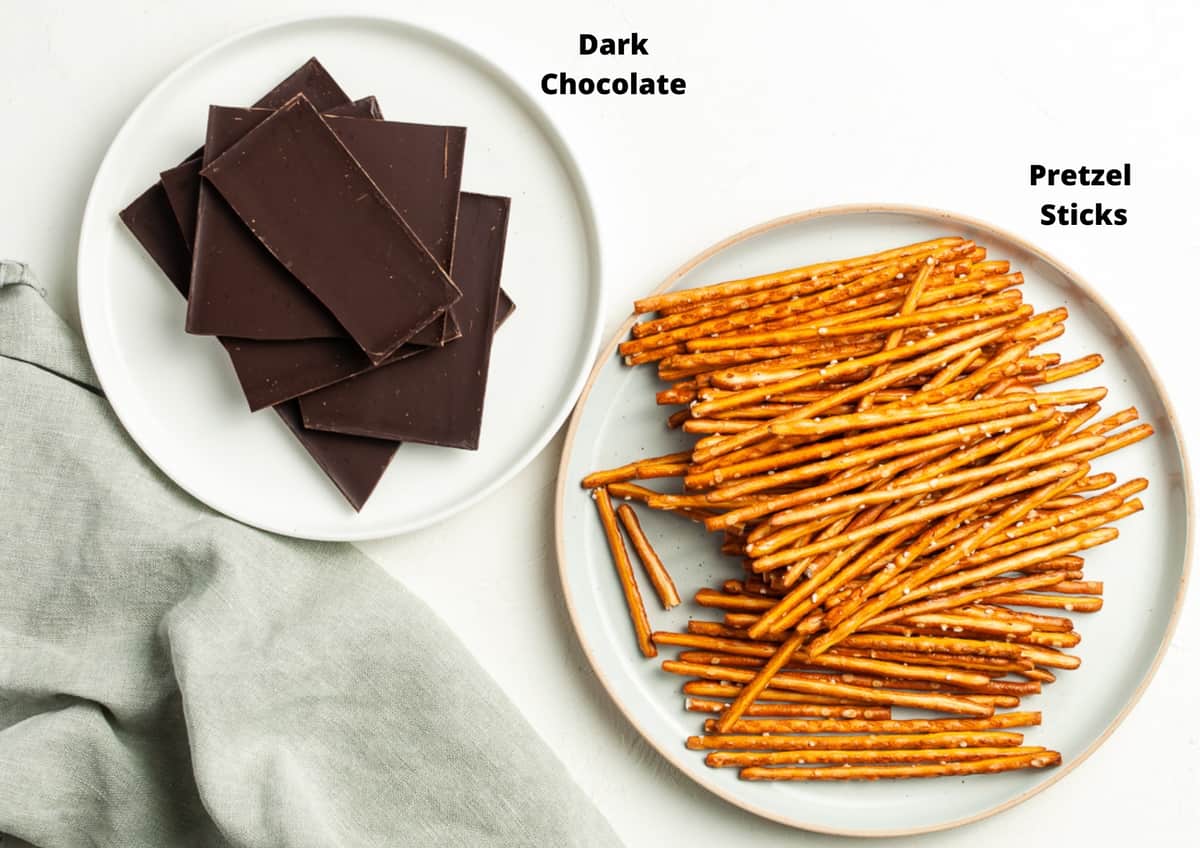
Ingredients in this recipe:
Please see the recipe card further along in the post for exact quantities of ingredients and the full method.
Chocolate – I have used dark chocolate as I like the combination with the pretzel sticks. However, if you prefer milk or white, I recommend that you use good quality chocolate – one that you enjoy eating.
Pretzel sticks – sometimes known as rods, I have used a narrow variety.
Coloured eggs/candy – I like colourful mini eggs but if you prefer, you can also use jelly beans or Smarties.
Step by step instructions:
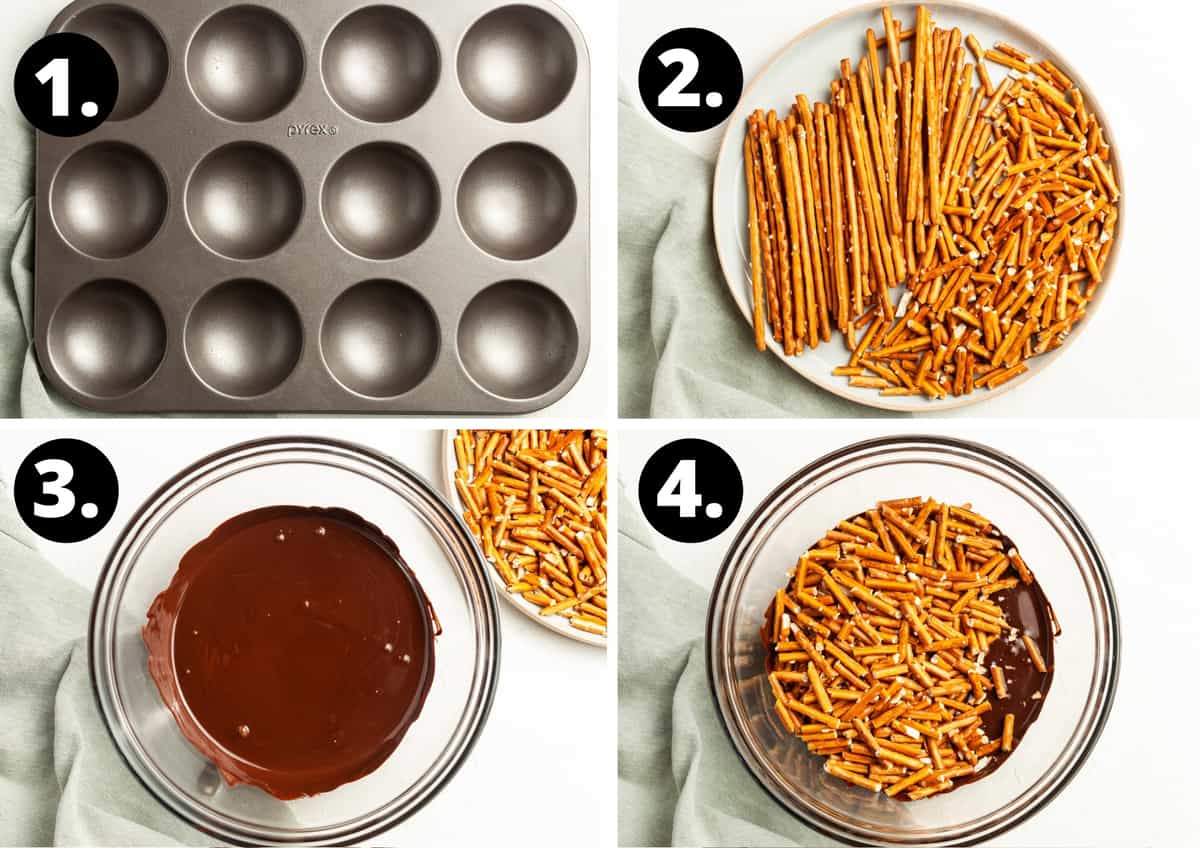
- To begin, brush or spray 2 patty pan tins with oil. If you don’t have patty pan tins you can shape the nests, using 2 teaspoons, on non-stick baking paper and you will still get an excellent result.
- Break pretzel sticks into short lengths, about 2 cm (/3/4 inch)
- Melt the chocolate.
- Add the broken pretzel sticks to the chocolate.
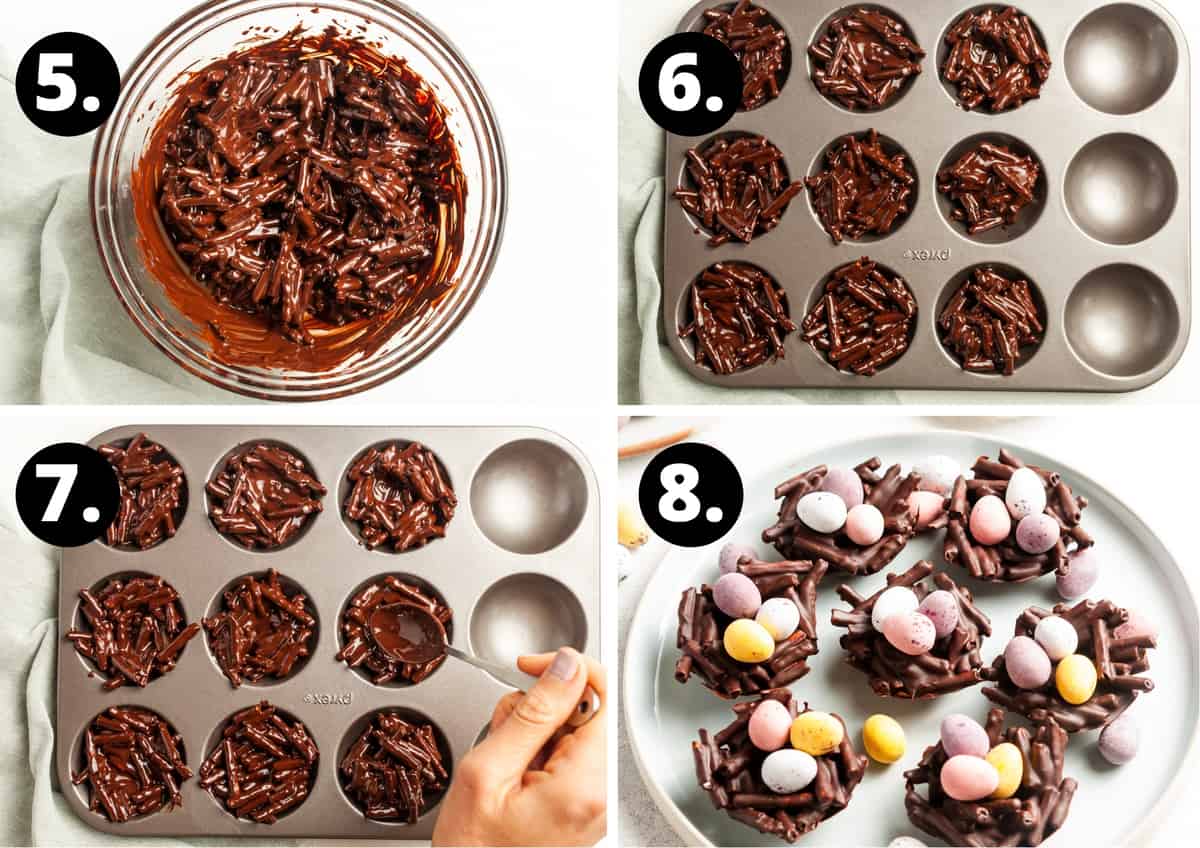
- Stir until well combined.
- Place about 2 teaspoons of the mixture into the patty pan cups or onto your sheet of non-stick baking paper.
- Use the tip of a teaspoon to shape the nests. If your room is cool, set the nests aside to set. If it is warm, you will need to place the tray in the refrigerator until the chocolate has set.
- When ready to serve, add the Easter eggs/candies of your choice to the nests.
Tips for success and FAQs:
For the best flavour, it is important to use good quality chocolate. Use one that you would enjoy eating.
My preference is the stovetop method. A double boiler gives the best control over the heat. If you use a chocolate bar, break or chop it into pieces of a similar size so that it will melt evenly. Be careful when melting the chocolate. If using a double boiler, ie, a bowl placed over a saucepan of water which has just begun to simmer, care must be taken to ensure that not a drop of water gets into the bowl or the chocolate will seize. This means that the chocolate will become thick and grainy making it unsuitable for this recipe. The bowl and the spoon/spatula that you use must be thoroughly dry. Do not use a wooden spoon as it may contain moisture. Further, the bowl must not touch the water in the saucepan or the chocolate may burn.
You can also use a microwave. Melt the chocolate in 30 second increments and stir occasionally. Keep an eye on it to ensure that it does not overcook.
The nests can be made 2 days in advance.
When the chocolate has set, store them in an airtight container in a cool, dark place. If the weather is warm, store the container in the refrigerator.
More delicious recipes for you to try:
Chocolate lovers, we hear you! Here are some more delicious sweet treats for you to try:
- Chocolate Tiffin
- Gluten-Free Brownies
- Vegan Chocolate Cupcakes
- Chocolate Popcorn Bars
- Chilli Chocolates
- Homemade Chocolate Freckles
- Or, view our full collection of Chocolate Recipes.
There are times when we all need a recipe for something that has a few simple ingredients, looks and tastes great and requires minimal effort. My Chocolate Pretzel Easter Nests are ideal. And don’t worry if your Nests are “rustic”. There is no right way to make them – it’s about fun.
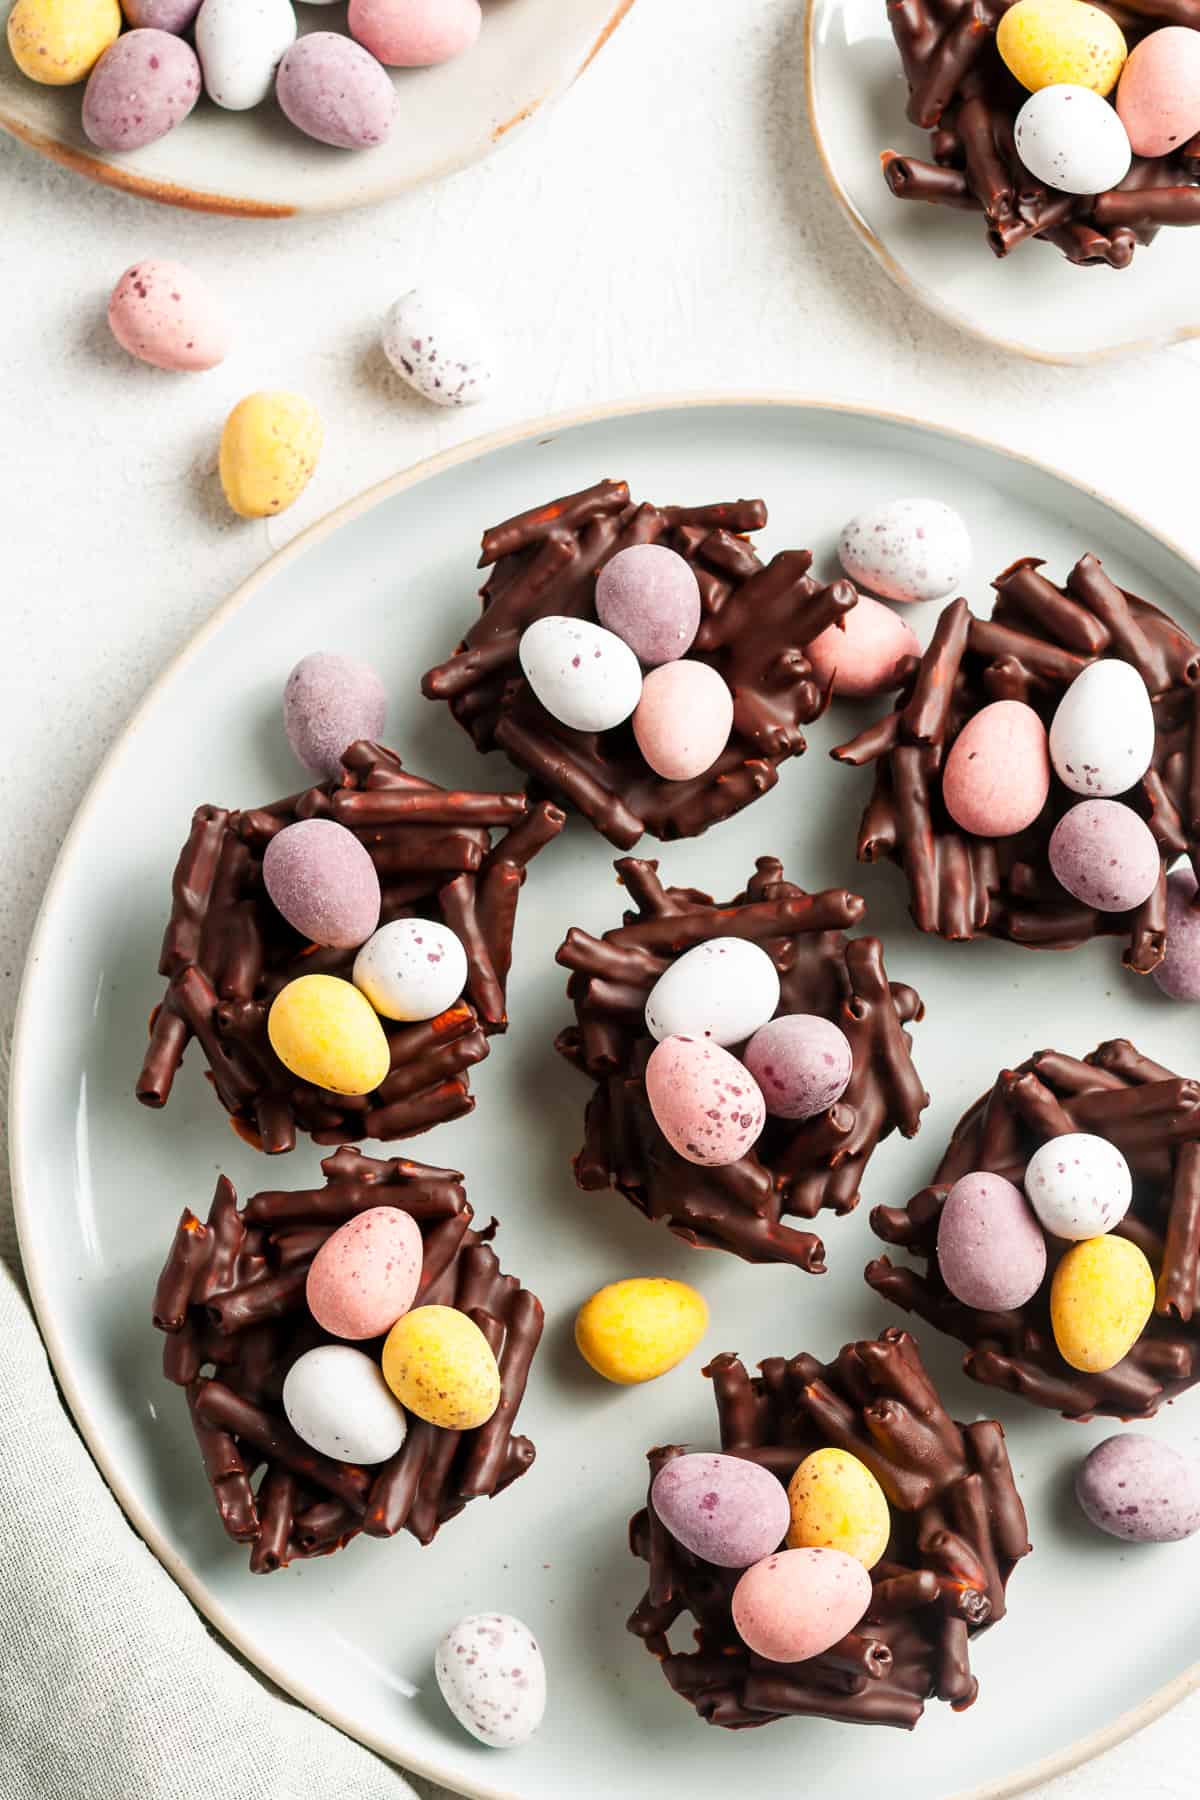
Add a colourful, cheerful note to your Easter celebrations with these easily prepared Easter Nests and have a great deal of fun making them. When ready to serve, you just need to place the Nests on a pretty platter and fill them with colourful eggs of your choice.
Please let me know in the comments below if you try them.
Alex xx
PS – don’t forget to leave one for the Easter Bunny!
This post was originally published in April 2019. It has been updated with new photos and more information. The recipe remains the same.
Chocolate Pretzel Easter Nests
Recipe Measurements:
For accuracy, when weights are provided, we recommend weighing your ingredients. This will produce the best results.
Ingredients
- 200 g (7 ounces) chocolate of your choice – See Note 1
- 80 g (3 ounces) pretzel sticks
- 1 tablespoon oil or oil spray – optional See Notes 2 and 3
To Decorate:
- eggs/candy of your choice See Note 4
Instructions
- Brush or spray 2 patty pan tins with oil. This is optional – See Note 2
- Break pretzel sticks into short lengths, about 2 cm (¾ inch).
- Prepare a double boiler to melt the chocolate. Alternatively, you may prefer to use a microwave. – see Note 5.A double boiler is a small to medium-sized saucepan and an ovenproof bowl which fits just inside the saucepan.Add about 2.5cm (1 inch) water to the saucepan, bring the water to a bare simmer.
- Break or chop the chocolate into even size pieces so that it will melt evenly and place into the heat-proof bowl. Sit the bowl over the saucepan.Be careful that your bowl does not touch the simmering water and ensure that water does not get into the chocolate or it will sieze. – See Note 6
- Stir occasionally as the chocolate melts. When the chocolate has almost melted, remove the bowl from the saucepan. The residual heat will continue to melt the chocolate.
- Add the broken pretzel sticks to the chocolate and stir well to combine.
- Place about 2 teaspoons of the mixture into the patty pan cups or onto a baking tray lined with non-stick baking paper. Use the tip of the teaspoons to shape the nests.
- Place the tray in the refrigerator until the chocolate has set.
- When the chocolate has set, store in an airtight container in a cool, dark place. If the weather is warm, store the container in the refrigerator. For serving, place the nests on a pretty platter and add the eggs of your choice.
Notes
- I have used 70% dark chocolate as I feel the dark chocolate beautifully complements the salty pretzel stick. However, you may prefer to use milk or white chocolate.
- I have used patty pan trays to shape the nests. The trays have rounded bottoms and I prepare them by brushing/spraying with oil. This amount of mixture makes about 18 nests so you will not need to oil all the cups. However, the patty pans are not essential. You can make the nests on non-stick baking paper. Shape them using 2 teaspoons and you will get excellent results.
- The Australian tablespoon is 20 ml or 4 teaspoons. In many other countries, the tablespoon is 15 ml or 3 teaspoons. Please adjust the measurements if necessary.
- I have chosen to use chocolate eggs with a crisp, candy coating (Cadbury Mini Eggs). However, foil covered eggs are also pretty. As well, you can use jelly-beans or Smarties.
- I prefer to use a double boiler as it is easier to control the heat. However, if you prefer to use a microwave, add chopped chocolate to a microwave-safe bowl. Melt in 30-second increments, stirring frequently. When most of the chocolate is melted, remove the bowl from the microwave and stir until it is completely melted. If possible, melt your chocolate on a low power setting. As each microwave functions differently, you will need to keep an eye on the chocolate so it does not overcook.
- The greatest enemy of melting chocolate is water. If water should get into the chocolate it will seize, becoming thick, grainy and not suitable to use.
- Please note, the nutritional information is based on one chocolate nest. It does not include what candy the nest is filled with. The nutritional information is an estimate only.
Nutrition Estimate:
Nutritional Disclaimer:
The nutritional information is an estimate only, and is derived from online calculators. For accurate results, we recommend calculating the nutritional information based on the ingredients and brands you use.
Leave a Comment