


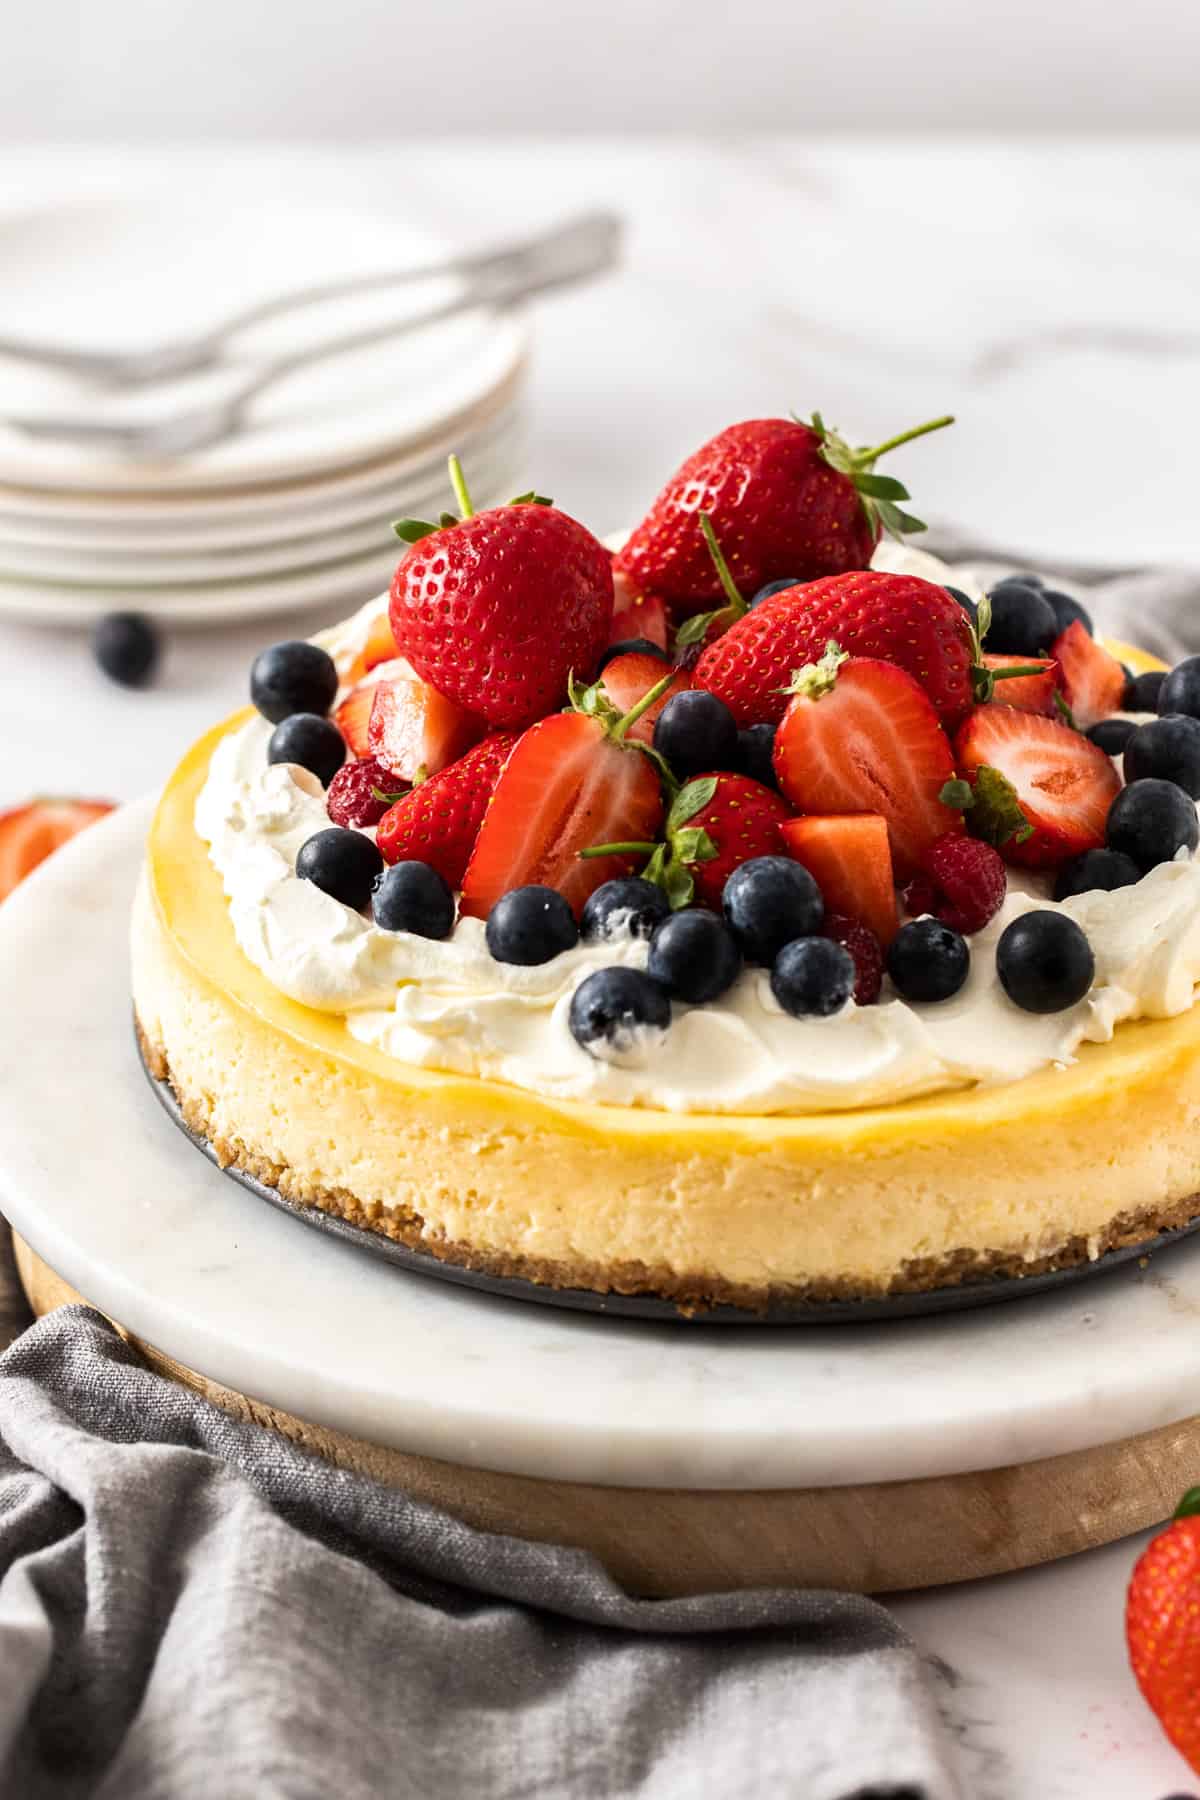
For a special dessert to end a meal, try my Classic Baked Cheesecake. When I’m entertaining, this is one of my favourite desserts to make, as it is always a hit with friends and family. It is the ideal dessert to make in advance, and is much easier than you may think!
Jump to:
Why we love this recipe:
Our Baked Cheesecake is a favourite recipe, and for good reason!
- It is divinely creamy, without being heavy, with freshness and brightness provided by lemon zest and juice.
- This is a show-stopper dessert and yet so easy to make.
- A simple fruit topping is all that is required to make this look extra special!
- For fuss free entertaining, this is the perfect, make-ahead dessert.
- You can make my Baked Cheesecake gluten-free; just use gluten-free biscuits/cookies in the base.
Ingredients in this recipe:
Please see the recipe card further along in the post for exact quantities of ingredients and the full method.
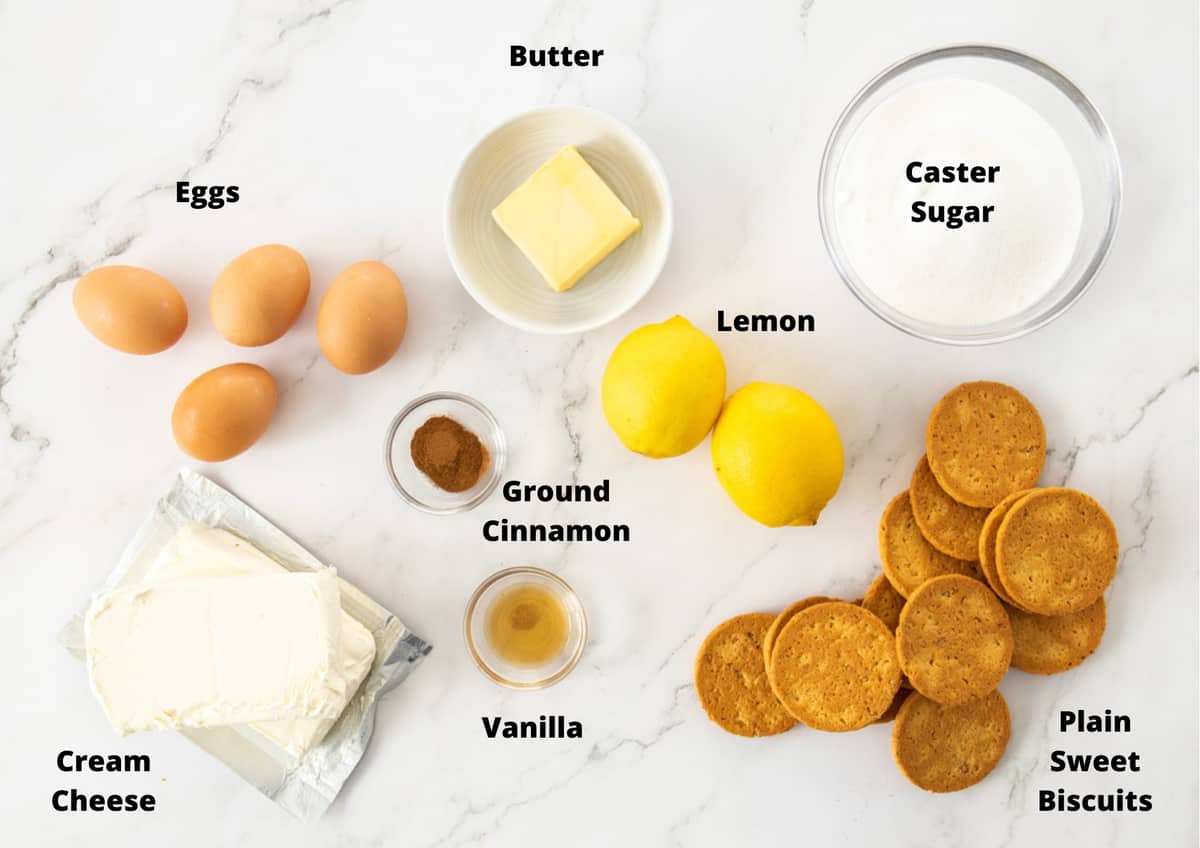
Base:
Plain sweet biscuits/cookies – Digestives, Granita or gluten-free plain biscuits/cookies.
Butter – unsalted for preference.
Ground cinnamon – For the best flavour, ensure that your spice is fresh.
Filling:
Cream cheese – I use full-fat cream cheese, the regular blocks from the supermarket.
Caster/superfine sugar – dissolves more readily than granulated.
Lemon zest and juice – for ease, be sure to remove the zest before the juice.
Vanilla – use a good quality extract from vanilla beans not one synthetically flavoured.
Eggs – I use large, free-range eggs.
Step by step instructions:
To begin, I lightly grease a 20 cm (8 inch) springform tin and line the base with non-stick baking paper. For ease, leave a little overhang of the baking paper – this will help remove the cheesecake from the base of the tin.
Once you have prepared the base, you’ll also want to preheat your oven.
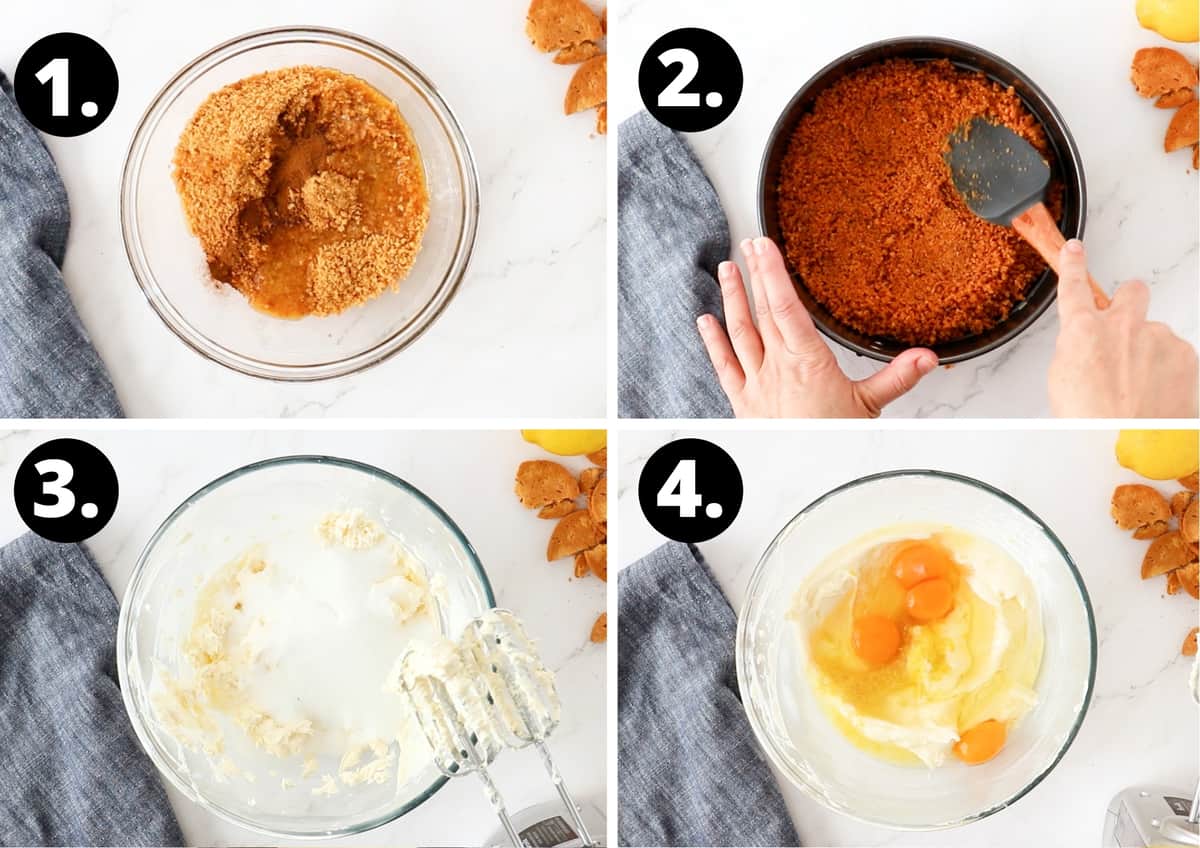
- Crush the biscuits either in a food processor or by hand and combine with melted butter and cinnamon.
- Using the back of a spoon or rubber spatula, firmly press this mixture into the base of the prepared tin. Refrigerate for 30 minutes to firm the base.
- To make the filling, use a hand-held mixer, or a food processor, and beat the cream cheese until smooth. Then, add the sugar and mix until well combined.
- Add the remaining ingredients and mix until smooth.
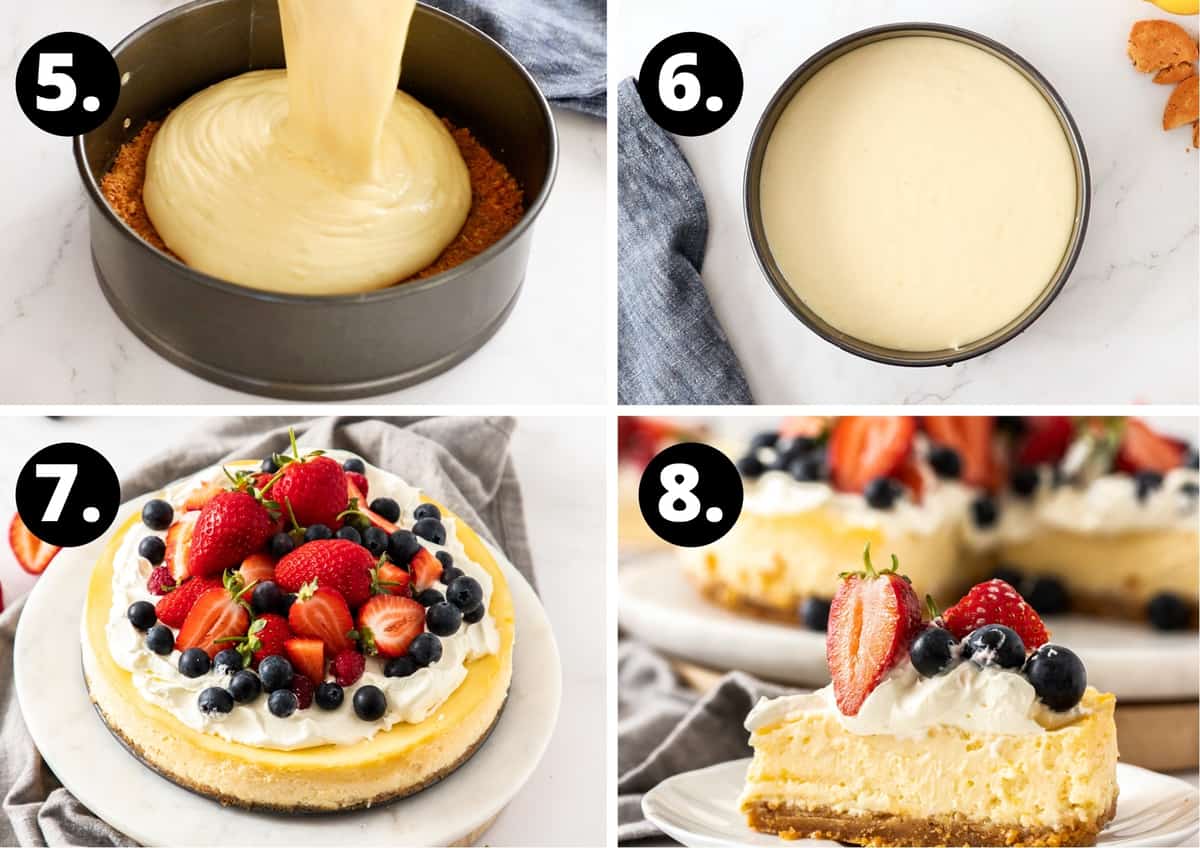
- Pour onto the chilled biscuit base.
- Bake in your preheated oven for 40-50 minutes. Your cheesecake should be just set, and still have a slight wobble in the centre. Turn off the oven, leave the door ajar slightly and allow the cheesecake to cool in the oven (to avoid it cracking).
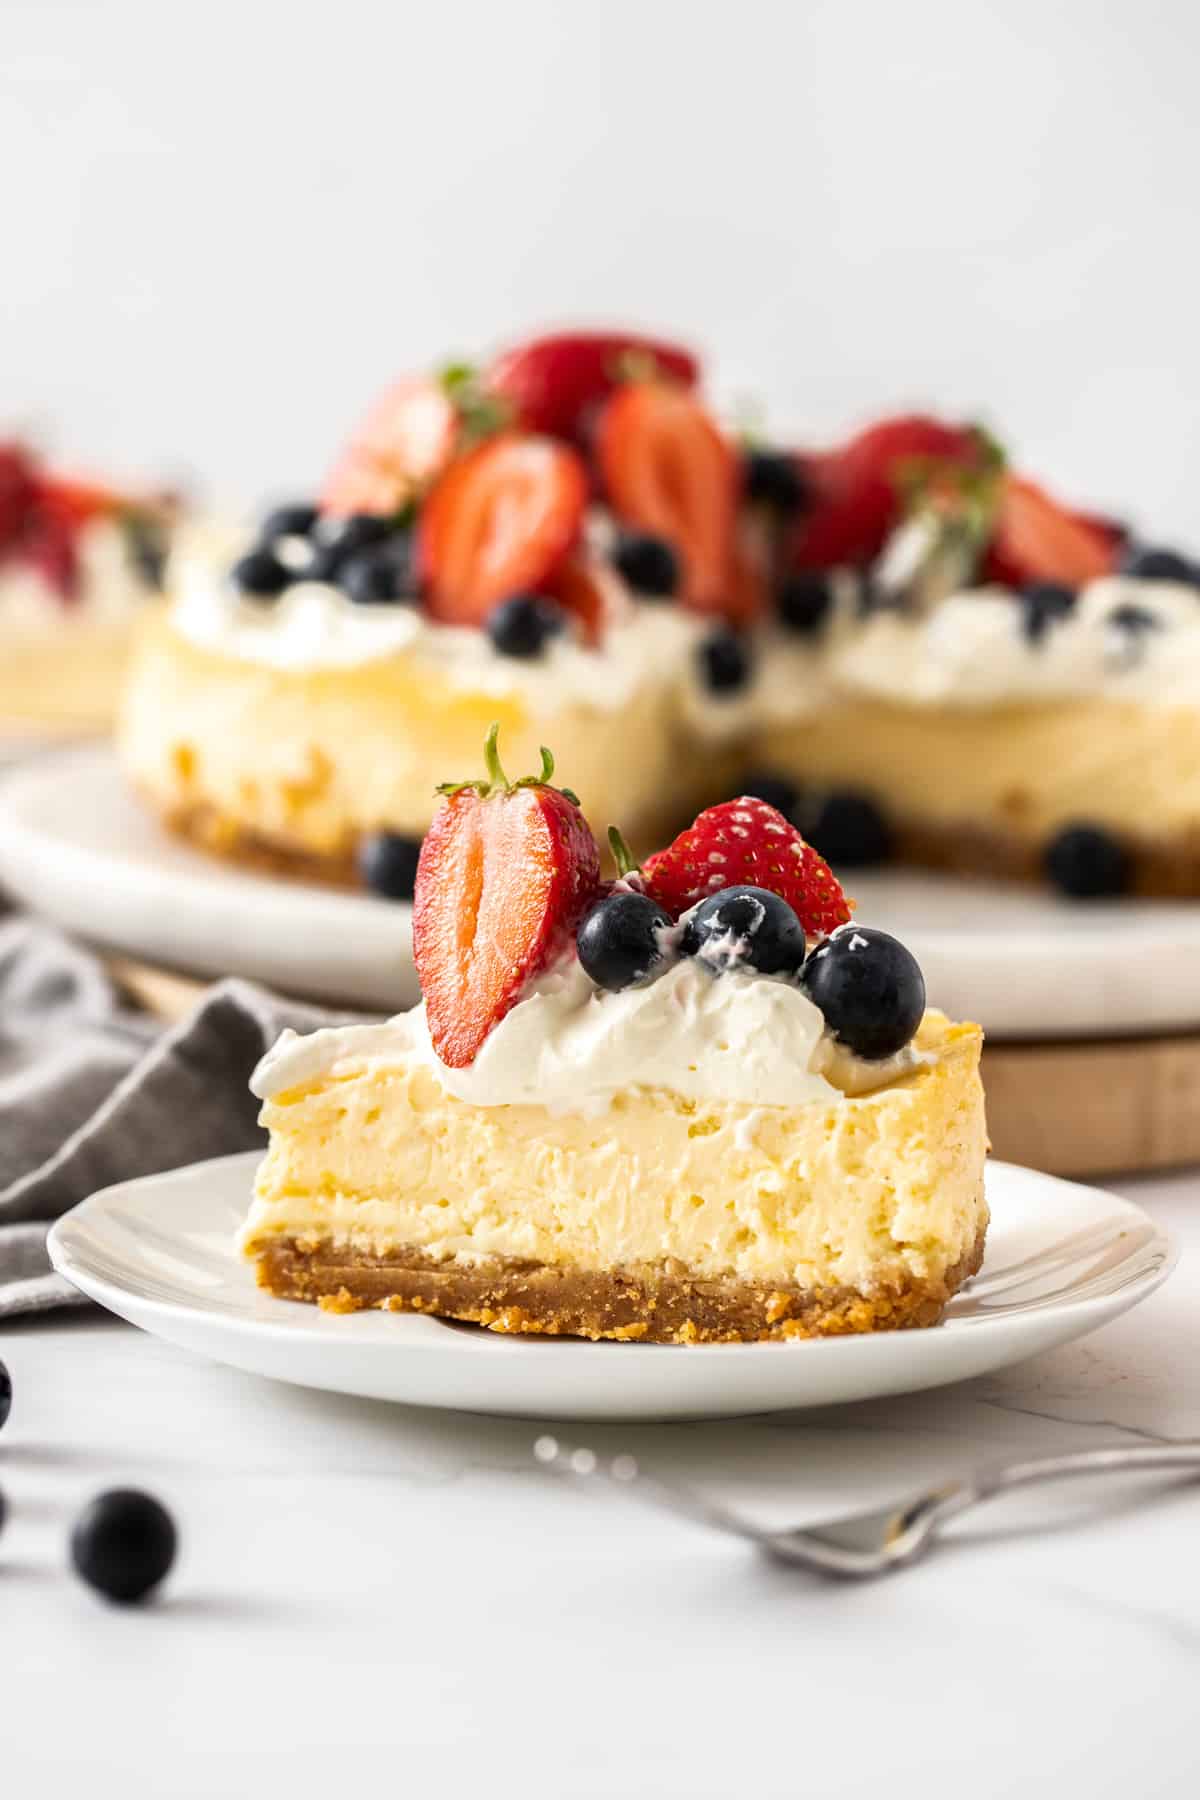
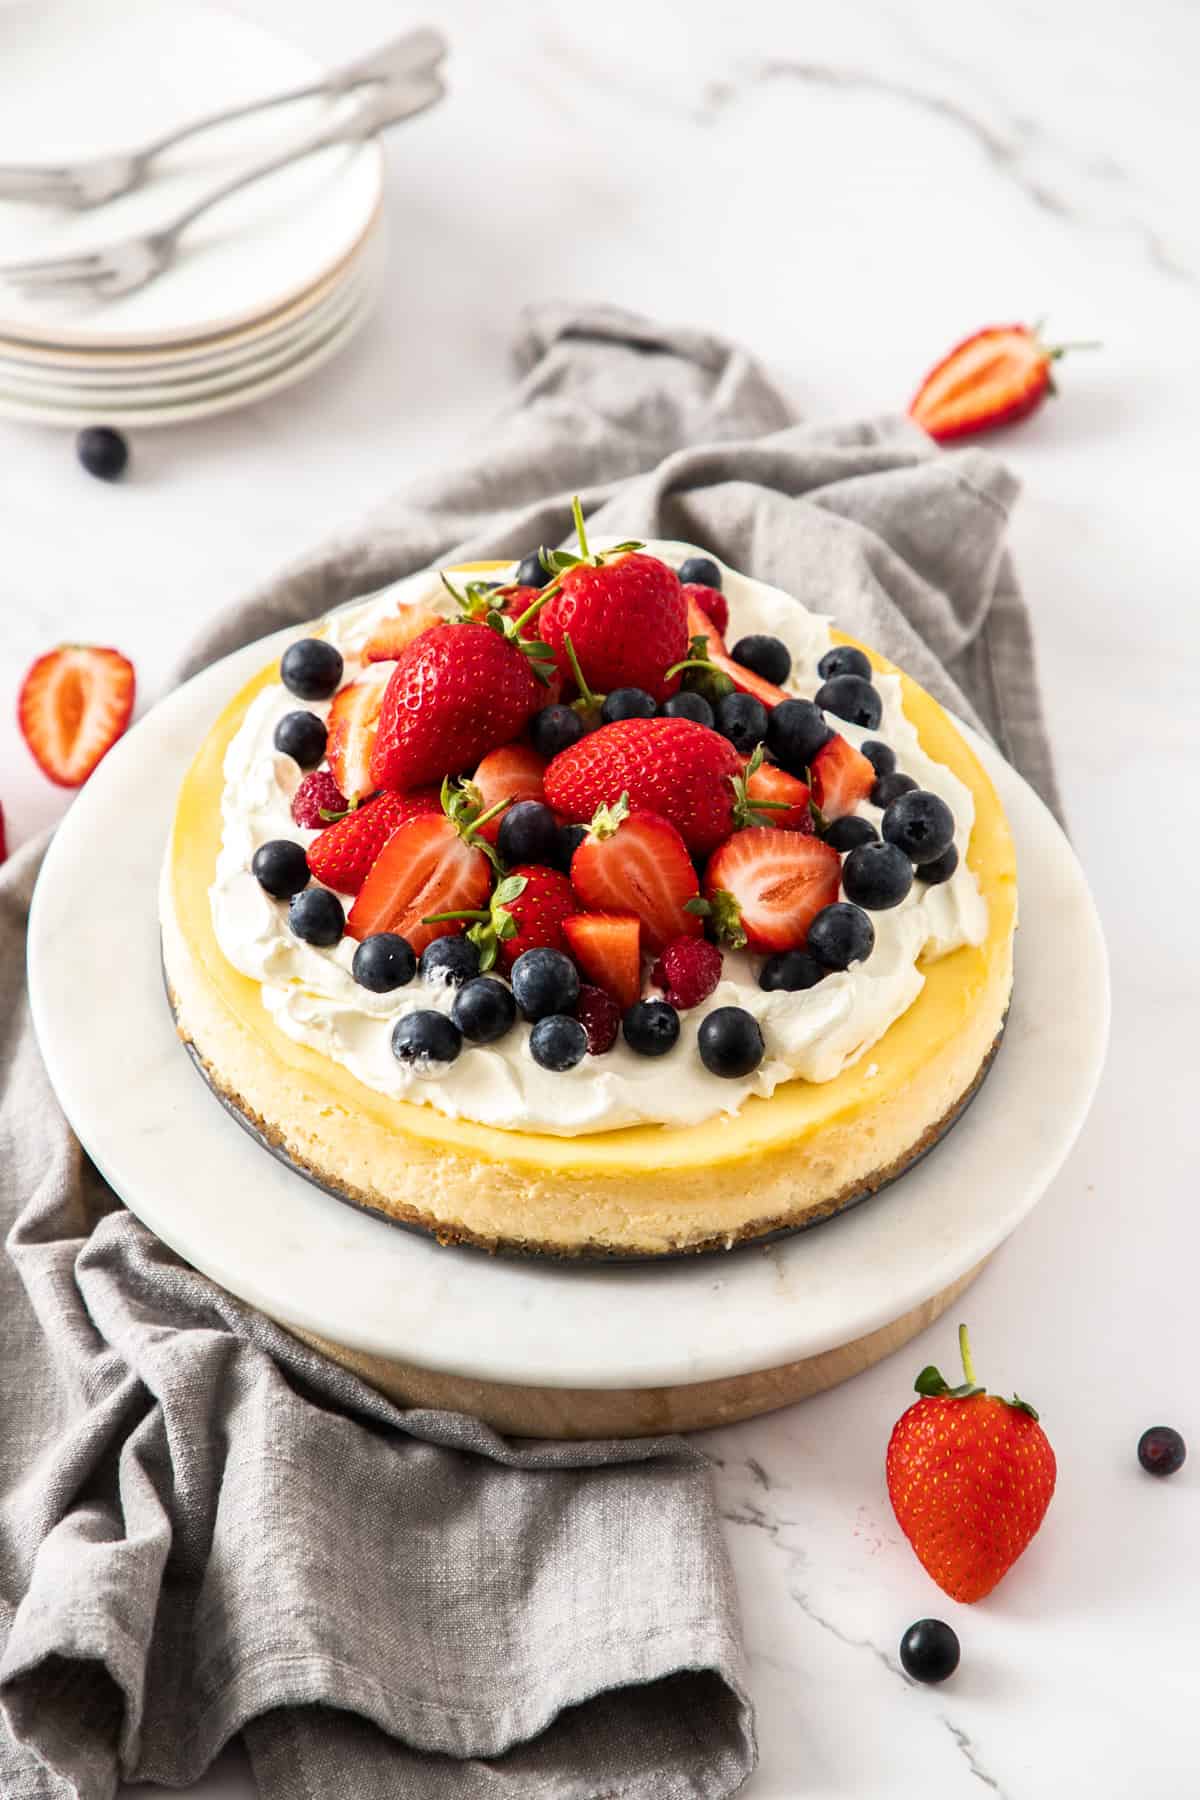
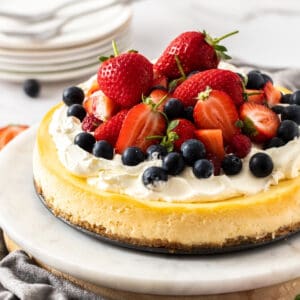
- Remove from the oven and chill completely in the fridge. Once chilled, remove from the tin, and place on a serving plate. Decorate with cream and berries if desired.
- Serve, and enjoy!
Tips for success and FAQs:
If you have not previously made a Baked Cheesecake, let me assure you, it is not difficult. I will guide you through the process and give you some tips to ensure success.
It is important to have your ingredients at room temperature – this will ensure that the filling is silky smooth.
With the back of a spoon or rubber spatula press the biscuit crumbs firmly into the baking tin to ensure that the crust does not crumble as you are serving the cheesecake.
To make it easy to remove the cheesecake, cover the base of the baking tin with a sheet of non-stick baking paper and leave the overhang. This will make it easier to transfer it to a serving plate.
When slicing the cheesecake, use a sharp knife, dipped into a jug of hot water, and wiped dry on paper towel between each slice.
Do not over-beat the filling – too much air in the mixture will cause the cheesecake to crack. For this reason, I prefer to use handheld electric beaters. This gives me more control so that I don’t over-mix the filling. You can, of course, use a food processor if you prefer. As well, the cheesecake may also crack if cooked too long.
Some recipes contain a small amount of flour to help prevent the cheesecake from cracking as it makes the texture firmer. However, I prefer a cheesecake without flour as the texture is softer, creamier, and silky smooth. If you do get a crack in the cheesecake, don’t worry, it will taste just as good. Just cover the top with cream or berries.
Take a potholder, open the oven door, and give the baking tin a gentle wobble. If the cheesecake is set around the edges and has a small portion in the centre that slightly “jiggles”, it is done. It will firm up as it cools. Turn off the oven, and with the door ajar, leave it to cool in the oven.
After you remove the cooled cheesecake from the oven, it needs to be chilled in the refrigerator for at least 4 hours or even overnight. Do not attempt to remove it from the tin before it has thoroughly chilled.
The cheesecake is best when enjoyed on the day of baking, or the day after. However, you can store this easy Classic Baked Cheesecake, well covered, ideally in an airtight container, in the refrigerator for up to three days. When serving the cheesecake, for safety, do not leave it unrefrigerated for longer than 2 hours. After this time, you should discard any leftovers. The best idea is to slice and serve it and immediately return any remaining to the refrigerator.
More delicious recipes for you to try:
Here are some more of our fantastic make-ahead desserts:
When you want an impressive, make-ahead dessert, you can’t do better than this classic Baked Cheesecake. Whilst you do need to start a little ahead of time for this dessert, it is well worth the wait.
I encourage you to treat your friends and family and serve them this simple, delicious, easily made Baked Cheesecake.
Alex xx
This post was originally published in July 2018. It has been updated with new photos and more information. The recipe remains the same.
Baked Cheesecake
Recipe Measurements:
For accuracy, when weights are provided, we recommend weighing your ingredients. This will produce the best results.
Ingredients
Base:
- 150 g (5 oz) plain sweet biscuits – eg: granita, digestives See Note 1
- 60 g (¼ cup) butter – melted
- ½ teaspoon ground cinnamon
Filling:
- 500 g (1 lb) cream cheese – at room temperature See Note 2
- 220 g (1 cup) caster/superfine sugar
- 4 large eggs – at room temperature See Note 2
- 60 ml (¼ cup) lemon juice – freshly squeezed
- 3 teaspoon lemon zest See Note 3
- 1 teaspoon vanilla extract See Note 4
Topping:
- 300 ml (1 ¼ cups) whipping cream – whipped to soft peaks
- fresh fruit, berries or jam
Instructions
- Lightly grease a 20 cm (8 inch) spring-form tin with butter and line the base with non-stick baking paper. Leave the overhang of the baking paper; it will make it easier to remove the cheesecake.
- In a food processor, crush biscuits finely, and combine with melted butter and cinnamon.
- Press the crumb mixture firmly into the base of the prepared tin – use the back of a spoon or rubber spatula.
- Refrigerate for 30 minutes to firm the base.
- Preheat your oven to 150 Degrees C (300 F).
- Using handheld electric beaters and a medium-size bowl, or in the bowl of a food processor, beat the cream cheese until smooth – this is essential to avoid lumps in your cheesecake.
- Add in the sugar and mix until well combined. Add the remaining ingredients and mix until smooth. Be careful not to overmix as too much air can cause your cheesecake to crack.
- Pour the mixture onto your biscuit base and bake in the preheated oven for 40-50 minutes.
- To test if the cheesecake is cooked, take a potholder, open the oven door, and give the baking tin a gentle wobble. If the cheesecake is set around the edges and has a small portion in the centre that slightly “jiggles”, it is done. It will firm up as it cools.
- Remove the cheesecake from the oven and turn off the power. Carefully run a knife around the edge to prevent it from sticking to the side of the tin. As it cools, it will contract. If the edge of the cheesecake remains stuck to the tin, cracks may form. Return the cheesecake to the oven, and with the door slightly ajar, leave it to cool in the oven to avoid cracking.
- Remove from the oven and chill completely in the fridge for 4 hours or even overnight. If leaving overnight, cover the tin well with cling wrap.
- Once chilled, remove from the tin, and place on a plate or cake stand. Decorate with cream and berries.
Video
Notes
- This recipe is easily adapted to gluten-free – just use gluten-free biscuits/cookies in the base.
- It is essential that your cream cheese and eggs are at room temperature. This will ensure that your mixture is smooth and creamy. If your try to beat cold cheese, you will not be able to remove all the lumps.
- When removing the lemon zest, try to avoid the bitter, white pith.
- For the best flavour, use good quality vanilla extracted from vanilla beans and not synthetically flavoured.
- If using fresh fruit or berries, dust them with icing sugar a few minutes before serving – it will give a lovely shine!
- Please note, the nutritional information is based on eight serves. It does not include what fruit, jam etc. you top the cake with. The nutritional information is an estimate only.
Nutrition Estimate:
Nutritional Disclaimer:
The nutritional information is an estimate only, and is derived from online calculators. For accurate results, we recommend calculating the nutritional information based on the ingredients and brands you use.
Sandra Ibrisim
Absolutely brilliant! Very clear instructions, quick recipe, delicious results; My son in law asked where did I buy it as he wanted to get another…..!!
Alexandra
Hello Sandra, thank you for your fantastic feedback regarding the Baked Cheesecake. I’m thrilled to hear that you like the recipe and the cheesecake was such a hit with your son in law. Thank you for you taking the time to let me know. 🙂
Emily
5 stars! I’ve tried many cheesecake recipes and I always come back to this one! It has the perfect consistency and texture and comes out great every time. It’s really a great recipe. I top mine with seasonal fruit and used mango and kiwi this time.
Alexandra
Hello Emily, thank you so much for your lovely comments on our Baked Cheesecake, I do appreciate them. Mango and Kiwi would be a delicious topping! 🙂
Heather
Hi Alex, I just love the recipe.!!
Alexandra
That is great to hear, Heather – thank you!